
One afternoon, I was on set trying to pull focus during a critical shot. I thought I had it all dialed in—until suddenly, the focus ring started turning the wrong way. My heart sank. For a moment, I wondered if I’d just ruined the entire take. That lightbulb moment—realizing my follow focus was working against me—was frustrating enough to make me question everything I knew about filmmaking gear.
Getting Your Focus Directions in Sync with Your Mind
If you’ve ever experienced your follow focus working backwards from what you expected, you’re not alone. It’s a surprisingly common issue among both beginners and seasoned pros. Sometimes, it’s a simple mistake, but other times, it’s a sign that something needs adjusting in your rig or workflow. Today, I promise to help you understand why this happens—and more importantly, how to fix it so your focus pulls are smooth, natural, and frustration-free.
Why Does My Follow Focus Go the Wrong Way?
In my early days, I made the mistake of assuming that all follow focus systems are created equal—and that they operate the same way. Turns out, that’s not true. One key reason your directional behavior might be inverted is because of the setup of your gear, particularly the connection between your focus wheel and lens. If your follow focus is wired or configured incorrectly, turning the wheel clockwise could actually cause your lens to focus in the opposite direction. This mistake is easy to fall into when setting up a rig for the first time, and it can lead to major headaches during a shoot.
Understanding this can be a game-changer. Once I realized that the directionality could be reversed due to the wiring or the gear’s default setup, I was able to troubleshoot more effectively. For example, some cine lenses are designed with focus rings that rotate counterclockwise for near focus, which can conflict with your follow focus system’s default configuration. Knowing this, I recommend consulting your gear’s manuals or setup guides, and verifying the wiring connections—often, a simple flip of the belt or a configuration change in your follow focus motor can resolve the issue.
If you’re interested in deepening your understanding of how to manage camera supports and stabilize your shots like a seasoned pro, check out this guide. It’s packed with tips on setup and calibration that can prevent issues like reversed focus directions from cropping up in the first place.
But what if you’ve checked all connections and still find that your focus moves in the opposite direction? Don’t worry—that’s a common puzzle that we’ll solve together as we dive into the practical steps to correct it and optimize your focus system for seamless operation.
Check Your Gear Connection Carefully
Begin by examining how your follow focus system is attached to your lens. Disassemble the motor and drive gear, then reassemble, ensuring the drive belt or gear alignment is perfectly straight. During my shoot in a cramped studio, I once overlooked a twisted belt—simply straightening it immediately reversed the focus direction, making my shot smoother. Always verify that the drive gear is fitting snugly onto the lens focus ring without slipping.
Use cine lenses explained to understand the focus rotation specifics of your glass. Some lenses spin counterclockwise to focus closer. Confirm whether your follow focus motor’s default direction matches your lens rotation, and plan to offset if needed.
Alter the Follow Focus Connection Settings
Adjust Motor Wiring
Many electronic follow focus units feature a switch or software setting to reverse the motor’s rotation. Test this by turning the wheel and observing if the focus moves in the expected direction. If it moves oppositely, flip the switch or change the setting. In my experience, a quick toggling saved a day of frustration during a gritty commercial shoot. Consult your device manual or contact support if you’re unsure about the process.
Configure Software Settings
If your follow focus connects via DMX or proprietary software, locate the rotation controls within the interface. Reversing the direction can often be done with a simple toggle or slider. This approach is especially helpful for wireless or app-controlled systems, where physical rewiring isn’t necessary. Just like aligning a projector’s focus, matching system settings ensures focus pulls are intuitive and natural.
Tweak Lens Focus Rotation
Some lenses come with a focus ring rotation that differs from the motor’s default setup. Mark the focus position before adjustments, then rotate the focus ring manually to observe the direction. For example, in a shoot with vintage primes, I had to rotate the focus ring counterclockwise to focus near, which was opposite my follow focus. In such cases, a simple manual calibration or marking can save hours of tweaking during production.
Test and Confirm Calibration Before Shooting
Once you’ve made adjustments, perform a test run. Mark a close and distant focus point on your lens, then use the follow focus to transition between them smoothly. If the focus shifts in the correct direction and feels natural, you’re set. Otherwise, revisit your wiring and configurations. This process is akin to calibrating a projector’s focus; it’s about precision and reassurance.
For a more comprehensive setup, consider stabilizing your shots and ensuring all components work harmoniously. Proper focus calibration is the foundation for cinematic storytelling without focus pulls feeling awkward or distracting, making your scenes seamless and polished.
In the world of professional filmmaking, there’s a common misconception that equipment like camera supports, projection screens, cinema projectors, cine lenses, and lighting are all fairly straightforward tools. However, as I’ve learned through years of experience, many of these components come with nuanced complexities that can significantly impact your final image if misunderstood. Let’s dig deeper into some overlooked intricacies that could be the difference between amateurish results and cinematic excellence.
Are All Support Systems Created Equal? Common Myths Debunked
Many assume that purchasing a high-end tripod or dollies guarantees stability and precision. But the reality is, the choice of support must match the specific weight distribution and movement requirements of your camera rig. For example, a lightweight carbon fiber tripod may seem ideal, yet if it’s paired with a heavy cinema lens or matte box, it could lead to subtle vibrations or drift. A study by Cine Gear Guide experts indicates that support robustness directly correlates with shot stability, especially during dynamic camera movements.
Additionally, there’s a trap in assuming that all supports are universally compatible across brands. Customized mounting plates and adjustments are often required to prevent wobble or slipping, especially with heavy, professional-grade gear. The unnoticed oversight of simple support calibration can introduce micro-shakes, ruining otherwise pristine footage.
The Tricks Behind Projection Screen Gains That No One Tells You
Projection screens’ gain settings—essentially their reflectivity—are critical for proper image clarity and contrast. A common misconception is that higher gain always produces a brighter image, but this ignores the subtle impact on viewing angles and color saturation. Overly high gain screens can introduce hot spots and reduce color accuracy, particularly in larger venues. According to research cited in Cine Gear’s analysis, films projected on high-gain surfaces require meticulous calibration to maintain fidelity.
Beware of overlooking ambient lighting and seating arrangements, which can drastically alter perceived gain effectiveness. A poorly chosen screen gain compensates for room conditions poorly, leading to washed-out or overly reflective images, and, ultimately, a compromised viewing experience.
Why Cinema Projectors’ Brightness and Contrast Settings Can Be Misleading
Many filmmakers invest heavily in expensive projectors, believing that higher lumens translate directly into better image quality. However, this is a dangerous oversimplification. Excessive brightness can cause the black levels to ‘lift,’ washing out shadows and reducing dynamic range. As Cine Gear’s comprehensive guide explains, achieving cinematic depth relies on a delicate balance of lumens, contrast ratio, and lens quality—more than just raw brightness.
Furthermore, many overlook the importance of properly calibrated contrast and color profiles for the specific projection environment. Without proper setup, even the most advanced projectors can produce mediocre results, or worse, false impressions of color accuracy that diminish your narrative’s visual integrity.
Mastering Cine Lenses and Lighting for Consistent Results
In my experience, even seasoned professionals can fall prey to misconceptions about cine lenses being ‘all the same.’ Each lens type—prime or zoom—has unique focus and aperture characteristics that influence depth of field and light transmission. A common mistake is neglecting to run thorough test calibrations across lens focal lengths, leading to inconsistent focus pulls and exposure shifts. This subtle oversight can compromise continuity in multi-shot scenes.
Similarly, in lighting, relying solely on automatic settings or generic ‘best practices’ can backfire. Fine-tuning key and fill lighting, color temperature, and diffusion is vital for establishing a cinematic mood. A firm understanding of how light interacts with different lens coatings and sensor types allows, for example, to prevent undesired flare or color shifts, ensuring a harmonized look throughout your production.
In summary, appreciating these nuanced facets of equipment selection and setup is crucial for elevating your craft. Never underestimate the power of detailed calibration and environment-aware adjustments. Want to deepen your understanding? Check out this guide to cine lenses or these projection screen tips. Have you ever fallen into this trap? Let me know in the comments and share your experiences.
Tools That Keep Your Equipment Running Smoothly
Investing in quality tools is crucial to maintaining a reliable filmmaking setup. A high-grade rig adjustment toolkit with precision screwdrivers, tension meters, and calibration gauges ensures your supports and lenses stay perfectly aligned over time. Additionally, a dedicated lens cleaning kit—including microfiber cloths, air blowers, and lens-safe cleaning solutions—helps preserve image quality and prevents dust buildup that can affect focus and image clarity.
Don’t forget to keep a set of replacement parts, such as drive belts for follow focus motors or fuse kits for projectors, readily available. Regularly inspecting and replacing worn components prevents sudden failures during critical shoots. A good multitool from a trusted brand can serve multiple maintenance functions, saving space and money in the field.
Establishing Long-Term Results with Routine Upkeep
Consistency in maintenance leads to predictable, high-quality results. Schedule monthly inspections of your projection screens, checking for wrinkles or discoloration that could affect image quality. Likewise, calibrate your cinema projectors using industry-standard software like CalMan or SpectraCal, which provide detailed profiles for color and brightness calibration, ensuring your visuals stay true over time.
For cine lenses, routine lubrication and inspection of focus rings, along with proper storage in climate-controlled cases, prolongs their lifespan. When it comes to lighting, regularly cleaning fixtures and verifying color temperature consistency prevent color shifts that can compromise your shot continuity. Using a light meter, such as the Sekonic C-800, helps ensure your lighting setup remains consistent from shoot to shoot.
Scaling Your System Effectively for Expanding Projects
As your productions grow, so does the need for scalable tools and support. Modular support systems with adjustable mounting plates allow quick reconfiguration of cameras and lenses, saving setup time. Consider investing in power distribution units that can handle multiple projectors, lights, and cameras, simplifying power management and reducing the risk of overloads.
Moreover, a secure storage and organization system, like labeled cases and shelving, keeps gear accessible and safe, preventing damage and loss. When you’re ready to expand your projection setup for larger venues, consulting expert tips can help you select appropriate screens and ensure your system scales smoothly without sacrificing image quality.
How do I keep my equipment functioning perfectly over time?
Implementing routine maintenance schedules, utilizing the right tools, and proactively replacing aging components are essential. Regular calibration, especially for projectors and lenses, guarantees your visuals remain sharp and true. Just as with any precision tool, consistent care extends your gear’s lifespan and preserves its value, making every dollar spent a worthwhile investment.
For advanced support, consider setting up an environmentally controlled storage area to shield sensitive gear from humidity and temperature fluctuations. This simple step can prevent deterioration and keep your equipment performing as intended. Take the time to develop a maintenance routine—your future self will thank you.
Want to dive deeper? Check out this guide for stabilizing your shots and supporting systems, or visit our contact page for personalized advice tailored to your setup. Start integrating these practices today, and notice the difference in your production quality!
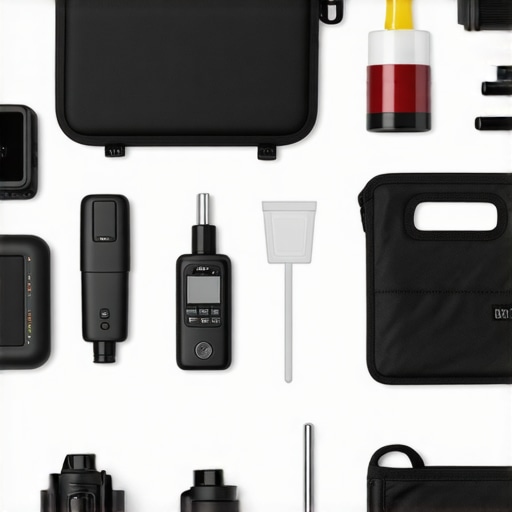
The Hardest Lesson I Learned About Camera Supports and Projection Equipment
One lesson that profoundly shaped my approach was realizing that even premium gear requires meticulous setup and calibration. I once relied solely on intuitive assembly, only to discover mid-shoot that my supporting system was subtly misaligned, causing instability and subtle vibrations. This taught me the importance of consistent maintenance and detailed checks, especially when working under tight deadlines. It’s a reminder that equipment, no matter how advanced, benefits from routine care and expert attention to unlock its full potential.
Must-Know Resources That Elevated My Filmmaking
Over the years, I’ve come to trust a few tools and books that truly transformed my workflow. This comprehensive guide on stabilizing camera supports helped me fine-tune my rigs for silky smooth shots, especially during complex movements. For choosing the right cine lenses, this resource provided invaluable insights into optical qualities and practical calibration tips. Additionally, these screen recommendations guided me in selecting surfaces that complement my projectors, ensuring pristine visuals. Investing in these resources empowered me to troubleshoot and optimize my equipment confidently.
Your Next Step in Achieving Cinematic Excellence
Don’t let equipment setup challenges hold back your creative vision. Remember, mastering camera supports, projection screens, cinema projectors, cine lenses, and lighting techniques is an ongoing journey—one that rewards patience and curiosity. Commit to regular calibration, seek out trusted resources, and embrace learning as a core part of your craft. Your dedication today will shine through in every frame you create tomorrow.
What’s one setup challenge you’ve faced recently? Share your experience below and let’s learn from each other’s journeys to cinematic mastery!
About the Author
James Duke
ThinkOTS
James Duke is a seasoned professional in the creative production industry, bringing a wealth of technical knowledge and hands-on experience to cinegearguide.com. As a key figure at ThinkOTS, James has spent years navigating the complexities of high-end production environments, where selecting the right equipment is the difference between a successful shoot and a logistical failure. His expertise spans the full spectrum of cinematography gear, from advanced camera systems to the intricate accessories that define modern filmmaking. On cinegearguide.com, James leverages his deep understanding of the industry to provide authoritative insights, gear reviews, and technical guides. He is known for his ability to break down complex specifications into practical, actionable advice for filmmakers of all levels. His perspective is rooted in the real-world application of technology, ensuring that every recommendation is backed by professional standards. James is dedicated to empowering the filmmaking community by sharing his expertise, helping others navigate the ever-evolving landscape of cinema technology with confidence and clarity.
LinkedIn Profile