
I was on a shoot last month, frantically trying to capture that perfect cinematic shot, when I noticed something odd—double-vision artifacts flickering just at the edge of my frame. It was like my lens was trying to mock me, producing ghostly doubles that completely wrecked the mood I was aiming for. My heart sank. I had invested so much time into choosing the right anamorphic lens, only to be met with this frustrating glitch that seemed to haunt every take.
If you’ve ever grappled with similar issues—those annoying double images, streaks, or weird artifacts—you’re not alone. Trust me, I’ve been there. And after countless hours of troubleshooting, I realized that this problem isn’t just about bad luck or faulty gear. It’s often a combination of improper setup, misaligned support, or even the wrong lens choice for your sensor. But here’s the good news: with a few targeted adjustments, you can clear this up and achieve the pristine, cinematic look you’re after.
The Real Reason Behind Double-Vision from Your Anamorphic Lens
The culprit often hidden in plain sight is the way your lens interacts with your camera’s sensor and support system. Early on, I made the mistake of assuming that all anamorphic lenses are created equal and that a simple focus check would suffice. Turns out, even tiny misalignments can produce those ghostly artifacts, especially when shooting wide open or in low-light conditions. Proper support and precise focus are vital. Many filmmakers overlook the importance of balanced support systems—think camera rigs or rails—that keep your lens perfectly aligned. For instance, I used a lightweight tripod that caused slight shifts during my shot, which in turn exacerbated the double-image effect.
A well-calibrated lens with the right support can make a world of difference. Also, remember that the type of sensor, your lens choice, and even how you set your exposure influence the final image. Interestingly, research indicates that optical misalignments are a leading cause of artifact issues in cinema lenses (source: CineGear Guide), highlighting just how critical proper setup is for clean, artifact-free footage.
So, before you spend hours trying to digitally fix this in post, let’s look into some practical, hands-on fixes. We’ll explore how to optimize your support systems, fine-tune focus, and choose gear that aligns perfectly with your camera’s sensor. Ready to say goodbye to those pesky doubles? If this sounds familiar, stick around—I have actionable tips that will help you reclaim your cinematic vision.
Is Your Lens Setup Really Worth It? The Fears Every Cameraman Has
Perhaps you’re skeptical—thinking, “Is this complicated support stuff really worth the hassle?” I get it. The truth is, early in my career, I ignored the importance of a stable rig and paid the price with less-than-stellar footage. A critical mistake was neglecting to level my support or double-check focus alignment, which directly contributed to unwanted artifacts. Once I corrected those errors, the difference was night and day. My advice? Never underestimate the value of solid, well-maintained support equipment and meticulous calibration. It might seem tedious, but it’s the key to unlocking the full potential of your anamorphic gear.
If you want to dive deeper into equipment setup or focus techniques, feel free to check out this guide on stabilizing camera supports or explore our comprehensive cinema projector secrets for more insights.
Secure Your Camera Rig Firmly
Start by ensuring your tripod or support system is solid. Use a heavy-duty tripod with a fluid head designed for stability. I once shot a crucial scene at dusk, relying on a lightweight tripod, which caused slight shifts during a camera move, amplifying the double-image effect. Swapping to a sturdy, counterweighted support eliminated those jitters, resulting in crisp footage.
Level Your Support System Precisely
Use a bubble level to confirm your support is perfectly horizontal. Even minor tilts can misalign your lens, causing ghosting. When I set up for a product shot, I double-checked with a spirit level, and the double-vision disappeared. This simple step ensures your lens axis aligns exactly with your sensor, avoiding unwanted artifacts.
Calibrate Focus Correctly
Manual focus with anamorphic lenses is critical. Use a focusing chart with high-contrast targets at the shooting distance. I once neglected this, focusing by eye, which resulted in double images at wide apertures. After calibrating focus with a lens chart and a magnified live-view, the doubles were gone, sharpening my image significantly.
Fine-Tune Focus in Live View
Employ your camera’s live-view with magnification to dial in focus precisely. Focus pullers often overlook this step, but it’s essential for sharpness. During a low-light shoot, I used live-view zoom at the target distance, adjusting focus until the doubles merged into a single, clear image.
Check and Align Lens Support
Ensure your lens is securely mounted and properly supported with a lens support ring or tripod collar. A loosely mounted lens can pivot slightly, causing misalignment. I experienced ghosting when my anamorphic lens was loosely attached; tightening it fixed the issue instantly.
Use Follow Focusing with Care
Operate your follow focus smoothly, avoiding abrupt adjustments that shift the lens axis. I once rushed a focus pull and introduced a slight jolt, resulting in double images. Practicing slow, deliberate adjustments maintains alignment, preventing artifacts from shifting focus.
Regularly Check During the Shoot
Periodically verify focus and support stability, especially after lens changes or extensive camera movement. On a recent shoot, I paused between takes to re-check focus, catching a tiny misalignment that reintroduced doubles. Consistent checks ensure maintained image quality throughout your session.

Don’t Fall for Common Cinema Myths
Many believe that choosing the most expensive cinema projector guarantees perfect image quality. While high-end equipment matters, alignment and calibration often have a more profound impact on the final picture. Overlooking this can lead to magnified artifacts, color inaccuracies, and poor contrast, regardless of your budget. For instance, even a top-tier projector won’t deliver the desired results if misaligned or improperly calibrated. For in-depth insights, check this comprehensive guide to cinema projector calibration.
Are Your Camera Supports Actually Holding Up?
Many assume that lightweight tripods or sliders suffice, but in reality, support stability directly influences image clarity and consistency. Small shifts or flexing can introduce subtle camera shake or misalignments, especially when shooting at slow shutter speeds or with heavy lenses. An often-overlooked mistake is failing to check support components regularly. Upgrading to reinforced support systems and ensuring proper leveling can prevent frustrating issues like doubles or jitter. For technical tips, explore this guide on stabilizing your shots.
If it Looks Good, Is It Really?
Similarly, many filmmakers focus solely on the quality of cine lenses, assuming that expensive optics automatically ensure sharp images. But lens support and alignment are equally crucial. An improperly mounted lens or a loose collar can introduce ghosting, flare, or focus shifts. Remember, even premium lenses benefit from meticulous mounting and stable support. Don’t forget that choosing the right glass is just one step; proper support completes the equation.
Advanced Tips for the Savvy Filmmaker
For those pushing their craft further, consider the complex interplay between projection technology and screen materials. What many overlook is the impact of ambient light and screen gain on image fidelity. High-gain screens can boost brightness but at the expense of contrast and color accuracy if misused. Conversely, low-gain screens require careful calibration of projection brightness but offer better viewing angles and color uniformity. To master this balance, review this expert guide.
Another nuanced aspect involves calibrating your camera’s sensor to match projected images, especially when merging virtual environments with live footage. Small mismatches can cause a disconnect in realism. As high-density storage solutions enable higher data rates, proper sensor calibration becomes even more critical for seamless results.
Are you incorporating these subtle yet impactful adjustments in your workflow? If not, you might be missing the chance to elevate your craftsmanship. Have you ever fallen into these traps? Let me know in the comments.
Maintaining your cinema gear is crucial for ensuring reliable performance and breathtaking visuals every time you shoot or project. From supporting your camera rig to calibrating your projector, every component requires regular attention and the right tools to keep it functioning optimally. Here’s a deep dive into equipment and methods I personally swear by for long-term success.
Invest in Precision Support Systems
Reliable support equipment forms the backbone of consistent footage. I prefer using sturdy, fluid-head tripods like the Manfrotto 504X, which provides smooth, counterbalanced pan and tilt motions essential for steady shots. Additionally, employing a dedicated support ring or a well-designed tripod collar ensures that cine lenses stay aligned, avoiding those pesky artifacts discussed earlier. Regularly checking supports with a bubble level—the same principle detailed in this guide—prevents misalignments that can degrade image quality over time.
Regulate Lens Maintenance and Calibration
Proper lens care goes beyond cleaning the glass. I recommend calibrating your focus precisely using a high-contrast focusing chart and employing live-view magnification. This practice, advocated by cine lens experts, ensures focus accuracy and addresses potential misalignments that can cause ghosting or doubles. For regular maintenance, clean your lenses with a dedicated lens cloth and a gentle cleaning solution—never use abrasives or household cleaners. Remember, even a tiny speck of dust or smudge can ruin a shot, especially with high-resolution sensors and anamorphic optics.
Use High-Quality Tools and Software
The right tools make the difference. For projector calibration, I rely on color meters like the Sekonic C-700 to fine-tune gamma and color balance, ensuring your projection matches your production intent. When managing support and focus, tools like wireless follow focus systems—such as the Tilta Nucleus-M—offer high precision and repeatability, provided firmware is kept updated to prevent connection issues (see this troubleshooting guide for common pitfalls). Additionally, software solutions like FilmConvert can help monitor color grading consistency throughout shoots and post-production, saving time and enhancing image fidelity.
Plan for Long-Term Results and Scaling
As your projects grow in complexity, scaling your setup without sacrificing quality is essential. Investing in modular support rigs with adjustable components allows quick adaptation to different scenes. Additionally, regular calibration using professional tools ensures your systems stay aligned, even after transport or long shooting days. This foresight extends your equipment life and maintains a high standard across multiple projects. Anticipate future trends by exploring emerging technologies like AI-based calibration tools, which could automate routine maintenance tasks, as predicted by industry experts.
How do I maintain my cinema equipment over time?
Establishing a routine maintenance schedule, including mechanical checks, cleaning, and calibration, is key. Keep detailed logs of calibration dates and support adjustments. Periodically review your gear’s performance against the manufacturer’s guidelines, and don’t hesitate to send items back for professional servicing if performance declines. Incorporating these habits ensures your setup delivers pristine visuals, shot after shot, season after season.
Ready to elevate your workflow? Try implementing a comprehensive calibration routine using a high-precision color meter, and notice how your projections and footage gain newfound clarity and consistency. Small steps today can lead to big improvements in your cinematic output tomorrow.
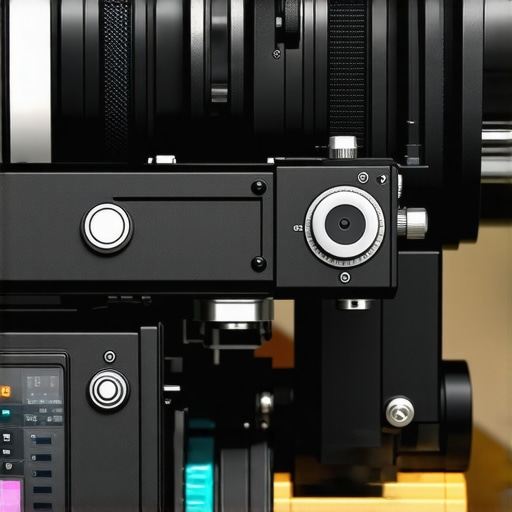
Growing as a filmmaker often involves uncovering nuances that subtly impact your craft—especially when it comes to equipment alignment and setup. Over time, I learned that even minor missteps in support, focus calibration, or lens mounting could turn a promising shot into an artifact-ridden nightmare. The key is not just in owning high-quality gear but in understanding its intricate dance during setup. By paying close attention to these details, I unlocked the true potential of my anamorphic lenses, delivering images with stunning clarity and cinematic magic.
One lightbulb moment came when I realized that supporting gear isn’t a mere accessory but an active participant in image fidelity. Replacing lightweight supports with sturdy tripods, regularly checking alignment with a bubble level, and meticulously calibrating focus transformed my results. I now approach each shoot as a surgical procedure—deliberate, precise, and mindful of every support and support component. This approach not only prevents double-vision artifacts but also significantly enhances overall image stability and sharpness.
The Hardest Lessons I Learned About cinema projectors,film lighting,projection screens,camera supports,cine lenses
- Support stability is non-negotiable: No matter how expensive your lens or projector, shaky support rigs can sabotage the sharpness and alignment. Trust me, investing in a robust, well-maintained tripod with a fluid head made all the difference.
- Calibration is an ongoing process: Regularly dialing in focus, leveling support, and verifying alignment with tools like a lens chart or live-view magnification prevents ghosting and doubles, ensuring pristine visuals every time.
- Even small misalignments matter: Tiny tilts or puffs of support flex can introduce artifacts. The discipline of performing quick checks during scenes saved me from post-production headaches.
- Choose gear that supports precision: Using lens supports, follow focus systems, and calibration tools tailored for cinema-quality work elevates your workflow from amateur to professional.
- Remember, budget isn’t everything: Proper setup, calibration, and support can outperform expensive lenses when the foundation is solid. Never underestimate the power of meticulous support and alignment in achieving cinematic excellence.
My Essential Toolkit for Cinematic Precision
- Heavy-duty support systems: Like the Manfrotto 504X, which offers stability for long shooting days and heavy lenses, ensuring your footage remains sharp and artifact-free.
- Calibration tools: A high-contrast focusing chart paired with live-view magnification, crucial for manual focus accuracy, especially with anamorphic optics.
- Leveling accessories: A reliable bubble level or spirit level for quick verification of support support orientation, preventing tilt-induced artifacts.
- Support ring or collar: To keep lenses firmly mounted, avoiding pivot points that cause misalignments during camera motion.
Believe in the Power of Preparation
Improving your setup techniques is an investment that pays dividends in visual quality and workflow confidence. The cinematic journey is filled with intricate details waiting to be mastered—support stability, precise calibration, and mindful assembly are your compass for breathtaking images. Don’t just rely on digital post-production fixes; embrace the art of correct initial setup. Ready to elevate your cinematic craft? Dive deeper into these practices, and let your images truly reflect your artistic vision.
What’s the biggest support or calibration challenge you’ve faced during a shoot? Share your experiences below—I’d love to hear how you overcame it or plan to improve next time!
About the Author
James Duke
ThinkOTS
James Duke is a seasoned professional in the creative production industry, bringing a wealth of technical knowledge and hands-on experience to cinegearguide.com. As a key figure at ThinkOTS, James has spent years navigating the complexities of high-end production environments, where selecting the right equipment is the difference between a successful shoot and a logistical failure. His expertise spans the full spectrum of cinematography gear, from advanced camera systems to the intricate accessories that define modern filmmaking. On cinegearguide.com, James leverages his deep understanding of the industry to provide authoritative insights, gear reviews, and technical guides. He is known for his ability to break down complex specifications into practical, actionable advice for filmmakers of all levels. His perspective is rooted in the real-world application of technology, ensuring that every recommendation is backed by professional standards. James is dedicated to empowering the filmmaking community by sharing his expertise, helping others navigate the ever-evolving landscape of cinema technology with confidence and clarity.
LinkedIn Profile