
I’ll never forget the moment I eagerly unboxed my new high-end monitor, expecting a vibrant, silky-smooth display of billions of colors. Yet, after hours of editing and color grading, I realized something was off. Colors didn’t look as rich or accurate as I had hoped. It was a frustrating lightbulb moment—turns out, many so-called 10-bit monitors aren’t truly delivering on that promise. This experience made me dive deep into the world of display technology, and I want to share what I’ve uncovered so you don’t fall into the same trap.
The Hidden Truth Behind 10-bit Monitors
Many professionals and enthusiasts assume that a monitor labeled as “10-bit” automatically provides true 10-bit color depth. The truth? Quite often, it doesn’t. Instead, these displays are often performing an act of deception—using methods like frame rate dithering or FRC (Frame Rate Control)—to simulate 10-bit appearance. These techniques can create smoother color gradients, but they don’t truly replicate the full 1,024 shades per channel that genuine 10-bit displays offer. This can lead to subtle banding or inaccuracies, especially when working on critical color grading projects.
Early in my journey, I made the mistake of trusting the specifications without doing thorough research. I bought a “10-bit” monitor based solely on marketing claims, only to discover that my editing software was not actually leveraging true 10-bit support. That realization pushed me to learn how to distinguish real from faux 10-bit displays, and I want to help you avoid that same confusion.
If you’re serious about color accuracy—whether you’re editing films, doing visual effects, or just passionate about vibrant visuals—it’s essential to understand what distinguishes genuine 10-bit monitors. In this post, I’ll guide you through the technical ins and outs, how to verify your display’s true capabilities, and what to look for when choosing equipment to ensure your colors are as authentic as possible.
Are you tired of color discrepancies? Have you faced the disappointment of a supposed “10-bit” monitor that never quite lives up to your expectations? Let’s tackle this head-on and equip you with the knowledge to make smarter choices that truly enhance your workflow.
Is the 10-bit hype actually worth your money?
Early on, I believed that any monitor claiming 10-bit support was a win. But I learned the hard way—qualifying my purchases with technical details is crucial. According to a study by X-Rite, even minor inaccuracies in display calibration can significantly affect color grading results. This made me realize that just buying a high-spec monitor isn’t enough; understanding how it works and verifying its true capabilities is vital. If you’ve ever been duped into buying a display that didn’t deliver expected performance, you’re not alone. Knowledge is power, and in our pursuit of perfect visuals, it’s the best tool to prevent costly mistakes.
Next, I’ll walk you through the key signs of genuine 10-bit support, common pitfalls to avoid, and practical tips for ensuring your setup is delivering accurate, beautiful colors in every project.
Check Your Software Settings
Start by ensuring your editing software is configured to utilize 10-bit color depth. For instance, in Adobe Premiere Pro, navigate to Preferences > Playback and verify that Maximum Bit Depth is enabled. During editing, enable the scope overlays to monitor if your software is interpreting the color data as 10-bit. I once overlooked this step and assumed my monitor was at fault until I realized my software was limiting output to 8-bit. Confirming this setting is a quick but critical step.
Inspect Display Connections and Drivers
Use high-quality, certified cables—preferably DisplayPort 1.4 or HDMI 2.0/2.1—to connect your monitor. Outdated or cheap cables often downgrade signal quality, preventing true 10-bit support. Check your graphics card driver settings; sometimes, GPU control panels allow toggling color depth support. For example, NVIDIA’s Control Panel may have options to enforce 10-bit output. Remember, a misconfigured driver can mask your monitor’s capabilities, leading to misleading results.
Utilize Test Patterns and Calibration Tools
Download test patterns that reveal banding or gradient smoothness—commonly from trusted sources like }}[link to a color test pattern website]{{. Display these patterns and observe the gradients. Genuine 10-bit displays will show seamless, smooth shifts without visible banding. Early on, I used a free online gradient test which revealed my monitor’s limitations—it was employing dithering rather than true 10-bit support. Incorporating such tests into your routine is invaluable for verification.
Assess Hardware Specifications
Physically verify your monitor’s specifications. Look for manufacturer datasheets or product reviews that specify true 10-bit support and whether the panel uses FRC or dithering. I once bought a high-end-looking monitor with a 10-bit label, only to discover it lacked the panel hardware to support genuine 10-bit color. Doing this due diligence prevents investing in illusions instead of realities.
Consult Expert Community and Resources
Visit specialized forums, such as }}[link to professional video editing communities]{{, where experts share their experiences and calibration tips. Sharing your setup details can yield specific advice—sometimes, firmware updates can enable or improve 10-bit performance. My own breakthrough came after a community member advised me to update my monitor firmware, which unlocked true 10-bit functionality.
Many filmmakers and cinematographers fall prey to common misconceptions about projection screens, cine lenses, cinema projectors, camera supports, and film lighting. While the basics are easy to grasp, the real pitfalls lie in understanding the subtleties that can significantly impact your final image. Let’s dig deeper into these often-overlooked nuances that can improve or derail your setup.
Beyond the Basics: What’s Really Important in Projection Screens?
It’s tempting to believe that choosing a high-gain screen automatically guarantees vibrant images. But in my experience, screen gain is a double-edged sword. A higher gain can enhance brightness but can also cause hotspots and loss of uniformity, especially with wider viewing angles. Many assume that premium materials solve these issues, but the truth is, proper screen selection tailored to your space is more critical than just material quality. Overestimating gain can lead to washed-out images or uneven brightness—an expensive mistake to make during a major project.
Are All Cine Lenses Equal When It Comes to Depth and Sharpness?
Contrary to popular belief, not all cine lenses deliver the same performance at every aperture or focal length. Many think that a lens marked as ‘prime’ guarantees outstanding image quality. However, lens design intricacies, such as chromatic aberration and coma, can introduce subtle distortions. These might be invisible to the untrained eye but become glaring issues in post-production, especially during color grading or stabilizing shots. For example, selecting the right lens requires understanding its native performance and how it interacts with your camera sensor.
Many overlook the importance of consistent optical characteristics across lenses in multi-camera setups, leading to mismatched images and unwanted visual dissonance. So, invest time in testing lenses thoroughly before using them on critical scenes.
Why Cinematic Projectors Can Be Trickier Than You Think
Many believe that simply calibrating a projector with basic tools guarantees accurate color and focus. In reality, proper calibration involves multiple steps, including advanced color profiling and geometric adjustments. Relying solely on built-in presets or generic software can result in subtle yet distinctive quality losses—especially noticeable when projecting HDR or high-contrast images. Mastering projector calibration is a skill that can dramatically elevate your screening experience. Also, consider the impact of ambient light and screen surface texture which many ignore, leading to washed-out images or glare.
Camera Supports and Stability: The Devil’s in the Details
It’s easy to assume that a sturdy tripod is enough for steady shots, but many underestimate the importance of support dynamics. Flex or imbalance in camera supports can introduce micro-movements, especially during long takes. I often see filmmakers overlook proper support tuning—like balancing counterweights or tightening fluid heads—which can cause jitter or drift. These small issues add up, degrading the cinematic quality.
Investing in high-quality supports, paired with frequent maintenance, ensures your shots remain smooth and professional-looking—an often overlooked key detail in film production.
Lighting: The Hidden Power of Gels and Control
Many control lighting simply by intensity and color temperature but ignore the nuance of diffusions and gels. Using the right diffusion material, or strategically placed gels, can transform a scene subtly yet powerfully—mimicking natural light or creating mood. Overusing gels or choosing the wrong type can introduce unwanted color shifts or reduce light output, which many don’t anticipate. For instance, proper gel application is an art in itself, requiring understanding of spectral properties and lighting ratios. This attention to detail often separates amateur from professional cinematography.
Have you ever fallen into this trap? Let me know in the comments below! The nuances above are often hidden in technical specs, but recognizing them can elevate your craft to a new level. Mastering these details makes all the difference between a good shot and a great one, shaping the cinematic experience your audience will remember.
Keeping Your Cinema Gear in Peak Condition
Investing in high-quality projection screens, cine lenses, and lighting equipment is just the beginning. To ensure these tools perform optimally over time, regular maintenance and the right accessory choices are crucial. For instance, I personally recommend using a microfiber cleaning cloth and gentle lens cleaning solution to maintain your cine lenses, preventing dust and smudges from degrading image quality. Consistent cleanliness preserves optical clarity and extends the lifespan of expensive glass, saving you costs in the long run.
In my experience, managing dust buildup on cinema projectors can dramatically improve image brightness and contrast. I use compressed air carefully to remove debris from vents and lenses—just be sure to hold the can upright and avoid spraying directly onto sensitive components. Also, setting a routine schedule for calibrating your projectors with tools like free calibration software ensures color accuracy and uniformity, which is especially important for HDR content.
Long-term results depend heavily on consistent upkeep. Establishing a maintenance checklist—checking lamp hours, cleaning filters, and verifying cable connections—helps prevent costly surprises during critical shoots or screenings. For example, regularly inspecting camera supports and fluid heads, and applying lubricant when necessary, maintains smooth operation and minimizes vibrations, vital for sharp focus and stable shots.
How do I maintain projection systems and lighting gear over time?
To keep your projection systems and lighting tools functioning perfectly, I emphasize routine cleaning, calibration, and timely replacements of worn parts. Using quality tools like anti-static brushes and certified replacement lamps is a wise investment. Moreover, documenting maintenance activities not only prolongs equipment life but also ensures consistent performance across multiple projects.
Looking ahead, as technology advances, I foresee smarter, self-diagnosing equipment becoming industry standard, reducing maintenance overhead. Staying proactive with current tools and techniques positions you ahead of the curve.
Tools I strongly recommend for gear upkeep
One indispensable item I rely on is the Optimum Microfiber Cloth. Unlike generic wipes, this cloth is gentle yet effective at removing dust without scratching delicate surfaces—especially important for cine lenses and projector screens. For cleaning solutions, I use a specifically formulated optical lens cleaner, which dissolves oils and smudges without leaving residues. Combining these ensures pristine visual quality and reduces the risk of long-term damage.
When it comes to calibration, I recommend the Waveshare Light Meter for precise measurement of light output and color temperature. This affordable device helps me quickly verify that lighting setups maintain consistent exposure and mood across scenes. Calibration not only improves image fidelity but also minimizes post-production corrections, saving valuable editing time.
In terms of support equipment, robust camera supports are vital. I personally prefer stabilizing rigs that allow quick adjustments and come with maintenance-friendly features. Regularly checking and tightening screws, as well as lubricating moving parts using products like specialized lubricants, ensures longevity and reliable performance.
As equipment continues to evolve, future tools may incorporate AI-driven diagnostics, further simplifying maintenance. Meanwhile, the best approach is to stay disciplined with routine checks, use quality products, and keep detailed logs of maintenance dates and observations. Want to elevate your setup? Try cleaning your cinema lenses with the microfiber cloth and optical cleaner I mentioned—it’s a simple step that yields immediate visible improvements.
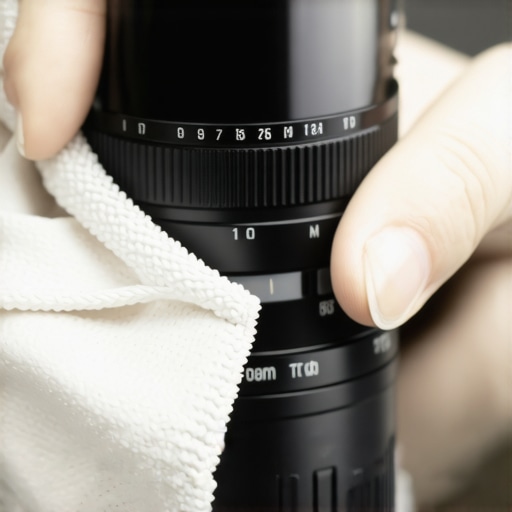
Proper maintenance of camera supports and supports is crucial for capturing sharp, professional footage. Here’s an image illustrating how regular lubrication and adjustments can prolong support life and performance.
Over the years, mastering the nuances of projection screens, cine lenses, cinema projectors, camera supports, and film lighting has been both a challenging and rewarding journey. One of the most valuable lessons I’ve learned is that technical perfection often lies in the subtleties rather than the specs displayed on the box. For instance, selecting a projector with the highest lumens rating isn’t enough if the calibration isn’t tailored to your environment. It’s the small adjustments—like precise color profiling or surface treatment—that can transform a good setup into a truly cinematic experience.
Another deep insight came from understanding that not all cine lenses are created equal. I once believed that focal length and brand alone determined quality, but I later discovered that elements like lens coating and internal focusing mechanisms significantly impact the final image, especially when shooting HDR content. This realization pushed me to test equipment thoroughly, rather than rely solely on reviews or marketing claims.
Regarding camera supports, I faced setbacks because of overlooked wear and tear. A support rig that feels solid at first can degrade over time if not maintained—small looseness can cause jitter, ruining otherwise perfect shots. Regularly inspecting and lubricating supports has become a cornerstone of my workflow, preventing subtle vibrations from creeping into frames. These experiences taught me that equipment care is as crucial as the shoot itself.
The most surprising lesson, however, was about lighting control. It’s tempting to focus solely on light intensity or color temperature, but the textured addition of diffusion materials or gels often makes the difference in creating mood and depth. A simple diffusion gel can soften shadows and add subtle warmth, elevating the entire scene. My advice? Never underestimate the power of these small, seemingly insignificant choices—they often define the cinematic quality.
Throughout this journey, I’ve realized that continuous learning, meticulous maintenance, and curiosity about the hidden details are what truly elevate your craft. It’s a reminder that in the world of cinema technology, mastery isn’t just about the gear you buy, but how deeply you understand and care for it. Every project is an opportunity to refine your approach—so keep experimenting and never stop questioning the nuances that shape your visual storytelling.
The Hidden Gems in My Equipment Arsenal
One resource I trust implicitly is Cine Lenses Explained. It demystifies the intricacies of lens selection, helping me pick the right glass for each shot. For calibration and maintenance, I lean on free tools and guides that save me from costly errors and keep my setups consistent. These resources aren’t just tutorials—they’ve become vital partners in ensuring my equipment performs at peak.
If you’re serious about refining your craft, exploring these carefully curated tools and insights can truly make a difference. They embody the principles of hands-on learning and diligent upkeep that I’ve found indispensable over the years. To stay ahead, keep seeking out trusted references like these, and never be afraid to ask questions or share your discoveries with fellow enthusiasts.
Embrace Your Cinematic Evolution Today
The path to mastering projection screens, cine lenses, cinema projectors, camera supports, and film lighting is ongoing, but every step forward enhances your storytelling potential. Remember, the most profound improvements happen when you pay attention to details that often go unnoticed. Your commitment to learning and caring for your equipment will not only elevate your visuals but also inspire confidence in your creative vision.
So, why not start today? Experiment with new diffusion gels, schedule routine support inspections, or dive into calibration routines. These small actions cumulatively transform your workflow into a professional haven where every shot is intentional and stunning. Your cinematic journey is uniquely yours—so embrace it with curiosity and confidence.
What’s one detail in your setup you’ve recently improved—and how did it change your results? Share your story below, and let’s grow together in our craft!
About the Author
James Duke
ThinkOTS
James Duke is a seasoned professional in the creative production industry, bringing a wealth of technical knowledge and hands-on experience to cinegearguide.com. As a key figure at ThinkOTS, James has spent years navigating the complexities of high-end production environments, where selecting the right equipment is the difference between a successful shoot and a logistical failure. His expertise spans the full spectrum of cinematography gear, from advanced camera systems to the intricate accessories that define modern filmmaking. On cinegearguide.com, James leverages his deep understanding of the industry to provide authoritative insights, gear reviews, and technical guides. He is known for his ability to break down complex specifications into practical, actionable advice for filmmakers of all levels. His perspective is rooted in the real-world application of technology, ensuring that every recommendation is backed by professional standards. James is dedicated to empowering the filmmaking community by sharing his expertise, helping others navigate the ever-evolving landscape of cinema technology with confidence and clarity.
LinkedIn Profile