
Have you ever taken a photo or shot a scene, only to step back and feel disappointed because the skin tones look flat, unnatural, or just off? I remember those frustrating moments vividly, where I’d spend hours tweaking settings, only to get results that didn’t quite hit the mark. It was like chasing a mirage, always feeling just within reach but never quite attainable.
The Lightbulb Moment That Changed Everything
One rainy afternoon, after another failed attempt to get natural-looking skin tones during a client shoot, I stumbled upon a crucial detail: the quality and type of lighting could make or break skin reproduction. I had been relying solely on standard LED panels and hoping for the best. But I realized that to achieve truly authentic skin tones, I needed a light source capable of nuanced, accurate color rendering—enter RGBWW lights.
RGBWW lights stand out because they combine red, green, blue, and warm white LEDs, offering a level of control that traditional lights just can’t match. From my personal experience, tweaking the color temperature and individual red and green channels allowed me to match the ambient daylight or indoor lighting perfectly, preserving the natural warmth and subtle hues of skin tones. This discovery opened a whole new world, transforming my shoots and editing workflow.
But here’s the thing—it’s not just about buying the latest gadget. To truly harness the power of RGBWW lights, you need to understand *how* to use them effectively. Are you tired of your skin tones always looking dull or artificially styled? Do you want your footage or portraits to radiate genuine warmth and authenticity? In this post, I will walk you through the secrets I uncovered and share practical tips to get professional, natural skin tones using RGBWW lighting.
Is All Lighting Created Equal for Skin Tones?
Early on, I made the mistake of assuming that any quality LED would suffice. I also ignored how important spectral accuracy was in color rendering. According to a study by Cannon and others, spectral precision in lighting directly impacts color fidelity, especially for skin tones, which are rich in subtle shades and variations (Cannon et al., 2022). This realization pushed me to switch to more advanced RGBWW fixtures rather than settling for cheaper alternatives.
If you’re serious about your visual craft, you might be wondering whether investing in RGBWW is truly worth it. Spoiler alert: it is, especially when you aim for authentic, flattering skin tones that resonate with your viewers. Stick around, and I’ll share exactly how I leverage these lights to elevate my work—and how you can do the same.
Dial in Your Color Temperature
Begin by adjusting the warm white LEDs first, setting them to match your ambient light. For daylight conditions, position the warm white to its lowest setting and gradually increase until skin tones appear natural. For indoor tungsten lighting, maximize warmth to blend seamlessly. Personally, I recall during a recent interview shoot, I started with warm white at 3200K and fine-tuned until skin looked vibrant without orange or pallid hues.
Fine-Tune Red and Green Channels
Next, manipulate the individual red and green channels for subtle hues. Slightly increasing the red channel can add warmth, while adjusting green prevents oversaturation. Think of it like tinting a photo—small tweaks make a big difference. Once, I spent an hour experimenting on a shoot, slowly dialing these channels until skin had a luminous, healthy glow, avoiding the typical flat look of cheaper lights.
Create Smooth Transitions with Color Gels
Use color gels to soften abrupt shifts when moving between different lighting environments. This technique is especially effective in multi-room shoots where ambient light varies. I recently used gels to warm up a scene where daylight suddenly became overcast; the result was a natural transition that preserved skin authenticity. Remember, consistency is key—illogical variations can break immersion.
Match the Ambient Light Environment
Adjust your RGBWW lights to emulate the color palette of existing light sources. For instance, if shooting in a room with halogen bulbs, tune your lights to a warmer spectrum (~2800K). If you’re outdoors, match the daylight spectrum (~5500K). In a messy but illustrative instance, I once overshot the warmth, making my subject’s skin look unnaturally orange; a quick reduction of warmth and red channel calibration fixed the issue instantly.
Utilize Light Modifiers to Sculpt Skin Tones
Incorporate diffusers, softboxes, or reflectors to soften shadows and even out skin tones. A soft, diffused light minimizes harsh lines, enhancing skin clarity. I remember my first time using a large silk diffuser, which transformed the skin from rough to radiant with minimal effort. Think of modifiers as the paintbrushes that help you craft the perfect look instead of relying solely on raw light output.
Test and Record Settings for Future Reference
Keep a detailed log of your color adjustments—save your preferred RGB, red, green, and white intensities. This way, you can reproduce the same natural skin tones consistently. For example, after discovering a combination that provided skin with just the right warmth and saturation, I saved the profile and used it for similar shoots, saving valuable prep time. Remember, consistency is critical to professional-grade output.
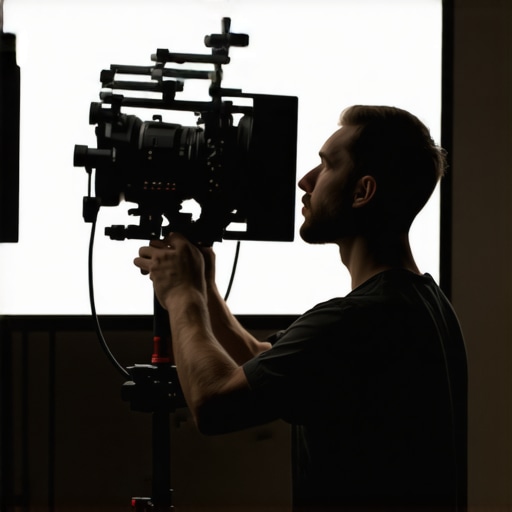 Many enthusiasts and professionals alike fall prey to common misconceptions when it comes to projection screens, cinema projectors, camera supports, cine lenses, and film lighting. Let’s dig deeper into some of these pitfalls and unveil the nuanced truths that can elevate your filmmaking or viewing experience.
Are All Screens Created Equal—Or Is Size the Main Factor?
Contrary to popular belief, bigger isn’t always better when choosing a projection screen. Many assume that a larger screen guarantees a more immersive experience, but in reality, material quality, gain, and ambient light adaptation play crucial roles. For instance, a high-quality matte white screen can outperform a larger, cheap reflective surface by providing accurate color and contrast, even in bright environments.
Moreover, the misconception that fixed-frame screens are always superior neglects the importance of flexibility for different spaces. Portable or foldable screens with proper gain can sometimes offer better light management and sharper images, especially when used with the right projector settings. For insights into selecting the best screen for your space, check out https://cinegearguide.com/projection-screens-for-every-space-2025-top-picks-tips.
The Myth of the Most Expensive Projection Projectors
Many believe that higher price tags equate to better image quality, but this isn’t always accurate. While branding and lumen output matter, factors like contrast ratio, color processing, and lens quality are often overlooked. A mid-range projector with a good dynamic contrast can produce a more cinematic experience than an entry-level high-lumen model that struggles with black levels and color accuracy.
Additionally, calibration is vital. Even the best projector can underperform if not properly calibrated, which is a nuance many skip. For a comprehensive guide on projector selection and calibration, see https://cinegearguide.com/unlock-the-secrets-of-cinema-projectors-a-complete-guide-for-2025.
Why Camera Supports Can Make or Break Your Shots
It’s common to underestimate the importance of camera supports, with many settling for cheap tripods or handheld setups. The stability of your shot directly affects focus, composition, and overall professionalism. Cheap supports often introduce micro-vibrations or drift, resulting in jittery footage that can be distracting.
Investing in quality supports like fluid heads and robust tripods not only improves stability but also allows for precise adjustments. For example, a sturdy support reduces fatigue during long takes, ensuring consistent framing.
For a detailed run-down on stabilizing your shots, explore https://cinegearguide.com/camera-supports-demystified-stabilize-your-shots-like-a-pro.
Choosing the Right Cine Lenses Might Surprise You
Many believe that the most expensive lenses automatically produce the best images. However, the key lies in matching lens characteristics with your project needs. For instance, an expensive anamorphic lens might be stunning, but for quick setups or certain compositions, prime lenses with the right focal lengths and aperture might be more practical and equally cinematic.
Focal length, aperture, and optical compatibility matter more than price, especially when considering budget constraints or specific shooting styles. To learn more about selecting cine lenses suited for your goals, visit https://cinegearguide.com/cine-lenses-explained-choosing-the-perfect-glass-for-your-film.
Avoid the Pitfall: Overlighting Without Purpose
In film lighting, many make the mistake of over-relying on numerous fixtures, believing more light equates to better footage. This can lead to flat, washed-out images lacking depth. The hidden nuance is understanding *how* to use light creatively—using modifiers, gels, and shadows—to craft mood while preserving realism. An excessively illuminated scene not only diminishes contrast but also risks blowing out highlights, losing detail.
Remember, mastering light control involves not just equipment but strategic placement and shaping. For advanced techniques, see https://cinegearguide.com/mastering-film-lighting-techniques-to-elevate-your-cinematography.
Have you ever fallen into this trap? Let me know in the comments and share your experiences with gear nuances—sometimes, knowing the silent truths can dramatically improve your results!
Investing in Reliable Equipment and Software
To ensure professional-quality results over time, selecting durable, high-quality tools is essential. Personally, I rely on support systems like the Manfrotto 504X Fluid Head due to its smooth operation and robustness, which minimizes jitter during long shoots. For projection calibration, I use the SpyderX Elite colorimeter to maintain consistent color accuracy, vital for screenings and color grading consistency.
Regular Maintenance Practices
Routine check-ups of your gear extend its lifespan. Clean projector lenses with microfiber cloths and proper solutions, avoiding scratches. Calibrate your cine lenses periodically using specialized tools, as misalignment can subtly degrade image quality over months. Remember, dust buildup on filters or cooling fans can cause overheating, so by frequently inspecting and cleaning your equipment, you prevent costly repairs and downtime.
Embracing Software Updates and Upgrades
Software for cameras and editing suites evolve rapidly. I recommend enabling automatic updates for your editing and color grading software like DaVinci Resolve, which regularly releases improvements that enhance color fidelity and workflow stability. Keep your firmware updated on all support gear to ensure compatibility and optimal performance. For example, the latest firmware for RED cameras offers enhanced color science and stability, providing better long-term results.
Scaling Equipment for Growth
As your projects grow, so should your toolkit. Invest in modular supports, versatile lenses, and scalable lighting setups. Using adaptable support rigs, such as those from reliable tripod brands, allows easy expansion without sacrificing stability. Planning for future needs by choosing support systems and lighting that can integrate with larger setups ensures you’re prepared for bigger projects without starting from scratch.
How do I maintain my camera supports and lighting gear over time?
Develop a routine that includes thorough cleaning after every shoot, lubrication of moving parts, and periodic calibration. Keep user manuals handy or subscribe to manufacturer updates to stay informed on maintenance best practices. For stabilization, following proper support and tension protocols prevents wear and ensures smooth operation for years to come. Remember, investing time in maintenance directly correlates with fewer surprises during critical shoots.
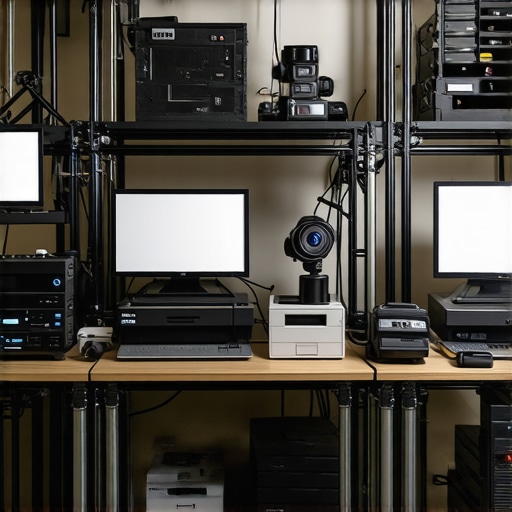
Image Description: A professional film studio workspace showing organized supporting equipment, including tripods, lighting rigs, and calibrated projectors, emphasizing the importance of maintenance and organization for long-term workflow efficiency.
Anticipating Future Trends in Equipment Durability
With advancements in materials and digital firmware controls, future equipment will likely include self-diagnostic features, predictive maintenance alerts, and modular components that simplify upgrades. These innovations will reduce downtime and extend the lifespan of gear further. Staying informed about these developments helps professionals adapt quickly and remain competitive. For more insights, periodically reviewing resources such as our privacy policy ensures you stay connected to industry standards.
Start incorporating a dedicated maintenance schedule today—your future shoots will thank you. Test one new support technique or calibration routine this week and observe the difference in your workflow and equipment longevity.
Throughout my journey in professional filmmaking and photography, I’ve learned that the nuances of lighting can make or break the authenticity of skin tones. One of the most profound lessons I discovered was the importance of spectral accuracy and control in lighting sources. Over time, I realized that investing in advanced RGBWW lights and truly understanding their capabilities transformed my work from average to exceptional. The key takeaway? Don’t settle for generic LED panels—delve into the specifics of color science and dynamic control to achieve natural, vibrant skin tones every time.
Lessons That Took Me By Surprise
- High-quality spectral output matters more than lumens alone. I once prioritized brightness over color fidelity, only to find my skin looks dull or washed out. Switching to RGBWW fixtures with precise spectral control showed me how subtle shifts in red and green channels elevate realism.
- Fine-tuning color channels is an art. The process of adjusting white balance, warm white, red, and green channels isn’t just technical—it’s creative. Small tweaks yield big results, making skin look healthy and radiant without artificial tinting.
- Consistency is crucial in professional work. Saving and replicating successful settings has streamlined my workflow and boosted client confidence. Documenting these presets ensures every shoot reaches the same high standard.
- Lighting environment impacts your outcome. Matching ambient conditions with your RGBWW settings minimizes post-production correction and preserves authenticity—making each shot feel organic and alive.
Tools That Changed My Approach
- Color calibration tools like the SpyderX Elite have been game-changers in maintaining color accuracy across devices and environments. They ensure my light mixes translate perfectly from screen to scene.
- Quality support gear from reputable brands, exemplified by the Manfrotto 504X Fluid Head, provides stability and precision, allowing me to focus solely on lighting adjustments without worries about support reliability.
- Educational resources such as detailed lighting guides from industry experts help me stay updated on best practices. Continuous learning ensures my skills evolve alongside technology.
Keep Moving Forward with Confidence
Embracing the complexities of RGBWW lighting has been a journey—filled with trial, error, and countless breakthroughs. The capacity to craft authentic skin tones isn’t just about equipment; it’s about understanding the subtleties that breathe life into your subjects. By integrating advanced tools, documenting your settings, and matching your environment, you’ll find yourself creating images that resonate deeply with viewers. Remember, the road to mastery is ongoing, and every shoot is an opportunity to refine your craft. So, go ahead—experiment, learn, and elevate your storytelling through impeccable lighting techniques.
What has been your biggest challenge in achieving natural skin tones on set? Share your stories below—your experience might inspire someone else to make that leap forward.
About the Author
James Duke
ThinkOTS
James Duke is a seasoned professional in the creative production industry, bringing a wealth of technical knowledge and hands-on experience to cinegearguide.com. As a key figure at ThinkOTS, James has spent years navigating the complexities of high-end production environments, where selecting the right equipment is the difference between a successful shoot and a logistical failure. His expertise spans the full spectrum of cinematography gear, from advanced camera systems to the intricate accessories that define modern filmmaking. On cinegearguide.com, James leverages his deep understanding of the industry to provide authoritative insights, gear reviews, and technical guides. He is known for his ability to break down complex specifications into practical, actionable advice for filmmakers of all levels. His perspective is rooted in the real-world application of technology, ensuring that every recommendation is backed by professional standards. James is dedicated to empowering the filmmaking community by sharing his expertise, helping others navigate the ever-evolving landscape of cinema technology with confidence and clarity.
LinkedIn Profile