
Ever since I started pushing my gimbal with big, hefty lenses, I’ve noticed something unsettling—vibrations that just wouldn’t go away. It was like trying to balance a bowling ball on a roller skate; every move felt shaky and uncertain. One frustrating shoot, after battling for hours to stabilize the shot, I had my lightbulb moment: it’s not just the weight. The real reason your gimbal is vibrating with heavy lenses is often overlooked but surprisingly simple to fix once you know the trick.
Heavy Lenses and Gimbal Struggling to Keep Steady
When I first started out, I naively thought that a good gimbal would handle anything I threw at it. Turns out, not quite. Heavy cine lenses, especially those over a kilogram, put a massive strain on your equipment. They can cause unwanted vibrations, jittery footage, and yes, even damage if you push them too hard. The root of the problem is often imbalance and insufficient motor torque. If your gimbal isn’t properly configured or rated for the weight, it’s playing catch-up the entire shoot. This subtle imbalance can breed instability, making your footage look amateurish and unprofessional.
But fret not—I’ve been down this rabbit hole, and I can help you avoid the same pitfalls. Today, I’ll walk you through the core reasons why your gimbal struggles with heavy lenses and, more importantly, how to fix it for good. Plus, I’ll share some practical tips that will help you get cinema-quality shots without that pesky wobble.
Is Your Setup Really Worth the Hype?
It’s understandable to hesitate—investing in heavier gear can seem counterintuitive when lighter, more portable rigs promise ease of use. I remember early on, I made the mistake of underestimating how crucial proper balancing and motor settings are. I believed a more expensive gimbal would solve everything—until I realized I was pushing it beyond its limits. This mistake, common among newcomers, can lead to mechanical wear and tear, costing you more in repairs and downtime. For an in-depth look at how to choose the right stabilizer for your needs, check out this guide on camera supports.
Understanding these nuances is key to elevating your work without wasting money or risking your gear. Now, let’s peel back the curtain and explore how to properly set up your gimbal for those heavy lenses, so you can shoot with confidence and pristine stability. Ready to fix your shaky footage once and for all? Let’s dive into the practical steps that make all the difference.
Check the Gimbal’s Payload Capacity
Before mounting your hefty cine lens, verify your gimbal’s maximum payload. Think of your setup like a cinema projector; if the projector’s lamp exceeds its recommended wattage, it risks damage. Similarly, overloading your gimbal stresses motors and can cause vibrations. Always consult the manufacturer specifications, and if you’re close to the limit, consider upgrading to a model designed for heavier loads. This proactive check prevents shaky footage and equipment strain.
Balance the Camera System Precisely
Proper balancing is crucial—imagine balancing a projection screen; even a slight tilt causes glare or distortion. For your gimbal, start by attaching the lens securely, then adjust the arm’s tilt and roll axes until your setup remains static in all positions. Use a quick-release plate with fine-tuning screws for precision. I once spent an hour fine-tuning my rig for a shot, and the difference was night and day—smooth, stable footage with minimal motor effort. Mastering balance minimizes motor load and reduces vibrations significantly.
Adjust the Gimbal’s Motor Settings
Most gimbals allow customization of motor parameters like stiffness and power. Think of these as the tension knobs on a film projector—correct tension ensures sharp focus without jitter. Access your gimbal’s app or control panel and gradually increase torque settings until the motors handle the weight without lag. Beware of over-tightening; excessive torque can cause abrupt movements or noise. Fine-tuning these settings matched to your lens weight creates a smoother operation, preventing vibrations during dynamic shots.
Implement Counterweights Strategically
Counterweights act like film projectors with balanced reels—they stabilize the entire system. For large lenses that shift center of gravity forward, add counterweights at the handle or base to balance the system. Use a simple scale to measure weight distribution, aiming for a center of mass aligned with the gimbal’s axis. I recall attaching a small weight to the bottom of my rig, which drastically smoothed out shake during handheld shots, especially when moving rapidly. Proper counterbalancing lessens motor strain, leading to less vibration and more professional footage.
Optimize Your Shooting Environment
Eliminate external vibrations by choosing a stable platform—like a tripod for cinema projectors, steadiness saves the shot. Use a soft surface or sandwich your setup on a stable table rather than uneven ground. Reduce wind or air currents, which act like uneven lighting casts on a screen, causing instability. Shield your gear with windbreaks when outdoors, and consider using sandbags or weights to anchor your setup. I learned this during a windy outdoor shoot; by mounting my gimbal on a weighted stand, I avoided jitters caused by gusts, ensuring crisp, cinematic results.
Practice Dynamic Adjustments
Even with optimal setup, real-world movement requires finesse. Think of it as matching the focus on a film camera—small tweaks make a huge difference. Practice slow, deliberate movements; quick jerks induce vibrations. Use your gimbal’s tilt and pan modes to compensate for movement and keep your lens steady. For example, during a run-and-gun shot, I kept my motions fluid, making micro-adjustments with my wrist and arms, resulting in stable footage despite rapid movement. Developing this muscle memory minimizes vibrations and produces smooth shots under dynamic conditions.
When it comes to selecting cine lenses, film lighting, projection screens, or camera supports, many practitioners rely on popular beliefs that can actually hinder their workflow. Let’s dig deeper into some common misconceptions and reveal the hidden nuances that can make the difference between amateur and professional results.
Why Most People Oversimplify Lens Selection
Contrary to the widespread notion that top-tier lenses automatically produce better images, many overlook the importance of matching lens characteristics to specific shooting conditions. For example, many believe that a lens’s maximum aperture solely determines low-light performance, but in reality, optical qualities like chromatic aberration and lens coatings play significant roles. If you chase after the highest f-stop without considering these factors, you might end up with images that are technically bright but lack color fidelity and contrast. For nuanced lens choices, dive into this comprehensive guide.
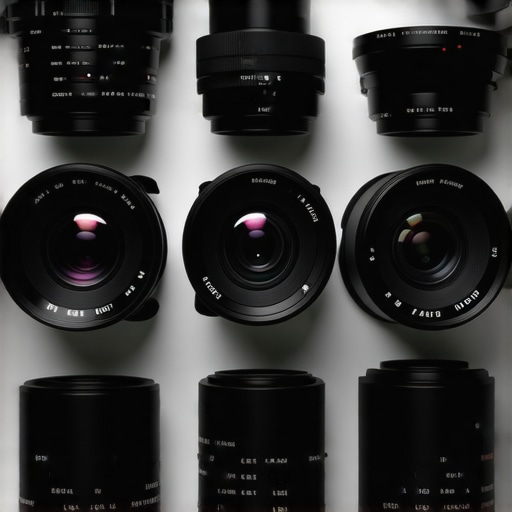
Image of various cine lenses with annotations highlighting their key optical features.
Common Myths About Film Lighting
Many believe that brighter lights always produce better cinematic effects. However, this oversimplification ignores the power of light shaping, diffusion, and color temperature. Overly intense lighting can wash out details or create unflattering shadows, especially if not carefully controlled. Conversely, skilled use of low-key lighting can evoke emotion and drama more effectively. An often-overlooked detail is the use of light shaping tools such as flags, grids, and gels, which allow for precise control of mood and texture.
Projection Screens May Not Be What You Think
Many assume that the larger or brighter a screen is, the better the image quality. Yet, the secret lies in the screen’s gain factor and material composition. A high-gain screen can increase brightness but often at the expense of viewing angles and contrast. In contrast, a matte white screen offers uniformity but may require more lumens from your projector. Understanding these nuances can prevent costly mistakes, especially in environments with ambient light. For detailed insights, check this resource.
Diagram comparing different projection screen materials and their light-reflective properties.
Camera Supports Are More Than Just Rigs
There’s a common misconception that any stabilizer or support system will do for professional shooting. In truth, the choice and setup of camera supports can significantly impact image stability, especially with heavy lenses and dynamic shots. For instance, using a basic tripod with inadequate legs can introduce vibrations, while a well-designed fluid head can smooth out pans effortlessly. Moreover, proper counterbalance and damping are often overlooked but crucial for reducing micro-movements. To master camera support ergonomics, explore this detailed guide.
Why Cutting Corners Can Damage Your Equipment
One silent trap is using incompatible or substandard accessories such as low-quality cables or cheap mounts. These shortcuts might save money upfront but can lead to system failures, image quality loss, or even hardware damage over time. For example, using non-proprietary gimbals or lenses without verifying specifications can cause motor overload or optical misalignment. Always prioritize quality and compatibility, understanding that a small investment in proper gear maintenance and accessories yields professional results.
Are you falling for these misconceptions? Let me know in the comments how you’ve navigated these pitfalls in your projects!
Stay Ahead with the Right Tools for Maintenance
Maintaining your cinema equipment requires precision tools and a proactive mindset. I personally rely on a high-quality lens cleaning kit from this trusted brand for cleaning delicate cine lenses; it ensures I never scratch or leave residues that can degrade image quality. For projectors, I use mineral-based lens cleaners combined with microfiber cloths to preserve sharpness over thousands of hours of use. Investing in a digital multimeter is invaluable for troubleshooting electrical issues in support gear or lighting systems, preventing downtime during critical shoots.
Implement Routine Checks to Extend Equipment Lifespan
Creating a maintenance schedule is vital. Regularly inspect and lubricate camera supports, such as tripods and gimbals, using manufacturer-recommended oils. This prevents stiff movements and micro-vibrations that degrade shot stability. For example, I follow a quarterly check that includes tightening all screws, testing motor torque on gimbals, and verifying alignment on projection screens. Such routines not only prevent costly repairs but also keep your gear performing at its best, ensuring long-term reliability.
Tools to Simplify Long-Term Results
Storing your gear properly is equally important. I utilize custom foam inserts in Pelican cases to prevent mechanical shocks and dust infiltration. Additionally, employing silicone-based sprays on support joints helps maintain smooth operation over time. For cinematic lighting setups, I rely on light meters like the Sekonic L-308X-U to ensure consistent exposure across shoots, which dramatically improves your post-production workflow and final image quality. These tools aren’t just accessories—they’re investments in your craft that pay dividends in professional results.
Scaling Your Setup When Growth Calls
If you’re expanding your shooting environment, consider modular support systems like the Cinegears U-Boat or custom support rigs tailored to your payload. These configurations enable quick adaptation to different projects and environments, keeping your workflow efficient. As I’ve transitioned to larger productions, these support solutions reduce setup time and improve stability during complex camera moves. Future trends suggest integrating smart support systems with IoT sensors to monitor load and vibrations in real-time, minimizing user error and equipment wear.
How Do I Maintain Cine Lenses and Support Equipment Over Time?
Establishing a disciplined maintenance routine is essential. Regularly clean lenses with appropriate solutions, tighten support joints, lubricate moving parts with manufacturer-approved lubricants, and store gear in climate-controlled environments. Incorporating digital record-keeping helps track maintenance history, ensuring nothing gets overlooked. For precision cleaning and calibration, I recommend consulting this comprehensive guide on cine lens care. And don’t forget to test your projection systems periodically using software-based calibration tools—keeping your visuals flawless for every showstopper. Why not try calibrating your projector using free online tools and notice the immediate quality improvement? Regular upkeep commands respect from your equipment, making your cinematic endeavors consistently exceptional.
Secrets Nobody Tells You About Handling Heavy Cine Lenses
One of the most overlooked lessons I learned is that weight isn’t the sole culprit of shaky footage—it’s about technique and setup. Putting a massive lens on your gimbal revealed how crucial precision balance and motor tuning are, and that even the best gear can’t compensate for improper configuration. The real game-changer was embracing meticulous balancing routines and understanding the limits of my equipment, which drastically improved my shot stability and extended the lifespan of my gear.
Tools and Resources That Elevate My Cinematic Game
Over the years, I’ve leaned on specific tools that have transformed my filmmaking process. A high-quality lens cleaning kit from this trusted brand ensures my cine lenses stay pristine, while a reliable light meter like the Sekonic L-308X-U helps me nail exposure consistently. For comprehensive support and calibration techniques, this resource offers invaluable insights. Having these tools is like adding a trusted co-pilot to your crew—making complex setups manageable and results professional.
Embrace the Journey: Your Next Cinematic Milestone Awaits
Diving into the nuances of gimbal setup, lens support, and studio environment might seem daunting at first, but each small adjustment brings your vision closer to reality. Remember, the pursuit of cinematic perfection is continuous—every shoot, every setup is an opportunity to learn something new. Equip yourself with knowledge, trust your instincts, and don’t shy away from experimenting. Your future projects will thank you for the effort, delivering footage that captivates and inspires. Ready to elevate your craft with precision and confidence? The journey starts now.
About the Author
James Duke
ThinkOTS
James Duke is a seasoned professional in the creative production industry, bringing a wealth of technical knowledge and hands-on experience to cinegearguide.com. As a key figure at ThinkOTS, James has spent years navigating the complexities of high-end production environments, where selecting the right equipment is the difference between a successful shoot and a logistical failure. His expertise spans the full spectrum of cinematography gear, from advanced camera systems to the intricate accessories that define modern filmmaking. On cinegearguide.com, James leverages his deep understanding of the industry to provide authoritative insights, gear reviews, and technical guides. He is known for his ability to break down complex specifications into practical, actionable advice for filmmakers of all levels. His perspective is rooted in the real-world application of technology, ensuring that every recommendation is backed by professional standards. James is dedicated to empowering the filmmaking community by sharing his expertise, helping others navigate the ever-evolving landscape of cinema technology with confidence and clarity.
LinkedIn Profile