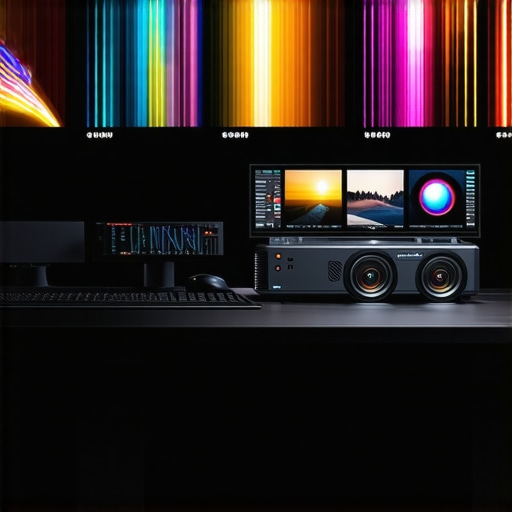
Have you ever sat in a theater or set up your own cinematic space, only to be frustrated by image quality that just doesn’t deliver the immersive experience you crave? I remember countless nights of tweaking projectors, trying to get that perfect brightness, contrast, and color fidelity, only to realize that my choice of projection technology might be holding me back. That lightbulb moment hit hard—especially as I started diving into the world of ultra-high-definition displays and 16K projectors, which are the future of home theaters and professional cinemas alike.
Why Deciding Between Quantum Dot and Laser Matters More Than Ever
As technology races toward 16K resolution, the debate heats up: which projection method truly stands out in 2026—Quantum Dot or Laser? If you’ve been considering upgrading your setup or investing in top-tier projectors, understanding the differences now can save you from costly mistakes and future-proof your entertainment space. The stakes are higher because the right choice impacts everything from color accuracy and brightness to maintenance costs and energy efficiency.
Is All the Buzz About 16K Projectors Just Hype?
Early in my journey, I made the common mistake of dismissing 16K as mere overkill—an impractical indulgence. But as I explored further, I realized that missing out on the best projection technology could mean sacrificing image clarity and color richness that elevate the viewer experience. According to industry experts, the shift toward 16K represents not just volume but a new standard for visual fidelity, pushing the boundaries of what’s possible in cinema and home entertainment.
If you’ve faced the dilemma of choosing between quantum dot enhancements or laser illumination—both promising brighter, more vivid images—you’re not alone. And the good news is, I’ll help you cut through the hype, understand the core differences, and identify which technology will actually give you the edge in 2026.
So, are you ready to navigate the maze of options and finally settle on a projector that meets your needs today and tomorrow? Let’s dive into the details to help you make an informed decision that will keep your visual experience sharp and vibrant for years to come.
.
Choose the Right Screen for Your Space
Select a projection screen that matches your room’s lighting conditions and size. For bright rooms, consider an ambient light rejecting (ALR) screen to enhance contrast and color. Measure your space meticulously; a screen too small or too large can ruin the viewing experience. Check out top picks and tips at Projection Screens for Every Space to make an informed choice.
Position Your Projector Strategically
Place your projector at the optimal distance and height to fill the screen fully without distortion. Use a level and laser distance measurer to ensure precise placement. For example, a short-throw projector can be ideal in limited spaces, reducing shadows and glare. Think of it like setting up a camera support—stability is key, which you can learn more about at Camera Supports Demystified.
Calibrate Focus and Keystone Correction
Adjust the lens focus carefully, and correct keystone distortion to keep your image sharp and rectangular. This is akin to fine-tuning a cine lens for crispness. Use the projector’s built-in tools or external calibration software for precision, especially critical when working with high-resolution 16K projectors as discussed in Cinema Projectors Guide.
Optimize Image Settings for Vivid Colors
Set your brightness, contrast, and color temperature based on the content and ambient lighting. For cinema-grade image fidelity, consider using color calibration tools or professional services. Remember, the goal is to mimic how film masters capture reality, which can be achieved with proper cine lenses and lighting, as explained at Film Lighting Techniques.
Implement Proper Installation Techniques
Secure your projector on a stable mount or support—think of it as your camera support—so vibrations and shifts don’t compromise image quality. Use anti-vibration pads and ensure cable management to prevent accidental displacements. A well-installed projector maintains focus and alignment over time, similar to practices in professional cinematography setup.
Test and Fine-Tune Your Setup
Once everything is in place, play test footage to evaluate image clarity and color accuracy. Adjust settings and positioning iteratively. Use test patterns available online to check for uniformity, distortion, and color balance. Document your adjustments to understand how each tweak impacts the overall quality, much like filmmakers using cine lenses and lighting to perfect each shot.
 While many enthusiasts and professionals focus on the core components like camera supports, cine lenses, and projection screens, there are subtle nuances and widespread myths that can trip you up if you’re not careful. Let’s explore some often-overlooked details that can make or break your cinematic quality.
One major misconception is that equipment alone guarantees perfect results. Everyone says, “Buy the best support rigs or glass,” but in my experience, the real game-changer is understanding the fine-tuning and calibration. For instance, many underestimate how critical proper stabilization is—using high-end supports isn’t enough if you haven’t calibrated your setup. You can learn more about stabilization tips at Camera Supports Demystified.
Another common myth involves cine lenses. Folks often believe that the most expensive lens automatically produces perfect focus and minimal aberration. In reality, even top-tier lenses can produce soft edges or focus drift if not properly aligned or if the lens choice isn’t matched to the sensor size and shooting style. This nuance is why understanding lens characteristics—like resolving power for 16k sensors—is essential; detailed explanations are available in Cine Lenses Explained.
Film lighting is another area ripe with misconceptions. Many assume that brighter lights are always better, but over-illumination can cause color spill and highlight unwanted reflections, especially with precision equipment. Properly controlling light temperature, diffusion, and placement—similar to professional lighting setups discussed at Mastering Film Lighting Techniques—ensures the image is balanced and true to the scene’s mood.
Regarding projection screens, there’s a myth that cheaper screens offer similar performance to high-end ALR (Ambient Light Rejecting) screens. This oversimplification ignores how material quality, gain, and anti-reflective coatings influence contrast and brightness in different ambient conditions. For a detailed comparison, see Projection Screens for Every Space.
Finally, many overlook the importance of the environment itself. Precise setup and quality gear won’t compensate for a room with uncontrolled ambient light, temperature fluctuations, or vibrations. Addressing these factors requires a holistic approach—consideration of the room’s acoustics, airflow, and stability—all of which influence final image quality. For advanced insights into optimal setups, check out Cinema Projectors Guide.
Recognizing these nuances and avoiding common pitfalls can dramatically elevate your craft. Have you ever fallen into this trap? Let me know in the comments and share your experiences! Let’s keep pushing the boundaries of what’s possible together.
To keep your cinematic equipment performing at its peak over time, investing in the right tools and follow-through maintenance routines is crucial. High-quality camera supports like carbon-fiber tripods and magnetic stabilizers not only enhance shot stability but also reduce wear and tear. Regularly inspecting and tightening support rigs prevents sagging or misalignment that could compromise your image quality. For cine lenses, using dedicated lens cleaning kits—including air blowers, microfiber cloths, and lens cleaning solutions—ensures that your glass remains free of dust and smudges, which directly affect sharpness and focus. Implementing a routine cleaning schedule minimizes degradation, especially when working in dusty or humid environments.
In terms of lighting, tools like liquid-cooled LED panels keep heat buildup minimal, protecting your expensive lights from overheating and extending their lifespan. During setup, employing watt meters to monitor power draw prevents overloading circuits, which can cause flickering or electrical damage over time. For projection screens, especially those used outdoors, I recommend using multi-layer ALR (ambient light rejecting) screens, which resist environmental damage and maintain contrast. Applying protective coatings and avoiding prolonged exposure to direct sunlight can significantly prolong screen life, ensuring consistent image quality.
Future trends suggest that automation and remote diagnostics will become standard for maintaining complex cinema rigs. Smart system monitors integrated with AI can alert you to component deviations before they cause major issues, akin to the predictive maintenance models used in industrial machinery. For instance, incorporating condition-based maintenance software like cinema projector calibration tools allows for precise adjustment schedules, saving you time and preventing costly repairs.
How do I maintain my equipment to ensure long-term performance?
Routine calibration and environmental control are your best allies. Regularly checking support supports for stability, cleaning lenses with appropriate tools, and monitoring lighting setups can prevent small issues from escalating. Additionally, keeping your environment stable—controlling room temperature, humidity, and vibrations—preserves the integrity of your setup. Remember, neglecting these crucial maintenance steps risks degrading your equipment’s performance and increasing long-term costs. Take the time to develop a maintenance plan incorporating these tools and practices, and you’ll ensure your cinematic endeavors continue to impress for years to come. Give one of these tips a try—like installing a condition-based monitoring system—and experience the difference in reliability and image quality. If you’d like personalized advice, don’t hesitate to reach out.
Over the years, my journey through the world of cinematic equipment has taught me that true excellence lies in mastering the subtle nuances that often go unnoticed. It’s tempting to focus solely on cutting-edge projectors or high-end lenses, but I’ve found that the real difference maker is a combination of meticulous calibration, innovative support systems, and a keen understanding of environmental influences. These insights have transformed my setups from good to breathtaking, and I believe they can do the same for your cinematic aspirations.
The Hidden Gems That Elevate Cinematic Craftsmanship
- Precision Calibration Is Key: No matter how advanced your projector or lens is, without proper calibration, it’s like driving a race car with the steering off. I learned this the hard way, spending countless hours adjusting focus and color settings after realizing that even a slight misalignment could muddy the image. Investing in professional calibration tools and dedicating time to fine-tuning can turn a decent image into a stunning one, making every pixel count.
- Support Systems Are Unsung Heroes: A sturdy, vibration-free support rig can make or break your shot stability. I underestimated the importance of high-quality camera supports until shaky footage started slipping into my projects. Upgrading to carbon-fiber tripods and magnetic stabilizers not only improved shot precision but also reduced setup time, letting me focus more on creativity rather than stabilization issues.
- Environmental Conditions Matter More Than You Think: Ambient lighting, room temperature, and vibrations influence image quality significantly. I once neglected room acoustics and lighting control, and the result was a washed-out projection during a crucial scene. Now, I prioritize controlling these factors, using specialized screens and room treatments, which ensures that every frame maintains its intended vibrancy and clarity.
- Incremental Improvements Make a Difference: It’s tempting to chase after the latest tech, but small, consistent upgrades—like using carbon-fiber sliders or implementing AI-driven calibration—add up to substantial quality leaps. Patience and attention to detail elevate your craft without overwhelming your budget.
Tools That Have Transformed My Workflow
- Pro Calibration Software: Programs like LightSpace or CalMAN help attain perfect color accuracy, essential for immersive viewing experiences. Their intuitive interfaces have made calibration accessible, even for enthusiasts.
- High-Quality Support Gear: Brands offering carbon-fiber tripods and magnetic support systems have reliably provided stability, reducing operational frustration and enabling smooth shots.
- Environment Control Kits: Devices like ambient light sensors and vibration dampers have helped mitigate external disturbances, ensuring consistent image quality across sessions.
- Educational Resources: Staying updated with expert guides and community forums, such as those found on Cine Lenses Explained, has kept my techniques sharp and informed my equipment choices.
Step Into a New Realm of Cinematic Excellence
Achieving professional-grade visuals is less about chasing the latest gear and more about understanding the synergy between your equipment and the environment. The knowledge I’ve gained—along with the tools I trust—has empowered me to craft scenes with clarity, color, and stability that captivate audiences. Remember, every detail matters and the effort you put into refining your setup translates directly into the storytelling power of your projects. Now is the time to take that next step and make your cinematic vision a vivid reality.
One Reply to “Quantum Dot vs Laser: Which 16K Projector Wins in 2026?”
Leave a Reply
Related Posts
3 AI-Based Pixel Shifters to Fix 16K Color Fringing [2026]
I remember the first time I watched a 16K projection…
3 Ways to Fix Rec.2020 Color Overlap on 16K Projectors in 2026
I'll never forget the moment I watched my first 16K…
Stop 16K Light Bleed: 3 Black-Level Fixes for 2026 Projectors
I remember the first time I disappointed my audience with…
Reading through this post really resonated with my own journey in perfecting my home theater setup. I’ve found that the biggest game-changer isn’t just choosing between quantum dot or laser tech, but also ensuring the entire environment is optimized for high-end projection. For instance, I recently invested in a light management system that automatically adjusts blinds and ambient lighting based on the screen content and room conditions. It’s made a noticeable difference in color accuracy and contrast, especially during evening movies.
One thing I’ve struggled with is maintaining consistent calibration over time, given fluctuations in room temperature and humidity. Has anyone explored automated calibration tools or AI-driven systems to keep their projectors perfectly tuned with minimal manual intervention? I’d love to hear about experiences or recommendations, as it could save a lot of time and frustration in the long run.