
I’ll never forget the moment I ruined a shot because I underestimated the power of lighting. The scene was perfectly lit, but suddenly, the exposure was off, and no matter what I tweaked, the color temperature felt wrong. It was frustrating—like trying to fix a leaky faucet with a hammer. Then I discovered the magic of using scrims to control exposure without messing up the color palette. That lightbulb moment transformed my approach to cinematic lighting, saving me hours of post-production work.
Why Scrims Are a Game-Changer in Exposure Management
If you’ve ever struggled with adjusting exposure levels on a shoot, especially when working with different light sources and color temperatures, you’re not alone. The common instinct is to resort to ND filters or secondary lighting, but these often introduce complications—color shifts, uneven diffusion, or loss of image quality. The real secret is understanding how to harness scrims effectively. Not only do they help tame harsh light, but they allow precise control over exposure levels without altering the color temperature—crucial for maintaining consistency across shots.
Is Relying on Scrims Really Worth the Effort?
Early in my career, I avoided scrims because I thought they were cumbersome or only for big productions. I fell into the trap of believing that adding accessories would complicate a simple setup. But that was a mistake. When I finally incorporated scrims into my workflow, my ability to fine-tune exposure improved dramatically. As a result, I could shoot faster, with fewer reshoots or color corrections. It’s a technique that seasoned cinematographers swear by, and the good news is that, with proper use, it’s accessible for almost any project. For more insights on building versatile camera support systems, check out camera supports for steady shots.
Now, I want to help you avoid the pitfalls I encountered and unlock the full potential of your lighting setups. We’ll explore how to use scrims effectively and why they should become a staple in your filming toolkit. Ready to take control of your exposure without sacrificing the integrity of your color temperature? Let’s dive in.
Set Up Your Environment for Immediate Control
Begin by securing your light source and using a sturdy, adjustable support system like a camera support system that can handle your lighting accessories. Position your light at the desired angle, keeping in mind the scene’s mood. For practical application, I once shot a interview scene where I quickly mounted a 6×6 ft scrim in front of a powerful key light using a C-stand and grip arms, which allowed me to instantly reduce harsh shadows without altering the color temperature.
Choose the Correct Type of Scrim for Your Needs
Lightweight and Collapsible
Flexibility is key. For quick setups, use collapsible fabric scrims that fold easily into a bag. These are perfect for outdoor shoots or when you need to move fast. For a recent outdoor interview, I used a collapsible scrim to soften sunlight, which helped maintain consistent exposure as clouds moved over the scene.
Frame-Based or Rigid
For larger or more precise control, opt for frame-based scrims, which can be mounted on stands or overhead rigs. They offer a more uniform diffusion. During a music video shoot, I mounted a 12×12 ft frame scrim overhead, which eliminated unwanted bounce light and kept my subject perfectly lit despite changing sunlight conditions.
Position and Adjust Your Scrim Effectively
Place the scrim approximately one to three times the distance from the light source, depending on the diffusion desired. The closer the scrim to the light, the softer and more controllable the light becomes. Use a light meter to measure exposure levels—aim for a reduction of 2-3 stops if you want to tame intense sunlight or hard studio lights. I recall adjusting a scrim during a corporate shoot; by repositioning it closer to my key light, I achieved a natural look without overexposing the background or risking color shifts, which can happen when stacking ND filters.
Fine-Tune Exposure Without Sacrificing Color Fidelity
While adjusting the scrim, keep an eye on the color temperature. Scrims diffuse and block light without altering its spectral qualities, unlike some diffusion filters or ND gels. This means you get consistent coloring across shots. When I used a silk scrim in a night shoot, my skin tones remained accurate, eliminating the need for extensive color correction in post-production.
Use Multiple Layers for Precise Control
Sometimes, a single scrim isn’t enough. Layering two or more diffusers can help you achieve the desired softness and exposure control. During a high-contrast scene, stacking a grid cloth over a smaller frame scrim allowed me to selectively reduce light spill without dimming the entire scene. Remember, the layering can introduce slight color shifts if not balanced, so always verify your meter readings and color rendition.
Maintain Mobility and Quick Adjustments
In dynamic shoots, be prepared to quickly reposition or remove scrims. Keep your support gear organized and within reach—buckets, clamps, and extra grip arms—so you can adapt as your scene evolves. For a documentary sequence, I had to adjust a scrim multiple times as the sun moved, ensuring consistent exposure without sacrificing the scene’s authenticity or introducing post-production complications.
Integrate Knowledge for Better Cinematic Results
Beyond merely blocking light, understanding how to manipulate scrims enhances your ability to craft mood and focus. Their effective use can save setup time, reduce reliance on digital correction, and preserve the integrity of your color palette. Check out advanced lighting techniques for more ways to elevate your lighting game.
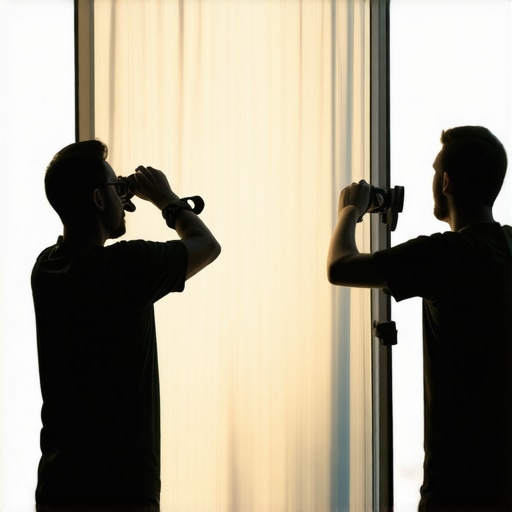
Many filmmakers and enthusiasts believe they understand the essentials of cinema technology, but beneath the surface lie subtle nuances that can sabotage your projects. For instance, a common myth is that high-end cinema projectors automatically produce the best image quality. In reality, factors like lens quality, calibration, and screen surface play crucial roles that are often overlooked. Relying solely on specs without considering these details can lead to disappointing results, regardless of budget. As an expert, I’ve seen many fall into this trap, wasting time and money on equipment that doesn’t deliver as promised.
Why does matching camera supports with film lighting matter so much?
Many assume that any support rig will do, but improper compatibility can introduce vibrations, misalignments, or even damage to delicate gear. For example, using a cheap tripod with a heavy cine lens setup can result in instability, leading to shaky footage and increased post-production work. The essence of professional support lies in understanding load capacities, damping systems, and quick-release mechanisms. Investing in quality support systems might seem costly initially, but it pays off in smooth operation and shot stability. For a detailed breakdown, check out this guide on camera supports.
Another misconception is that all projection screens are created equal. People often select screens based on gain ratings alone, assuming higher gain equals better picture. However, high-gain screens tend to reflect more light and can cause hotspot issues, which distorts the image and introduces artifacts. The nuanced choice involves balancing gain with viewing angles and room lighting conditions. For instance, matte surfaces with lower gain distribute light evenly, preserving contrast across wide seating areas. To learn more about optimal screen choices, explore this expert advice.
What do most overlook when selecting cine lenses for big productions?
The common mistake is to prioritize aperture and focal length without considering the lens elements’ optical quality and coatings. Many assume that modern auto-focus cine lenses are superior, but in narrative filmmaking, manual lenses with high-quality glass often outperform auto-focus counterparts due to better control and fewer mechanical compromises. Moreover, understanding the influence of barrel distortion, chromatic aberration, and flare is vital. Using lenses with coatings designed to minimize internal reflections yields sharper, cleaner images—an aspect underrated by many. For a comprehensive comparison, see this detailed explanation.
Why do lighting mistakes often go unnoticed until editing?
Many overlook that film lighting isn’t just about brightness but about spectral quality, contrast, and shadow control. A common error is overusing diffusers or mismatched color temperatures, leading to color shifts and flat images, especially when mixing light sources. Advanced cinematographers pay attention to the spectral response of their lighting instruments and often use lighting meters to precisely match color temperatures—something beginners neglect. An even more subtle mistake involves neglecting the ambient environment, which can introduce reflections or color casts. For in-depth strategies, consult this guide on lighting techniques.
Ensuring your cinema gear remains reliable and performing at its best requires more than just selecting the right equipment; it involves a disciplined maintenance routine and the use of specialized tools. Personally, I rely heavily on specific gear and software that allow me to keep my supports, lenses, projectors, and lighting in top condition, ultimately saving time and money during shoots and post-production.
Why Regular Maintenance Matters for Professional Cinematography
Just like a high-performance car, your camera rigs, support systems, and projection setups demand consistent upkeep to prevent unexpected failures. Regular cleaning of cine lenses with microfiber cloths and anti-static solutions reduces dust and avoids internal fungus. I use specialized lens cleaning kits that include alcohol wipes and brushes designed for delicate glass elements. This proactive approach preserves image quality and extends the lifespan of your optics.
Tools I Recommend for Peak Support and Stability
For camera supports, I swear by the support rigs with adjustable damping systems. These allow me to fine-tune tension and damping, reducing vibrations during handheld shots or crane movements. Investing in a quality support system drastically improves shot stability, especially when working with heavy cine lenses. Additionally, quick-release plates with secure locking mechanisms prevent accidental drops—an often-overlooked safety feature that can save expensive equipment from damaging falls.
Calibration Software Keeps Projectors in Check
Maintaining consistent image quality on projection screens involves precise calibration, and I rely on software tools like free calibration software to fine-tune color and brightness levels. Regular calibration ensures uniformity across multiple projectors, essential for large venues or multi-room installations. Staying on top of calibration minimizes the risk of image artifacts and color inconsistencies that can detract from the cinematic experience.
Long-Term Investment Through Proper Storage and Handling
Proper storage routines significantly contribute to the longevity of your gear. Using dedicated cases with moisture control and desiccants protects lenses and electronic components from humidity and temperature fluctuations. For rugged outdoor shoots, portable shield covers and weatherproof support mounts prevent environmental damage. I also recommend maintaining a detailed inventory, tracking maintenance schedules, and regularly inspecting gear that sees heavy use, such as film lighting fixtures, to catch potential issues early.
How do I maintain my cinema equipment over time?
Developing a maintenance schedule that includes cleaning, calibration, and careful handling is key. Incorporate routine checks before and after shoots, and don’t overlook the importance of documented maintenance records—this practice can help identify recurring issues and optimize your workflow. Staying proactive with these strategies not only prolongs your gear’s lifespan but also ensures your equipment performs at peak levels when it counts most. For a comprehensive overview of supporting tools, check out this guide on camera supports. Don’t forget to try implementing a regular lens cleaning routine using specialized kits and see the difference it makes in your image clarity and consistency.
Lessons That Changed My Perspective on Cinematic Lighting
- Realizing that quick fixes like stacking ND filters often lead to color shifts taught me to appreciate the subtle power of simple tools like scrims. They can give you precise control without sacrificing color fidelity, a lesson that shifted my entire approach to lighting setups.
- Understanding the importance of positioning scrims at the right distance to achieve desired softness and exposure levels has saved me countless reshoots. It’s a small adjustment that makes a significant difference in shot quality.
- I learned that layering diffusers isn’t just about softness—it’s about nuance. Sometimes, stacking two layers can fine-tune the light more effectively than complex equipment, emphasizing the value of foundational techniques.
- Earlier, I underestimated the value of investing in quality support systems for lighting accessories. Adequate support and quick adjustments empower you to adapt on the fly, especially in dynamic scenes, enhancing both safety and efficiency.
My Toolbox for Cinematic Success
- Support Rigs with Adjustable Damping Systems: These allow precise control over vibration and movement, making handheld shots steadier even with heavy cine lenses. I rely on them daily to achieve professional stability.
- Calibration Software for Projectors: Tools like free calibration software ensure consistent image quality across multiple screens, vital for large-scale presentations and screenings involving cinematic projection.
- Specialized Lens Cleaning Kits: Regular maintenance with high-quality cleaning tools preserves optical clarity, directly impacting image sharpness and contrast, an often overlooked aspect of cinematic quality.
- Weather-Resistant Support Gear: Durable, weatherproof supports and mounts protect your investment during outdoor shoots, ensuring reliability in unpredictable environments.
Embrace Your Cinematic Journey
Every piece of equipment, from scrims to projectors, offers an opportunity to elevate your storytelling. Don’t get caught up in the myth that complex gear alone creates stunning visuals; skillful use of simple tools can lead to extraordinary results. The key is consistency, maintenance, and a willingness to learn from each shoot. Keep experimenting, stay curious, and let your cinematography evolve naturally. Want to explore more on elevating your craft? Dive into these advanced lighting techniques for deeper insights. How have you improved your exposure control in challenging lighting conditions? Share your story below!
About the Author
James Duke
ThinkOTS
James Duke is a seasoned professional in the creative production industry, bringing a wealth of technical knowledge and hands-on experience to cinegearguide.com. As a key figure at ThinkOTS, James has spent years navigating the complexities of high-end production environments, where selecting the right equipment is the difference between a successful shoot and a logistical failure. His expertise spans the full spectrum of cinematography gear, from advanced camera systems to the intricate accessories that define modern filmmaking. On cinegearguide.com, James leverages his deep understanding of the industry to provide authoritative insights, gear reviews, and technical guides. He is known for his ability to break down complex specifications into practical, actionable advice for filmmakers of all levels. His perspective is rooted in the real-world application of technology, ensuring that every recommendation is backed by professional standards. James is dedicated to empowering the filmmaking community by sharing his expertise, helping others navigate the ever-evolving landscape of cinema technology with confidence and clarity.
LinkedIn Profile