
Ever had a perfect sound setup—and then suddenly, that annoying buzz creeps in right when you’re about to record or enjoy your favorite film? I remember the moment I finally plugged in my new audio gear and was confronted by a persistent, maddening hum. It was as if my equipment was whispering a secret just out of reach, and no matter what I tried, it wouldn’t go away. Frustrating doesn’t even begin to cover it. That lightbulb moment came when I realized the culprit: grounding issues.
Why Proper Grounding Makes All the Difference
In the world of professional audio and film production, grounding might seem like a tedious afterthought. But let me tell you, neglecting it can sabotage your entire setup. Proper grounding eliminates that dreaded buzz and keeps your audio crystal clear. The problem is, many of us dive into connecting equipment without fully understanding the grounding process—mistakes that can cause not only hums but also equipment damage.
Early on, I made the mistake of plugging everything into the same power strip without checking if it was properly grounded. That oversight introduced a ground loop, creating the very buzz I was desperately trying to silence. It was a costly lesson, but it pushed me to learn the ins and outs of grounding audio gear the right way. As an industry standard, according to cinema lighting experts, proper grounding is essential to achieving interference-free audio.
Is Grounding Really That Crucial, or Just Overhyped?
You might be skeptical—”Does grounding really make that much difference?” I get it. Early in my career, I wondered if all this fuss about grounding was overblown. But the truth is, improper grounding is a common mistake that leads to subtle noise issues turning into a full-blown audio nightmare. I’ve seen setups with seemingly expensive gear plagued by buzz because of overlooked grounding problems. Taking the time to ensure your equipment is properly grounded isn’t just good practice; it’s your best defense against audio issues.
If you’re tired of dealing with persistent hums or simply want to get the most out of your gear, mastering the grounding basics will make a noticeable difference. And trust me, it’s easier than you think—once you understand the principles, you’ll be able to troubleshoot and fix issues swiftly. Ready to stop audio buzz from ruining your recordings? Let’s dive into the practical steps to ground your gear properly and reclaim that pristine sound quality.
Identify Your Grounding Points
Start by mapping out all your audio gear and power sources. Think of your setup as a complex network of cine lenses and camera supports—each component must be properly aligned for optimal performance. Pencil in every device—mixers, microphones, and amplifiers—and trace their power cords back to the main electrical outlet.
Check for Proper Grounding Outlets
Use a multimeter or outlet tester to verify if your outlets are correctly grounded. Imagine your power source as a projection screen; without proper grounding, it’s like flickering and blurring the image. If an outlet isn’t grounded, your setup becomes susceptible to hums and noise. Replace faulty outlets or enlist a qualified electrician to correct wiring issues.
Establish a Common Ground Reference
Connect all equipment grounds to a single reference point. This is similar to aligning cine lenses to ensure a sharp, unified focus—each piece needs to work in harmony. Use high-quality, low-resistance ground cables to link your devices to a dedicated grounding rod or bus bar. This minimizes potential differences that cause ground loops and buzz.
Implement Ground Loop Isolators and Transformers
If you encounter persistent hums despite grounding, consider integrating ground loop isolators or isolation transformers. Think of this as employing diffusers or filters in your lighting setup—they smooth out undesirable effects. Install these devices inline with audio cables, especially in long runs, to break the loop and eliminate background noise.
Use Proper Cables and Connectors
Opt for shielded, balanced cables—like XLR or TRS—to connect your gear. These cables act as cine supports, providing stability and preventing interference from external electromagnetic fields. When routing, keep cables away from power lines or transformers, akin to shielding your projection screen from sunlight to avoid glare.
Secure and Organize Cables Effectively
Manage cables meticulously with clips, cable ties, and cable ducts. Proper organization is like tensioning a projection screen—maintaining smoothness and preventing sagging. This reduces physical stress and prevents accidental disconnections or shorts, which can reintroduce hums and noise. Regularly inspect and clean cable connectors to maintain integrity.
Test and Fine-tune Your Setup
Once everything is connected, power on the system and listen carefully. Use a sine wave generator or tone test to identify any residual hum. Just as in film lighting, where you adjust intensity and position for perfect illumination, adjust your ground connections and shielding until noise is minimized. Keep a log of changes for future troubleshooting.
Document Your Grounding Methodology
Maintain a detailed record of your grounding configuration, including cable types, connection points, and adjustments. This documentation acts as a blueprint—much like a film script—that guides you during future setup or troubleshooting sessions. Over time, this proactive approach ensures consistent, noise-free audio quality.
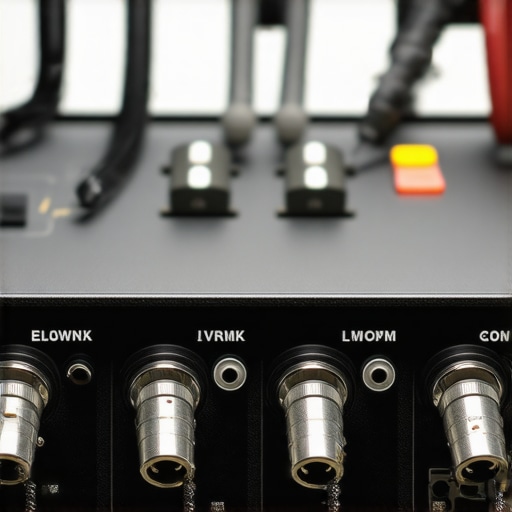 Many enthusiasts and even seasoned professionals often accept conventional wisdom about cinema projectors, screens, lighting, lenses, and supports, but some of these beliefs can be misleading or downright incorrect. Let’s dig deeper into the nuances that can make or break your production quality. For example, a widespread myth is that brighter projectors always deliver better images. In reality, high brightness can sometimes lead to washed-out images if the screen’s gain isn’t matched properly, which emphasizes the importance of choosing the right projection screen according to your room’s ambient light, as discussed in our guide on projection screens. Overestimating screen gain or sweating over lumens alone can trap you into poor contrast and color fidelity.
Another common mistake involves cine lenses. Many believe that more expensive lenses automatically guarantee superior image quality. While high-quality optics are crucial, the real deal lies in understanding how to leverage lens characteristics like aperture and focal length for storytelling, rather than relying solely on cost. As explained in our in-depth lens guide, mastering lens choice and use can elevate your footage significantly.
Misconceptions about camera supports also persist. For instance, some assume that heavier tripods offer more stability. However, without proper centering and lock mechanisms, even the heaviest setups can wobble or shake. Investing in a sturdy, well-tuned support system—including fluid heads with precise tension adjustments—can avoid costly re-shoots. You can learn more about stabilizing your shots effectively at this resource on camera supports.
Now, considering advanced questions, how do subtle lighting variations create different cinematic moods despite similar setups? Subtle control of light temperature, diffusion, and positioning can dramatically alter the emotional tone. Professional cinematographers often rely on a few well-placed flags or negative fill to shape shadows and highlights, which is a nuanced art. To master this, I recommend exploring lighting techniques for cinematic feel. Making these small but deliberate adjustments can elevate your production beyond common pitfalls.
A trap many fall into is overspending on equipment without fully understanding its role within the scene’s needs. Instead of going for the most expensive gear blindly, it’s critical to assess how each component interacts to achieve your specific artistic vision. Be skeptical of claims that push higher specs as always better—it’s about compatibility and synergy. For instance, matching your projector’s color profile with your screen material and ambient lighting is key, as highlighted in our guide on screen gain issues.
In conclusion, mastering what most overlook about cinema gear entails understanding the interplay between equipment specs, environmental factors, and cinematic intent. Avoid simple assumptions; instead, experiment and refine your approach. Have you ever fallen into this trap? Let me know in the comments.
Staying Ahead with Proper Maintenance
Ensuring your cinema setup remains in optimal condition requires regular maintenance routines and some essential tools. Start by establishing a schedule for inspecting and cleaning critical components like lenses, projectors, and screens. Using a microfiber cloth and specialized cleaning solutions, such as isopropyl alcohol-based cleaners for lenses, can prevent dust buildup and preserve image quality. For projectors, a compressed air canister helps remove internal dust without damaging delicate parts. Incorporating routine checks for cable integrity and connections prevents unexpected failures during screenings.
Recommended Tools for Long-Term Reliability
I personally rely on a combination of high-quality microfiber cloths for cleaning optics, a dedicated air blower for removing dust from sensitive electronics, and a calibrated light meter to ensure consistent lighting conditions. When it comes to projection screens, maintaining proper tension and tensioning tools is vital to avoid sagging and image distortions. Investing in a touchscreen multimeter assists in verifying outlet grounding, which, as discussed earlier, is vital for quiet, interference-free operation. For film lighting, a portable dimmer and color temp meter allow precise adjustments, ensuring long-term consistency in your lighting setup.
Planning for Future Scaling and Upgrades
As your projects evolve, so should your toolkit. Keep a detailed log of equipment performance and regular calibration dates—this helps track wear and plan timely replacements. When considering upgrades, prioritize modular components like cine lenses with adjustable mounts, which facilitate easy enhancements without overhauling entire systems. Software updates for projectors and controllers should also be scheduled periodically; manufacturers often release firmware that improves stability and introduces new features. Additionally, exploring scalable lighting systems with LAN-controlled dimming units can streamline expansion, especially when coordinating complex scenes.
How do I maintain long-term equipment health?
Regular cleaning, timely calibrations, and thoughtful storage are fundamental. For example, storing projectors and lenses in climate-controlled environments prevents fungus and material deterioration—similar to how high-end film supports are kept in specialized racks. Always refer to manufacturer maintenance schedules and use recommended tools to avoid voiding warranties. Implementing preventive measures like surge protectors and uninterruptible power supplies further shield your gear from electrical surges and outages, ensuring longevity. Remember, a proactive approach can save you costly repairs and downtime in the future.
For detailed guidance tailored to your specific setup, visit our contact page, and don’t hesitate to reach out with your questions. Also, consider integrating a calibration routine for your post-production suite using simple, budget-friendly tools. This practice ensures your images and colors remain consistent over time, which is crucial for professional quality.
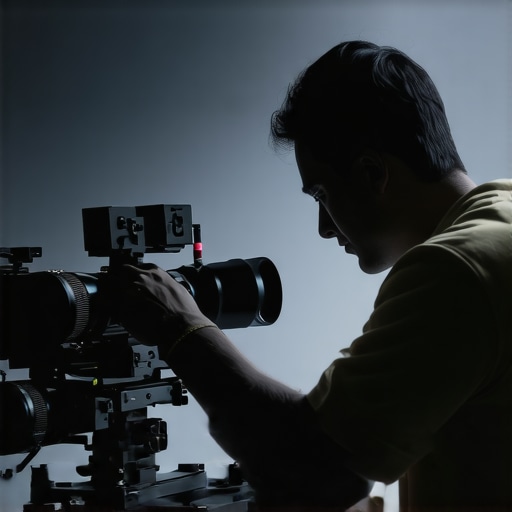
Here’s an image showcasing a technician performing calibration with professional instruments on a cinema projector, emphasizing precision maintenance practices.
Brand new, well-maintained equipment won’t just perform better; it will also last longer, saving you money and frustration in the long run.
Lessons the Pros Don’t Share Openly
- One of my biggest lightbulb moments happened when I realized that the smallest grounding oversight could turn my pristine audio into a sea of hums. It’s not just about plugging in; it’s about understanding the nuances of electrical harmony in your setup.
- I used to believe that expensive cables alone would save me from noise issues. Turns out, proper grounding practices make a far more significant difference—advice I wish I’d known earlier in my journey.
- I learned that establishing a single ground reference point prevents ground loops, a silent killer of audio clarity. Synchronizing everything to one point isn’t just best practice; it’s essential for professional-quality sound.
- From my experience, using ground loop isolators is a game-changer when hum persists despite correct grounding. Employing these devices is like adding a diffuser to your lighting—subtle but transformative.
- Finally, regular testing with a multimeter isn’t optional; it’s your guarantee that your setup remains quiet over time. A small investment in routine checks saves countless hours of troubleshooting later.
My Go-To Arsenal for Reliable Cinema Sound
- Multifunctional Outlet Tester: I trust this tool implicitly for quick evaluations of outlet grounding, preventing many headaches before they start. Check out models that offer detailed diagnostics.
- High-Quality Ground Cables: Low-resistance, shielded cables are non-negotiable. They serve as the backbone of noise-free audio, especially when running long distances.
- Isolation Transformers and Loop Breakers: Critical for stubborn hums, these devices act like filters for your audio signal, ensuring only the cleanest sound reaches your speakers.
- Cleaning and Maintenance Supplies: Keeping connectors lint-free and cables organized extends their life and maintains optimal performance. Regular inspection is your silent partner.
Your Next Step Begins with Attitude
Embracing proper grounding techniques is like fine-tuning your lens for a cinematic masterpiece—small adjustments that make a world of difference. The journey to impeccable cinema sound isn’t reserved for experts alone; it’s accessible, rewarding, and entirely within your reach. With patience and the right tools, you’re equipped to banish hums and elevate your audio environment to professional standards.
So, what’s your biggest grounding challenge right now? Share your struggles or victories below—I’d love to hear your story.
About the Author
James Duke
ThinkOTS
James Duke is a seasoned professional in the creative production industry, bringing a wealth of technical knowledge and hands-on experience to cinegearguide.com. As a key figure at ThinkOTS, James has spent years navigating the complexities of high-end production environments, where selecting the right equipment is the difference between a successful shoot and a logistical failure. His expertise spans the full spectrum of cinematography gear, from advanced camera systems to the intricate accessories that define modern filmmaking. On cinegearguide.com, James leverages his deep understanding of the industry to provide authoritative insights, gear reviews, and technical guides. He is known for his ability to break down complex specifications into practical, actionable advice for filmmakers of all levels. His perspective is rooted in the real-world application of technology, ensuring that every recommendation is backed by professional standards. James is dedicated to empowering the filmmaking community by sharing his expertise, helping others navigate the ever-evolving landscape of cinema technology with confidence and clarity.
LinkedIn Profile