
There was a moment in my home theater setup when I nearly wrecked my newly installed projector. I had underestimated the complexity of mounting on my slanted ceiling, which resulted in a shaky, unsafe hold and a lot of frustration. That experience was a lightbulb moment—understanding just how crucial a proper, secure mount is, especially when dealing with angled surfaces. It’s not just about aesthetics; it’s about safety, image clarity, and longevity of your equipment. If you’ve ever struggled to secure a projector on a sloped surface, you’re not alone. Many enthusiasts face this challenge, but few realize there’s a safe, effective way to handle it without turning your ceiling into a DIY disaster.
Why Slanted Ceilings Make Mounting a Challenge—and Why You Should Care
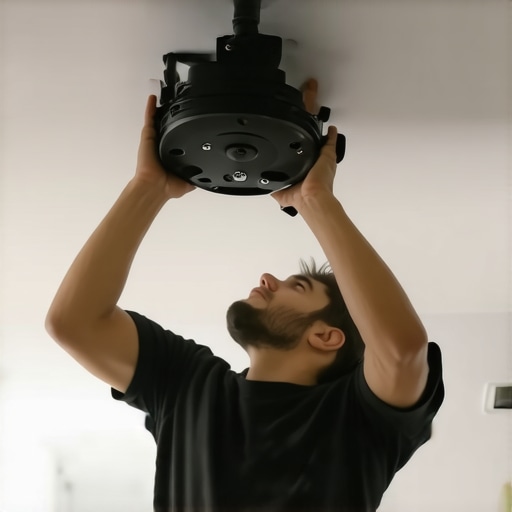
Mounting a projector on a sloped ceiling can feel like trying to balance a bicycle on a tightrope. The angle introduces a series of problems: uneven weight distribution, slipping mounts, and even potential hazards if the projector falls. Early in my own journey, I made the mistake of using generic ceiling mounts not designed for angled surfaces, which led to instability and a trip to the hardware store to fix my mess. That misstep not only cost me time and money but also put my equipment and family at risk. Since then, I’ve learned that the right approach can transform this obstacle into a straightforward project—something I wish I’d known from the start.
Proper mounting ensures your projector stays put, delivers crisp images, and prevents accidents. Think about it—your projector likely cost a pretty penny, and missteps can damage the equipment or even cause injury. Plus, a stable mount means you won’t have to recalibrate your setup every other day. According to industry experts, using the right hardware and techniques reduces the risk of costly damage and keeps your viewing experience seamless. Curious about the best methods? You’re in the right place. I’ll guide you through the practical steps to mount your projector safely on a slanted ceiling, backed by real-world advice and top tips.
Is it Really Worth the Effort or Just Overthinking?
Honestly, I once thought I could just jerry-rig something quickly and save time. Big mistake. Early on, I learned the hard way that rushing a mount can lead to dangerous slips or even a falling projector—scary stuff, and definitely not worth risking your investment or safety. The key takeaway? Proper mounting isn’t just about convenience; it’s about peace of mind. To get everything right, I recommend checking out detailed guides like this resource for more insights into securing your gear.
Now, let’s address those doubts and get you set up with a safe, reliable solution. Ready? Let’s move on to the essential steps that will turn your mounting nightmare into a straightforward project, so you can kick back and enjoy your home theater without worry.
Assess Your Ceiling and Gather the Right Hardware
Before any physical work begins, examine your ceiling’s slope precisely. Use a level and measuring tape to determine the exact angle and available space. I recall spending an afternoon with my phone’s inclinometer app and a notepad, plotting every nuance of my sloped ceiling. Once measured, select a universal mount with adjustable arms or a custom option designed for angled surfaces. Opt for heavy-duty anchors and bolts rated for your ceiling material—concrete or drywall—and consider using **toggle bolts** or **molly screws** for added stability. Avoid generic mounts not specified for angled ceilings; they are likely to slip or fail over time.
Create a Stable Base with Proper Brackets
Mounting directly onto uneven surfaces can cause instability, so use brackets or mounting plates that compensate for the slope. Secure the bracket into a stud or solid anchor point, ensuring no movement. When I installed my projector, I used a wedge-shaped shimming system behind the mount to level the projector chassis—this prevented misalignment of the image and put less stress on the hardware. Pro tip: apply a generous amount of construction adhesive or epoxy under the shims for extra security, especially if the ceiling’s material is brittle or fluid.
Ensure Proper Orientation and Angle of the Projector
Position your projector so it’s aimed precisely at the screen, considering the throw distance and lens shift capabilities. Use a laser level to draw a straight line from the projector’s lens to the center of the screen, making micro-adjustments to aim for optimal image placement. Remember that digital projectors often have keystone correction, but relying solely on it can degrade image quality. During my initial attempt, I overlooked this and ended up with a distorted picture—learning the importance of correct projector placement early on saved me hours of calibration in post-production.
Secure the Mount and Test Stability
Once the projector is positioned, tighten all bolts to manufacturer torque specifications—over-tightening can crack the ceiling material, while under-tightening risks slippage. Gently shake the projector to test for movement; if it wobbles, recheck your mounts or add additional bracing. To ensure safety during long-term use, consider installing vibration dampers or cushion pads between the mount and ceiling. I added rubber washers during my setup, which smoothed out minor vibrations and reduced noise. For visual confirmation of stability, observe the image over a few hours, especially if there are environmental factors like HVAC activity or seismic vibrations.
Routine Inspection and Adjustments
Periodically check the mount’s integrity—bolts can loosen, and adhesive may degrade over time. Set reminders to inspect and tighten if necessary, particularly after extreme weather or construction work nearby. Your investment in robust mounting ensures consistent performance and safety. Remember, a secure mount not only preserves your equipment but also provides peace of mind as you enjoy your home theater experience.
With these actionable steps, your projector will remain firmly in place, delivering pristine images without risk. Proper preparation and hardware choice are crucial to transforming a challenging ceiling into a reliable platform, letting you indulge in cinematic adventures without worry.
Many aspiring filmmakers and enthusiasts believe they understand cine lenses, projectors, screens, and lighting on a surface level, but the real mastery lies in grasping the subtle intricacies that often go unnoticed. One common myth is that more expensive gear always equals better results. While high-end equipment offers advantages, it’s the nuanced understanding of their limitations and optimal use that truly elevates your craft. For instance, cine lenses aren’t just about sharpness; their breathing characteristics and t-f-stops play a crucial role in achieving cinematic depth and consistent exposure—details often ignored by beginners. This resource delves into selecting the right lens for nuanced storytelling, highlighting how overlooked features influence a shot’s emotional impact.
Similarly, many underestimate what makes a projector truly professional. The myth that 4K resolution guarantees vivid images ignores factors like contrast ratio, black levels, and color accuracy—elements critical to immersion. The hidden truth is that a projector’s lumens are less impactful if the device cannot produce deep blacks; a point backed by industry standards outlined in this comprehensive guide.
When it comes to projection screens, the common oversight is assuming all screens are created equal. Many prefer white screens for versatility, but expert advice points out that gray screens often provide superior contrast, especially in rooms with ambient light. This nuance can transform your viewing experience, yet it remains misunderstood. Another underappreciated aspect is the gain factor of screens; higher gain can lead to hot-spotting, diminishing image quality if not properly chosen. Proper screen selection involves more than just size—it’s about understanding the environment and desired image fidelity.
In the realm of camera supports, many rely on cheap tripods or shaky rigs. But the hidden trap is neglecting proper stabilization techniques. Even a lightweight camera benefits immensely from advanced supports with dampening features, which prevent micro-vibrations and improve shot stability. Overlooking these details can result in footage that feels amateurish despite the best camera settings.
Lighting remains an area rife with misconceptions. The critical nuance is understanding color temperature and its impact on mood and realism. Many think a single light source suffices, but cinema lighting demands strategic layering—key, fill, and back lights—in tandem with well-chosen gels and diffusers. Mastering lighting techniques can dramatically elevate the cinematic quality, far beyond merely illuminating the set.
Now, you might be asking—what’s the real danger in neglecting these nuances? The oops factor is widespread; subtle mistakes compound over a shoot, leading to wasted time, increased costs, or compromised storytelling. For example, overlooking the importance of lens breathing can cause distracting shifts in composition during focus pulls. Similarly, ignoring the ambient light affects contrast and color grading, limiting post-production flexibility.
How can understanding these subtleties improve your filmmaking results?
By digging deeper into these often-overlooked details, you gain control over every visual and technical element, creating a cohesive, professional aesthetic. It’s about not settling for surface-level knowledge but striving for mastery that enables you to troubleshoot, innovate, and truly express your creative vision. For an in-depth exploration, check out this guide on cine lenses, which emphasizes the importance of understanding optical nuances.
Have you ever fallen into this trap of oversimplification? Let me know in the comments and share your experience. Remember, excellence in cinema demands attention to these hidden nuances—your audience will thank you for it.
How do I keep my cinema equipment in top shape over time?
Regular maintenance is essential to preserve the performance and longevity of your cine lenses, projectors, screens, and supporting gear. For example, I personally rely on proper lens cleaning techniques using blower brushes and microfiber cloths to prevent dust and smudges that can degrade image quality. Additionally, investing in high-quality toolsets like precision screwdrivers and calibration kits ensures your equipment stays aligned and functions flawlessly. I recommend scheduling monthly checks for mounts, firmware updates that improve performance, and color calibration to maintain consistent picture quality. Industry experts suggest that these routine practices can extend your gear’s lifespan significantly, avoiding costly replacements.
In the future, as technology advances, expect smarter diagnostic tools and IoT-connected devices that will alert you to potential issues before they become critical. Staying ahead of these trends will save both time and money and keep your setup running at peak condition.
Seeking advice on specific maintenance issues? Contact us or visit our contact page for personalized tips. Now, try applying the technique of deep cleaning your cine lenses with specialized products to see immediate improvements in image clarity. Your future self will thank you for it!
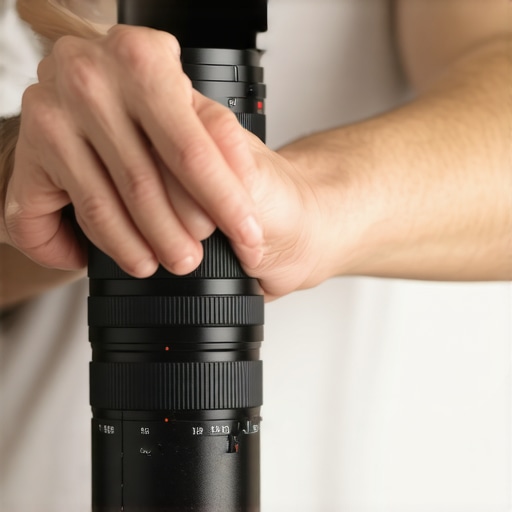
Using the right tools for maintenance isn’t just about preserving your gear; it’s about ensuring that every shot or projection maintains professional standards. From dusting sensitive optics to updating firmware, each step acts as a safeguard against long-term wear and unexpected failures. Don’t overlook these small but critical details—your cinematic experience depends on them.
The Hard-Earned Wisdom That Changed My Approach to Home Cinema
One pivotal realization I had was that investing in premium cine lenses and professional projection equipment is only part of the equation; understanding their nuanced behavior truly unlocks their potential. I learned that even small adjustments in projector placement or lens selection can dramatically affect image quality, contrast, and immersion—lessons I wish I’d understood earlier. For example, experimenting with different lens apertures and learning how to manage flare created much more cinematic results. These insights came from countless hours troubleshooting my gear, emphasizing that mastery arises from patience and a genuine curiosity to learn each component’s subtle quirks.
Tools and Resources That Elevated My Cinema Knowledge
Over time, I found that trusted tools like this guide on cine lenses provided clarity on selecting optics tailored to my project needs. Additionally, a comprehensive projector guide helped me understand how contrast ratios and lumen output influence viewing experiences. For maintaining my equipment, I rely on proper cleaning techniques that prevent damage and preserve image clarity. These resources became essential parts of my toolkit, enabling sustained top performance of my home theater.
Fuel Your Passion, Stay Inspired to Create Better Cinema
Embarking on your journey to professional-grade home theater can feel daunting, but don’t let hesitation hold you back. Embrace the process—every small tweak and experiment adds up to a more immersive experience. Remember, the pursuit of cinematic excellence is a journey fueled by curiosity and dedication. Take action today: start by assessing your projector’s placement or exploring new lighting techniques—your future self will thank you for the investment in quality and knowledge.
What’s been your biggest challenge in setting up or maintaining your cine gear, and how did you overcome it? Share your story below—let’s grow together in mastering our craft!
About the Author
James Duke
ThinkOTS
James Duke is a seasoned professional in the creative production industry, bringing a wealth of technical knowledge and hands-on experience to cinegearguide.com. As a key figure at ThinkOTS, James has spent years navigating the complexities of high-end production environments, where selecting the right equipment is the difference between a successful shoot and a logistical failure. His expertise spans the full spectrum of cinematography gear, from advanced camera systems to the intricate accessories that define modern filmmaking. On cinegearguide.com, James leverages his deep understanding of the industry to provide authoritative insights, gear reviews, and technical guides. He is known for his ability to break down complex specifications into practical, actionable advice for filmmakers of all levels. His perspective is rooted in the real-world application of technology, ensuring that every recommendation is backed by professional standards. James is dedicated to empowering the filmmaking community by sharing his expertise, helping others navigate the ever-evolving landscape of cinema technology with confidence and clarity.
LinkedIn Profile