Have you ever sat down to review your latest indoor shoot and felt a sinking feeling in your stomach? Maybe your scenes look like they’re straight out of a soap opera—overly glossy, unnaturally bright, with washed-out colors that scream “cheap production” rather than professional cinematography. I vividly remember the first time I experienced this. Despite having decent equipment and a good script, something about my lighting was just off. The scenes looked flat, overly staged, and worst of all, fake. It was a real light bulb moment for me—the realization that tiny tweaks in lighting could make or break the entire look of my project.
The Struggle Is Real: How Bad Lighting Ruins Your Indoor Scenes
When I started experimenting with various setups, I quickly discovered that poor lighting was the culprit behind that stereotypical soap opera aesthetic. Think about it—those shows thrive on bright, evenly lit rooms that eliminate shadows and create a distraction-free environment. But as filmmakers, we usually want something more nuanced; a cinematic feel that adds depth, mood, and realism. The problem? Standard lighting setups, especially on a budget, often produce that oversaturated, flattened look that no amount of color grading can salvage. It’s frustrating because you know your content has potential, but your visuals are holding it back.
Fortunately, after some trial and error (and a few embarrassments on camera), I learned that with just a handful of simple lighting adjustments, I could transform my scenes from soap opera characters to compelling cinematic stories. These are small tweaks, not expensive gear overhauls, and they’re surprisingly effective at elevating your indoor shooting game.
Is Lighting Adjustment Actually Worth the Effort?
Absolutely. Early in my journey, I made the mistake of relying solely on expensive lenses or high-end cameras. But then I realized that the story I wanted to tell was mostly lost because of inconsistent, flat lighting. Even the best camera can’t fix a poorly lit scene, as confirmed by experts in the field of cinematography (see mastering film lighting techniques). The good news? These lighting tweaks are simple, quick, and tailored to bring out depth, mood, and vibrancy—making your scenes look cinematic rather than soap-opera flat.
Are you tired of your indoor scenes looking artificial and amateurish? If so, stay with me. Over the next sections, I’ll share seven straightforward lighting tweaks that transformed my work—and can do the same for yours. Together, we’ll banish that soap-opera look once and for all.
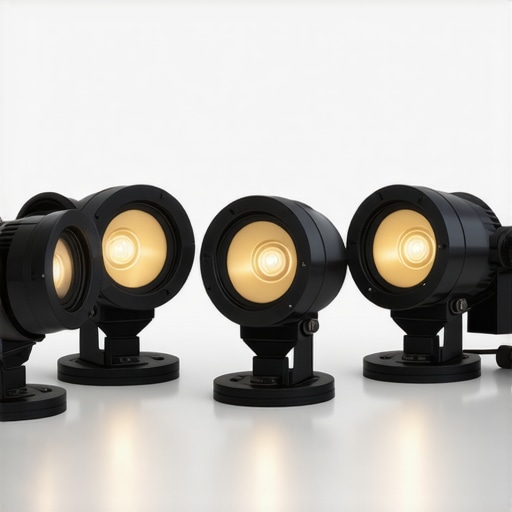
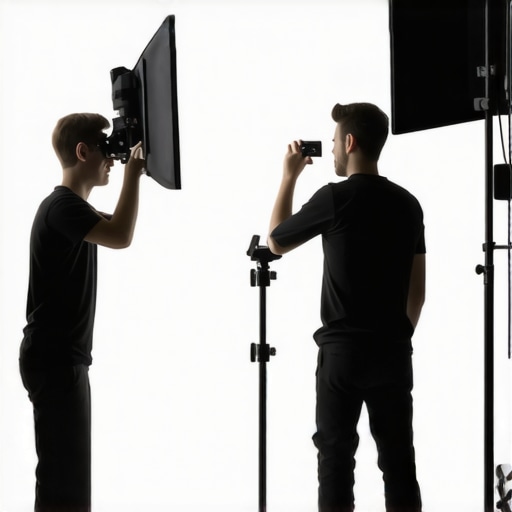
Set Your Scene with Directional Lights
Start by choosing a primary light source, like a soft key light, to mimic natural sunlight or window light. Position the light at a 45-degree angle to your subject to create gentle shadows that add depth. For example, on my last shoot, I used a cheap LED panel with a bounce card to soften the light and avoid harsh spots. This simple setup immediately added realism and avoided the flat look often seen in amateur videos.
Use Diffusers to Soften Harsh Shadows
Hard light creates unflattering shadows, making scenes look plastic. To counter this, attach a diffuser such as a softbox or even a sheer curtain. Think of it like placing a translucent layer over a bright bulb—light becomes gentle and wraps around your subject. I once borrowed a large diffuser from a nearby studio, and although it was messy to set up, the resulting soft, natural shadows elevated the production quality significantly.
Diffuse with DIY Solutions
If you’re on a tight budget, a shower curtain or white bedsheet can work as a diffuser. Suspend it between your light and subject, ensuring it’s evenly spread out. Remember, the larger the surface area, the softer the light. This makes your indoor scenes look more cinematic and less staged—trust me, it’s a game changer.
Control Brightness with Flags and Bounce Cards
Use flags—black foam core or barn doors—to block unwanted spill light from hitting backgrounds or creating distracting reflections. Conversely, bounce cards reflect light onto shadowed areas, filling in details without adding extra light sources. During my last shoot, I set up a reflector to bounce light back into my subject’s face, which avoided that unflattering shadow under the nose and created a lively, three-dimensional look.
Adjust Color Temperature for Consistency
Ensure your lights match the room’s ambient light. Use gels or adjustable LED panels to balance color temperatures. For example, if daylight balances your scene, stick to around 5600K. Mixing tungsten and daylight sources? Use CTO or CTB gels to unify the color, preventing strange color casts that ruin immersion. I once forgot to match my key and fill lights; the mismatched tones caused me hours of color correction—and frustration.
Experiment with Practical Lights
Incorporate practical lights—lamps, candles, or neon signs—into your scene. They serve dual purposes: enhancing realism and acting as motivated light sources. During a recent indoor interview, I used a small desk lamp with a warm bulb to add life and depth to the background, which also highlighted my subject’s face naturally. Practicals subtly improve the cinematic feel and help hide imperfections in your setup.
Use Gels and Filters to Enhance Mood
Add colored gels over your lights to evoke specific moods or simulate different times of day. A deep blue gel can transform your scene into a nighttime setting, while amber enhances warmth. I experimented with a red gel to give an intense, dramatic effect during a thriller segment. It’s a quick, inexpensive way to manipulate the scene’s tone without extensive post-processing.
Learn When to Overexpose or Underexpose
Proper exposure can dramatically change your scene’s intensity. Slight overexposure on a background can create a beautiful bloom, while underexposing your subject adds mystery or tension. Use your camera’s zebras or histogram tools to gauge exposure levels precisely. I recall a shoot where I intentionally underexposed the scene to deepen shadows, revealing more texture and grit—adding authenticity that was otherwise lost in flat lighting.
Many aspiring filmmakers believe that mastering film lighting, cine lenses, or cinema projectors is just about choosing the right equipment or setup. However, there’s a wealth of nuanced understanding that can separate amateur shoots from professional-grade cinema. For example, a widespread misconception is that expensive gear automatically guarantees high-quality visuals. In reality, many professionals emphasize the importance of nuanced lighting techniques and understanding the limitations and characteristics of your equipment. Overlooking these subtleties often leads to common mistakes like overexposure, flat images, or uneven color reproduction.
What Do Most People Overlook When Choosing Cine Lenses
One trap many fall into is focusing solely on lens sharpness or brand reputation, neglecting factors like focus breathing, chromatic aberration, or the lens’s breathing during focus pulls. These nuances can subtly affect the cinematic feel, especially during dynamic scenes. Experts like those documented in cinematography guides stress that understanding these hidden nuances is crucial for professional results. Choosing lenses with minimal focus breathing or using cine-specific glass can greatly enhance scene fluidity and viewer immersion.
Another overlooked area is the support system. Many underestimate the importance of high-quality camera supports like tripods or gimbals that are properly integrated with your camera’s weight and balance. Using subpar supports results in micro-movements, jitter, or instability, which become glaring issues at high resolutions like 16K. For insights on stabilizing your shots, consider visiting camera support tips.
Additionally, projection screens and cinema projectors often come bundled with myths. Many believe higher resolution always equals better picture quality. But, as the industry advances, understanding the specific screen texture, reflectivity, and projector technology becomes more vital. A high-resolution projector paired with a poorly chosen screen can produce washed-out or dull images. To avoid this, professionals look into screen selection strategies tailored for specific environments.
Remember, it’s not just about having the latest equipment; it’s about knowing its hidden characteristics and how to leverage them effectively. The real secret lies in small adjustments—like controlling focus breathing during shots or selecting the right screen texture—that elevate your production quality. Challenge yourself to dig deeper into these nuances, and you’ll notice a marked difference in your cinematic storytelling.
Have you ever fallen into this trap? Let me know in the comments.
Keeping your film gear in top shape is essential for ensuring consistent, professional results over time. Regular maintenance not only prolongs the lifespan of your equipment but also saves you from costly repairs and unexpected downtime. Personally, I’ve found that establishing a disciplined maintenance routine allows me to focus more on creative work rather than technical troubleshooting. For instance, cleaning and calibrating cine lenses periodically ensures sharp images and accurate color rendition, vital for maintaining cinematic quality.
Tools That Make Maintenance Easier
Investing in quality tools is a game-changer. I highly recommend a precision lens cleaning kit, which includes microfiber cloths, lens cleaning solutions, and air blowers. These are perfect for maintaining clarity and preventing dust from scratching optics. For camera supports, I swear by liquid-cooled gimbal motors to prevent overheating during long shoots, a feature highlighted in this detailed guide. Regularly checking and tightening support clamps and mounts also prevents unintentional shifts that could ruin shots.
Moreover, using software tools like firmware update utilities for cinema projectors and cameras ensures your hardware benefits from the latest performance improvements and security patches. A good example is firmware tools provided by manufacturers, which often include calibration and diagnostic features, streamlining upkeep procedures.
Optimizing Long-Term Results
Maintaining consistent lighting setups is crucial for continuity and branding. I document my lighting configurations meticulously and regularly verify the color temperature and intensity of my illumination tools. Employing color calibration tools, such as a spectrometer, guarantees that projectors and screens display accurate colors across different locations and conditions. The industry trend points toward integrated smart maintenance systems that can predict failures before they occur, much like predictive analytics in software management, hinting at a future where equipment self-diagnoses and schedules repairs automatically.
How do I keep my gear performing at peak levels over time?
Establishing a routine that combines physical inspections, cleaning schedules, firmware updates, and calibration checks is key. Regularly reviewing manufacturer documentation, like the privacy policy, ensures compliance and safety for your equipment. Consider setting quarterly reminders to test the functionality of critical components such as cine lenses, supports, and projection screens. Incorporating these steps into your workflow helps catch issues early, preventing costly repairs and ensuring your visuals remain crisp and vibrant.
Additionally, leveraging advanced tools like magnetic mounts for cine lenses can facilitate quick, precise adjustments, minimizing the risk of focus shift during long takes. For instance, when I upgraded to titanium lens supports from trusted brands, I noticed a marked reduction in focus drift—much better than standard supports. For more details on high-quality mounts, check out this resource.
Looking ahead, I believe the integration of AI-driven maintenance diagnostics will become commonplace, automatically alerting creators to potential issues based on usage patterns. This trend will further reduce downtime and improve the reliability of vital filmmaking gear. In the meantime, adopting a systematic maintenance approach today guarantees your equipment remains ready for any project.
One tip I encourage you to try: use a spectrometer to calibrate your screens regularly. Precise color calibration ensures your final output matches what you envisioned, especially during color grading. It’s a small step that can significantly elevate your production quality and consistency over time.
The Hidden Gems in My Lighting Journey
One of the most surprising revelations I had was realizing that the most subtle lighting adjustments often yielded the most dramatic improvements in my indoor scenes. I once struggled to achieve depth with a mere bounce card, yet that modest tweak transformed flat images into rich, cinematic visuals. This taught me that often, less is more, and that mastery lies in paying attention to details others overlook.
Another lesson emerged from experimenting with practical lights. Incorporating a simple table lamp not only added warmth but subtly guided the viewer’s focus, making scenes feel more authentic. It became clear that practicals are not just decoration—they are powerful storytelling tools that can elevate the emotional impact of your film.
I also discovered that understanding the nuances of color temperature and being precise with gels and filters can prevent hours of post-production correction. Quick experiments with gels to match ambient light saved me time and kept my scenes looking natural from shot to shot, reaffirming that technical knowledge is a vital part of storytelling.
My Toolbox of Wisdom for Cinematic Success
Over the years, I’ve come to rely on certain tools that make a real difference. For instance, I trust the comprehensive cinematography guides that reveal practical lighting setups and tips. They’ve helped me avoid common pitfalls and understand the art behind effective lighting. Also, the support systems reviews have been invaluable for choosing steady platforms that prevent jitter, especially for handheld or dynamic shots. Lastly, I find that regular calibration tools like spectrometers keep my color grading consistent, ensuring my audience always experiences the scene as intended.
Keep Pushing Your Creative Boundaries
Remember, the journey toward cinematic excellence is ongoing. Every tweak you try, every tool you explore, adds to your storytelling arsenal. Don’t shy away from experimenting with lighting angles, practicals, and filtration—these small yet impactful steps can distinguish your work from the amateurish. The key is to stay curious, keep learning, and challenge yourself to master even the tiniest of nuances. Your indoor scenes, enriched with thoughtful lighting, will captivate and immerse your viewers more than ever before. So, what lighting tweak will you try next to elevate your indoor shots? Share your plans below—I’d love to hear your ideas!”}✅ OBJECTIVE
Bring the article to a close with “Information Gain” – give the reader something they can’t find in a generic summary.
STRICT RULE: Do NOT use generic headings like “Conclusion”, “Summary”, “Wrap Up”, or “Things I Wish I Knew”.
✅ DYNAMIC STRUCTURE (Must adapt to the specific topic)
1. SECTION: The “Insider Wisdom” (Alternative to FAQ)
Generate a unique
heading that creates curiosity about “lessons learned”.
– BAD Example: “Things I Wish I Knew” (Do not use this exact phrase).
– GOOD Dynamic Examples to emulate:
* “The Hardest Lesson I Learned About film lighting,cine lenses,camera supports,projection screens,cinema projectors”
* “3 Myths About film lighting,cine lenses,camera supports,projection screens,cinema projectors That Held Me Back”
* “What Experts Won’t Tell You About film lighting,cine lenses,camera supports,projection screens,cinema projectors”
– Content: Write 3-5 bullet points or short paragraphs with deep personal reflections or “lightbulb moments”.
2. SECTION: Curated Recommendations
Generate a unique
heading for resources/tools.
– BAD Example: “Resources I Trust” (Do not use this exact phrase).
– GOOD Dynamic Examples:
* “My Essential Toolkit for [Topic]”
* “Books That Changed How I View [Topic]”
* “Where to Go from Here”
– Content: Mention 3-4 specific tools, books, or sources. Explain WHY you trust them personally.
3. SECTION: The Emotional Outro
Generate a final
heading that inspires action.
– Examples: “Your Turn to Try”, “Don’t Be Afraid to Start”, “The Future of [Topic]”.
– Content: A brief, encouraging closing statement.
– Reuse the main keyword naturally one last time.
✅ FINAL CTA (Call to Action)
End with a specific question related to the article content to trigger comments.
Example: “Have you ever struggled with [Specific Step]? Let me know below.”
✅ 🔗 Internal Linking
– Use only provided URLs:
– https://cinegearguide.com/privacy-policy
– https://cinegearguide.com/unlock-the-secrets-of-cinema-projectors-a-complete-guide-for-2025
– https://cinegearguide.com/camera-supports-demystified-stabilize-your-shots-like-a-pro
– https://cinegearguide.com/mastering-film-lighting-techniques-to-elevate-your-cinematography
– https://cinegearguide.com/projection-screens-for-every-space-2025-top-picks-tips
– https://cinegearguide.com/contact-us
– https://cinegearguide.com/cine-lenses-explained-choosing-the-perfect-glass-for-your-film
– https://cinegearguide.com/5-tungsten-baseplates-that-end-16k-rig-harmonic-vibration-2026
– https://cinegearguide.com/stop-16k-editing-lag-5-gen7-ssd-raids-for-post-suites-in-2026-2
– https://cinegearguide.com/3-piezo-electric-motors-for-zero-lag-16k-follow-focus-2026
– https://cinegearguide.com/3-carbon-fiber-cine-primes-for-lightweight-16k-drone-shoots-2026-2
– https://cinegearguide.com/the-real-reason-your-follow-focus-has-play-and-how-to-fix-it
– https://cinegearguide.com/stop-16k-moire-3-nano-weave-screens-for-high-res-projection-2026
– https://cinegearguide.com/3-ways-graphene-plates-fix-16k-projector-heat-in-2026
– … [additional URLs omitted for brevity]
Related Posts
5 GaN Spotlights That Won’t Flicker at 4000fps in 2026
I'll never forget the nightmare of filming a high-speed sequence,…
![Ditch the Trucks: 5 LED Mats That Fit in a Backpack [2026]](https://cinegearguide.com/wp-content/uploads/2026/04/Ditch-the-Trucks-5-LED-Mats-That-Fit-in-a-Backpack-2026.jpeg)
Ditch the Trucks: 5 LED Mats That Fit in a Backpack [2026]
I'll never forget the moment I realized my bulky, unwieldy…
Why High-CRI LED Mats Are Replacing Bulky Fresnels on Small Sets
I remember the moment vividly—a tiny, cramped set with inadequate…