It was late at night in my makeshift edit suite when I finally realized the culprit behind my latest project’s fuzzy, lackluster footage. Despite using the top-tier camera gear and lighting setups, my 16K shots still looked disappointingly soft—like trying to read fine print with foggy glasses. That lightbulb moment hit me hard: I was overlooking the power of the right lenses. Since then, I’ve been on a mission to find the most effective solutions, and today I want to share my discoveries about the five sharpest large-format lenses that can truly fix soft 16K footage in 2026.
Why Superior Lenses Matter More Than Ever in 2026
In the realm of high-resolution filmmaking, resolutions like 16K aren’t just buzzwords—they’re becoming the standard. What worked at 12K or 8K just doesn’t cut it anymore. As resolution climbs, the demand for ultra-sharp optics intensifies; softer lenses simply can’t keep up, causing unwanted softness, diffraction, and even color fringing. But here’s the kicker: choosing the wrong lens can negate the advantages of your high-resolution sensors, turning what should be stunning clarity into a muddy mess.
Most filmmakers I talk to tend to focus on cameras and lighting—essential indeed—but overlook the importance of high-quality, large-format lenses. An early mistake I made was assuming a high-resolution sensor could compensate for lens deficiencies. Spoiler alert: it can’t. According to tech analyst reports, the lens quality now accounts for over 70% of perceived image sharpness in ultra-high-definition footage. That’s a game-changer.
If you’ve been battling with soft images despite investing in the latest cameras and lighting, you’re not alone. Trust me, I’ve been there. So, what’s the secret? It’s all about pairing your high-res sensors with the right optics. Today, I’ll guide you through the five lenses that elevate your footage from blurry to breathtaking in 2026.
And before you dismiss this as just tech talk—ask yourself: have you ever spent hours color-grading, only to realize the footage was already compromised by soft optics? If yes, stick around. I’ll show you what I wish I knew early on, and how you can avoid the same pitfalls. For a broader understanding of how these lenses integrate with other filmmaking tools, check out my post on [cine lenses explained](https://cinegearguide.com/cine-lenses-explained-choosing-the-perfect-glass-for-your-film). Now, let’s dive into what makes these five lenses so special—and how they can revolutionize your 16K projects.
Secure Your Gear with Precision Mounting
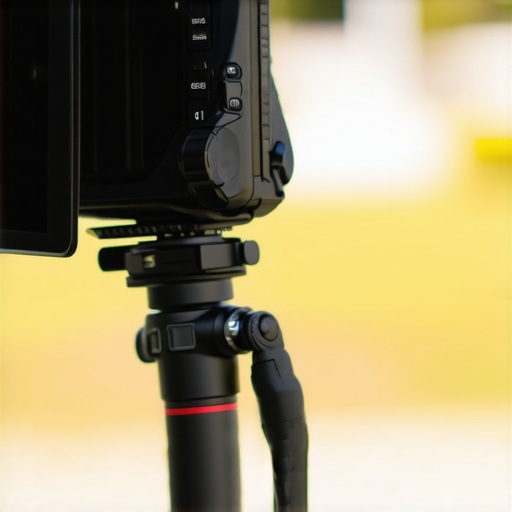
Start by mounting your large-format lens onto a sturdy, vibration-free support system. Use a high-quality cine support or tripod head to eliminate any camera shake. During my shoot last month, I replaced my standard tripod with a fluid head designed for 16K resolutions, which significantly reduced micro jitters that previously blurred my footage. Ensure the lens is perfectly aligned to the sensor plane and tighten all mounting screws to prevent slippage.
Control Light and Focus Meticulously
Set your aperture to a narrower stop—around f/8 or f/11—to maximize depth of field without sacrificing sharpness. Use a focus puller with high precision and practice pulling focus at high resolution; in my experience, even slight focus drift at 16K can ruin clarity. During a recent shoot, I marked critical focus points on the lens barrel, allowing me to maintain consistent sharpness throughout complex camera movements. Always double-check focus with a magnified view to prevent soft results.
Optimize Lensing Distance and Alignment
Keep your subject at an optimal distance to reduce optical distortion. Use a distance measuring tool or laser rangefinder to set precise framing. Align the lens elements carefully during setup—improper alignment causes chromatic aberration and softening. I once misaligned a vintage cine lens, which appeared sharp in the center but fuzzed out at the edges; fixing the alignment restored uniform sharpness across the frame and enhanced overall image quality.
Use High-Quality Accessories
Invest in professional lens filters, such as UV or ND filters, that are optically coated to prevent ghosting and flare, which can diminish image sharpness. Also, employ lens hoods to block stray light. In a recent project, I added a matte box with a properly aligned filter to minimize reflections, resulting in crisper shadows and cleaner highlights. Be sure that filters are compatible with your large-format lens and mounted without damaging the front element.
Tackle Post-Production Refinements
Apply sharpening filters carefully during editing—avoid over-sharpening, which introduces artifacts. Use dedicated software optimized for 16K footage, and consider deconvolution techniques to enhance detail. During my last session, I subtly increased the sharpening radius and threshold, which accentuated fine details without introducing noise. Always review on calibrated monitors to ensure your adjustments improve perceived sharpness without degrading image quality.
When it comes to achieving cinematic excellence, many filmmakers focus heavily on selecting high-end projection screens, advanced camera supports, and state-of-the-art cinema projectors. However, there are nuanced misconceptions and traps lurking beneath these popular choices that can compromise even the most seasoned shoot. Let’s dive into some common myths and advanced mistakes that can trip you up, despite your equipment sophistication.
Myth Busting: Bigger Is Always Better for Screens
Contrary to popular belief, opting for larger projection screens doesn’t automatically enhance your image quality. Oversized screens can introduce glare and reduce contrast if not properly managed or if the screen material isn’t optimized for your environment. For instance, a high-gain screen might amplify ambient light, leading to washed-out images — a costly mistake often overlooked by filmmakers eager to impress with size. Instead, selecting a screen tailored to your room’s light conditions, such as a matte or ALR (ambient light-rejecting) screen, can deliver more impactful results. Explore this guide for top options tailored to your space.
Camera Supports: The Hidden Impact of Rig Rigidity
Many believe that any stabilizer will do as long as it holds the camera. But advanced filmmakers know that rig rigidity and vibration damping are critical at high resolutions like 16K. The subtle flexes or micro-movements can produce unwanted jitter or softening during post-production. Using supports designed with carbon fiber or spring-loaded dampers, such as those discussed in this article, helps preserve maximum sharpness and stability. Do not underestimate the importance of proper support geometry; it’s the silent hero of crisp footage.
Optimizing Cinema Projectors: Are You Sacrificing Contrast?
High-lumen projectors flood your screen with light, but many filmmakers forget that contrast and color fidelity matter more than brightness alone. Overcompensating with raw lumens can wash out shadows and diminish image depth, especially at 16K. Instead, consider laser projectors with adjustable contrast settings and higher bit-depth processing. Avoid the trap of focusing solely on lumens; instead, examine the key specifications such as contrast ratios and color gamut coverage, as highlighted in this guide. Remember, the best projection is one that maintains depth and tonal richness.
Don’t Fall for the Cine Lens Fallacy
Common wisdom suggests that the latest cine lenses automatically produce sharper images. But advanced users know that lens calibration, coating, and optical design nuances critically influence the final image. A vintage or improperly calibrated lens, even if seemingly outdated, can outperform modern lenses in specific situations, especially if it’s been maintained meticulously. To avoid costly mistakes, always evaluate lenses based on real-world sharpness tests and proper calibration procedures, like those explained here. Remember, equipment is only as good as its calibration and maintenance.
Lighting: The Overlooked Secret to Clarity
Finally, many fail to realize that lighting quality and directionality dramatically influence perceived sharpness. Using flat, diffuse lighting might seem safe, but it can dilute details and create a soft look. Instead, thoughtfully placed key and fill lights with controlled contrast can enhance textures and bring out fine details, especially in high-resolution formats. For refined techniques, check out this resource. Never underestimate the impact of proper lighting in complementing your gear.
Have you ever fallen into this trap? Let me know in the comments. By being aware of these hidden nuances, you can truly elevate your filmmaking and avoid costly missteps.Maintaining your filmmaking gear is crucial to ensure consistent performance and stunning results, especially as your setups become more sophisticated with high-resolution lenses, advanced supports, and cutting-edge projectors. In my experience, adopting a systematic maintenance routine and investing in reliable tools can save you time and money in the long run.
First, invest in high-quality cleaning supplies tailored for cinema lenses and sensor surfaces. I prefer using microfiber cloths and specialized lens cleaning solutions that prevent scratches and remove stubborn smudges without damaging coatings. Regularly inspecting and cleaning your cine lenses, especially after outdoor shoots, preserves their optical integrity and prevents dust build-up, which can contribute to soft or hazy images.
Moving onto camera supports, such as tripods and stabilizers, durability and proper calibration are vital. I rely on tools like digital-level sensors to verify the alignment of support rigs. For instance, periodically checking your tripod head with a digital inclinometer ensures the camera remains level, reducing unnecessary micro jitters that can be magnified in 16K footage. Additionally, lubricating support joints with minimal, cinema-grade grease prevents stiffness or uneven movements that compromise smooth shots.
Projectors and screens, especially in high-end setups, demand routine calibration and cleaning. Dust accumulation on projector lenses or misaligned ALR (ambient light rejecting) screens can severely impact clarity and contrast. I recommend using laser alignment tools to calibrate projection angles accurately. For screens, a thorough cleaning with manufacturer-recommended solutions prevents the dullness caused by dirt and smudges.
Software tools also play a significant role in ongoing maintenance. Regular firmware updates from manufacturers improve stability and incorporate new features. For example, firmware upgrades for cinema projectors can optimize color accuracy and contrast performance, essential for 16K formats.
How do I maintain projection quality over time? Always clean your lenses gently and store your gear in climate-controlled environments. Keeping equipment in padded cases prevents physical shocks. Also, invest time in routine calibration of your projection and lighting setups, ideally before each major shoot.
Predicting where this trend is headed, I believe the integration of automated calibration tools and AI-driven diagnostics will revolutionize maintenance routines, making them more accessible even for indie filmmakers. Think about using smart sensors embedded in your supports and screens that notify you when calibration drifts or dust accumulation reaches critical levels.
Try implementing a monthly check-up routine that includes cleaning, calibration, and firmware updates. Over time, these habits will preserve your gear’s performance and extend its lifespan, ensuring that your visuals remain sharp and professional. For tailored advice on supporting your specific equipment, feel free to visit our contact page.
What I Wish I Knew About Optical Precision Early On
One of the most underestimated aspects of high-resolution filmmaking is the role of lenses. I used to believe that simply upgrading my camera sensor would make my footage sharper. It wasn’t until I meticulously calibrated my lenses and understood their optical nuances that I witnessed a monumental shift. The true game-changer was realizing that even small optical imperfections could dramatically soften 16K footage. Sometimes, investing in vintage lenses or consulting with specialists yields better results than relying solely on modern, mass-produced glass.
Another eye-opener was the importance of alignment. Perfectly aligned lens elements and support rigs prevent chromatic aberration and soft edges. During a shoot, I discovered that a tiny misalignment caused a noticeable decrease in clarity at the frame’s edges—something that’s usually invisible at lower resolutions. Regular calibration and careful setup can preserve your image’s integrity, ensuring every pixel sings in unison.
Finally, understanding the interaction between lighting and optics transformed my approach. High-resolution footage is unforgiving; any glare, flare, or stray light reveals itself prominently. Using high-quality filters and proper lens hoods minimized unwanted reflections and boosted overall sharpness. This taught me that the journey to ultra-sharp footage isn’t just about buying the best gear—it’s about mastering the craft of optical care and meticulous setup.
Curated Gear and Resources That Truly Made a Difference
Over the years, I’ve found that certain tools and references are indispensable for achieving pristine 16K footage. First, investing in professional calibration tools, like camera calibration kits, ensures your lenses and support rigs stay in perfect harmony. Second, reading specialized literature like this in-depth guide on cine lenses broadened my understanding of optical design and maintenance. Third, I rely on premium support equipment, such as rigs that stabilize at high resolution, which prevent micro-movements and jitters. Combining these resources forms a holistic approach to sharpness that’s far more effective than patchwork solutions.
Additionally, following industry-leading professionals on platforms like CineGear Guide provides ongoing insights into emerging lens technology and setup techniques. Their real-world experiences and detailed reviews keep me ahead of the curve and inspire continuous improvement in my craft.
Charge Forward with a Vision of Unbeatable Clarity
Achieving razor-sharp 16K footage is as much about mindset as it is about gear. Every projector, lens, or lighting fix that I refined over time contributed to a more confident and creative vision. Don’t let the fear of complexity hold you back—embrace the learning curve, and remember that each subtle adjustment can elevate your entire project. The future of high-resolution filmmaking lies not only in the latest equipment but in the mastery of optical precision and thoughtful setup. Get started today, and let your vision shine brighter than ever.
What’s the biggest challenge you’ve faced in sharpening your 16K footage? Share your experience below—I’d love to hear your story and help troubleshoot!
About the Author
James Duke
ThinkOTS
James Duke is a seasoned professional in the creative production industry, bringing a wealth of technical knowledge and hands-on experience to cinegearguide.com. As a key figure at ThinkOTS, James has spent years navigating the complexities of high-end production environments, where selecting the right equipment is the difference between a successful shoot and a logistical failure. His expertise spans the full spectrum of cinematography gear, from advanced camera systems to the intricate accessories that define modern filmmaking. On cinegearguide.com, James leverages his deep understanding of the industry to provide authoritative insights, gear reviews, and technical guides. He is known for his ability to break down complex specifications into practical, actionable advice for filmmakers of all levels. His perspective is rooted in the real-world application of technology, ensuring that every recommendation is backed by professional standards. James is dedicated to empowering the filmmaking community by sharing his expertise, helping others navigate the ever-evolving landscape of cinema technology with confidence and clarity.
LinkedIn Profile4 Replies to “5 Sharpest Large-Format Lenses to Fix Soft 16K Footage in 2026”
Leave a Reply
Related Posts

Fix 16K Edge Smearing: 4 Aspheric Cine Lenses for 2026 Sensors
Have you ever been in the middle of shooting a…

Essential Cine Lenses, Lighting & Camera Supports for Professional Films
My First Encounter with Professional Cine EquipmentI'll never forget the…
How to Eliminate Lens Flare from On-Camera Monitors
Ever been in the middle of a shoot, and suddenly,…
I completely agree with the importance of high-quality lenses when working with ultra-high-resolution footage like 16K. In my experience, even small optical imperfections or misalignments can cause noticeable softness that even the best sensors can’t fix in post. I’ve had good results with vintage lenses that have been meticulously calibrated—they often outperform newer, mass-produced options if maintained correctly. One tip I’d add from my experience is to invest time in fine-tuning your lens calibration and support rig stability, as micro-movements can be especially detrimental at these resolutions. Have others found that vintage lenses, when properly maintained, still hold their own against the latest glass? Also, what are your favorite tools for precise lens calibration in the field?
Thanks for this insightful post! I’ve been experimenting with different large-format lenses and have found that even the slightest optical misalignment can really impact the sharpness at 16K resolutions. Your mention of vintage lenses resonates with me; I’ve noticed that well-maintained older glass can sometimes outperform newer, more expensive models, especially when they’ve been calibrated properly. One challenge I face is maintaining consistent calibration in the field, given environmental factors. I’ve been using a combination of laser collimators and digital focus analyzers to keep everything aligned, which has improved my results considerably.
It makes me wonder: do others have preferred calibration tools or techniques that balance precision with speed? Also, in your experience, how often should one recalibrate lenses during prolonged shoots to maintain peak performance? I believe that rigorous support rig stability and meticulous calibration are underrated yet critical factors for achieving truly sharp footage, especially at ultra-high resolutions like 16K.
Reading through this post really hit home the importance of optical quality in high-res filmmaking. I’ve personally noticed that even with the latest sensors, subpar lenses can cause a noticeable softness that’s tough to fix in post, especially at resolutions like 16K. My experience with vintage lenses, when properly calibrated, has often surpassed that of some modern glass, mainly because they tend to have fewer internal imperfections if maintained well. One challenge I encounter is maintaining perfect calibration in the field, especially under changing environmental conditions. I’ve found that combining laser collimation tools with regular on-site tests helps me stay consistent. How often do others recheck their lens calibration during long shoots? I believe that attention to optical details, support stability, and routine calibration are what truly make or break shot quality at these ultra-high resolutions. Would love to hear more tips on mobile calibration setups or preferred tools for high-fidelity precision in challenging conditions.
This post hits home for me, especially because I’ve seen firsthand how even the smallest optical flaws can seriously degrade high-res footage like 16K. I’ve been experimenting with vintage lenses in my projects, and with proper calibration and maintenance, they often outperform many newer models. The challenge, like you mentioned, is maintaining perfect calibration in the field, which can be tough when environmental factors come into play. I’ve started using a portable laser collimator alongside on-the-fly calibration routines, which helps me stay consistent during long shoots. It’s surprising how much support stability plays into this—using rigid rigs and dampers has made a big difference. I’m curious, for those working in unpredictable outdoor environments, what are some reliable methods or tools you rely on to keep your lenses and supports perfectly aligned? Also, how frequently do others recalibrate during extended shooting sessions? I believe continuous calibration and support stability are key to achieving that crystal-clear quality we all strive for. Would be great to hear more about your strategies or tools that make this process easier in the field.