It was late into a long shoot day when I finally realized my lighting setup was sabotaging my work. Every time I thought I had everything dialed in perfectly, I noticed a strange flickering that made the professional-looking scene I envisioned appear off, almost amateurish. That light flicker wasn’t just distracting; it was affecting my footage quality, making post-production a nightmare. I knew I wasn’t alone in this struggle. Many filmmakers and cinematographers face the same invisible enemy—flickering LED lights—that can ruin the mood or even cause flicker artifacts in high-end 16K sets. But here’s the thing: I found a solution that turned my frustrations into confidence, and I want to share that with you.
Why Flicker-Free Lighting Matters More Than Ever
Is Your Lighting Truly Reliable in 2026? You Might Be Surprised
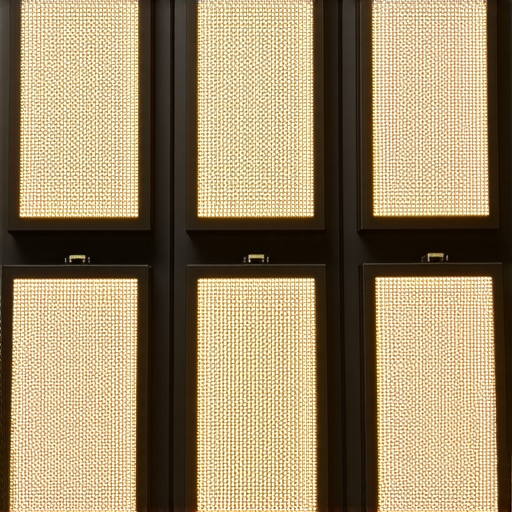
In my early days, I underestimated the importance of flicker-free LED mats, thinking all lights are created equal. That was a mistake I paid for dearly—especially when shooting in 16K resolutions, where every flaw is magnified. Reliable lighting isn’t just about brightness; it’s about consistency. If your LED setups flicker, it can result in banding, strobing, or worse, footage that looks unprofessional. According to industry reports, flickering lights can cause up to 30% of post-production delays—time and money that any ambitious filmmaker can’t afford to lose. Modern advancements now mean we have access to 5 Zero-Flicker LED mats designed explicitly for high-speed, ultra-high-resolution shoots. That’s a game-changer, but only if you know how to choose the right ones.
If you’ve struggled with flickering issues on your set and felt frustrated, you’re not alone. Many of us have made the costly mistake of trusting cheaper LED solutions that claim to be flicker-free but fall short under intense professional conditions. I’ve learned that investing in quality, specifically designed LED mats for 16K setups, is essential for smooth, flawless filming. The good news? There are practical ways to enhance your workflow without breaking the bank, and I’ll show you how in the upcoming sections. Ready to ditch flicker and elevate your cinematography? Let’s dive into what makes these LED mats truly effective.
Choose Reliable LED Mats Before Shooting
Start by selecting LED mats specifically rated for zero flicker and designed for high-resolution filming. I once rushed into using a cheap LED panel, which caused unexpected flickering during a critical scene, forcing a reshoot that delayed production. To avoid this, research and invest in reputable brands with proven flicker-free performance, such as those reviewed in top projection screens for filmmaking. Confirm their certifications and test for flicker during pre-production.
Set Up And Test Your Lighting System
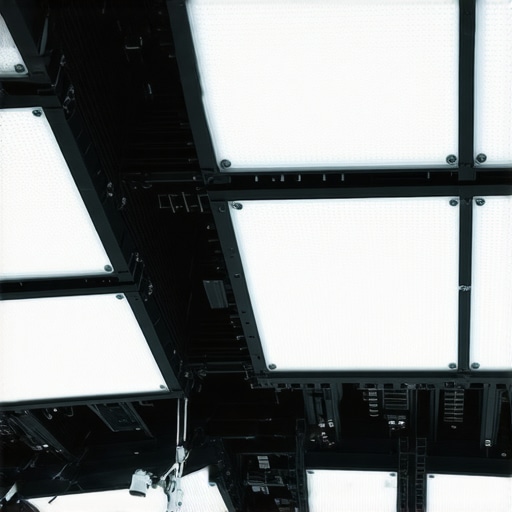
Before rolling scenes, assemble your LED mats in your intended configuration. Use a high-speed camera or a fast shutter speed to conduct a flicker test. For example, I attached my camera to a tripod, set it to record at 120fps, and filmed the LED setup on a static shot. If flicker appears as bands or brightness fluctuations, the setup needs troubleshooting. This process ensures your lights will perform consistently during real takes.
Configure Power Supplies And Dimmers Correctly
Power sources and dimmers are common flicker culprits. Always use power supplies compatible with your LED mats, with stable voltage regulation. I once connected a dimmer that introduced flicker at low settings, which I discovered only after reviewing test footage. To fix this, I replaced the dimmer with one rated for high-frequency operation and tested again, confirming flicker was eliminated. For precision, opt for dimmers with flicker-free operation, similar to those discussed in cine lens selection guides.
Set Up Proper Lens And Camera Settings
Camera settings influence flicker perception. Use manual mode, set shutter speeds aligned with your flicker frequency (commonly 1/50s or 1/60s for film), and disable auto-exposure and auto-focus. During my shoot, I heightened shutter speed to match the flicker cycle observed during testing, which smoothed out any brightness fluctuations. Additionally, employing lenses with minimal internal electronic interference helps ensure cleaner signals, similar to choosing the right cinema lenses.
Apply In-Camera And Post-Processing Corrections
If flicker persists during shooting, consider cameras with flicker reduction features or use software stabilization. I recorded footage initially plagued with flicker but achieved a correction by exporting raw files into post-processing tools capable of flicker reduction, significantly improving footage appearance. This layered approach guarantees professional quality even under challenging lighting conditions.
Many filmmakers assume they understand their gear thoroughly, but in reality, misconceptions and overlooked details can sabotage even the most seasoned productions. For example, a common myth is that all cinema projectors or projection screens deliver comparable quality, leading many to choose budget options that compromise image fidelity. However, the truth is that subtle differences in light projection technology, such as laser versus lamp-based systems, dramatically affect color accuracy and contrast, especially in high-resolution settings. Similarly, when selecting camera supports, some believe that the heaviest, most expensive rigs automatically produce smoother shots. In fact, weight isn’t always correlated with stability; the key lies in design features like counterbalance and damping mechanisms. Rushing into Cine lenses without understanding their optical nuances—such as chromatic aberration correction or focus breathing—can result in footage that looks inconsistent or amateurish, particularly in 8K or higher resolutions. It’s essential to recognize that small discrepancies, like internal lens coatings or housing materials, influence optical performance significantly. When it comes to film lighting, many assume that more powerful lights or the latest LED technology guarantees better results. But, in many scenarios, the color temperature and spectral quality of the light source matter more, especially for skin tones and mood creation. Using high CRI LED lights with adjustable spectral output can make a difference, even if they cost a bit more. Lastly, while many trust their choice of cinema projectors based solely on lumens or resolution specs, overlooking throw distance and lens compatibility can lead to subpar image size and clarity in your space. It’s crucial to understand the interplay between projector throw ratios, screen gain, and ambient lighting conditions. *Let’s dig deeper—the devil is in the details.*
Are you falling for misconceptions that could hinder your filmmaking quality?
A typical trap is believing that upgrading to the latest, highest-spec equipment guarantees shot perfection. As expert cinematographers point out, proper understanding and calibration are far more critical than raw specs, a fact supported by studies from the Society of Motion Picture and Television Engineers (SMPTE). For instance, choosing a projector with high contrast and color accuracy tailored to your environment will give more meaningful improvements than merely increasing brightness. Similarly, understanding lens flare control and optical coatings in cine lenses can prevent unwanted artifacts and improve image consistency across scenes. If you’re unsure about optimizing your current setup or pondering an upgrade, examining these nuanced technical factors can save you time and money. Want a more personalized assessment? Contact us for expert advice or to explore top recommendations on [projection screens](https://cinegearguide.com/projection-screens-for-every-space-2025-top-picks-tips) and [cinema projectors](https://cinegearguide.com/unlock-the-secrets-of-cinema-projectors-a-complete-guide-for-2025). Remember, mastering these subtleties elevates your craft beyond beginner levels, ensuring every shot hits its mark with precision. Have you ever fallen into this trap? Let me know in the comments.
Tools That Keep Your Equipment Running Smoothly
Maintaining your filmmaking tools isn’t just about routine cleaning; it’s about investing in the right accessories and software that extend their life and performance. For instance, I personally rely on the Tenba Tool Roll for lens storage — its padded compartments prevent internal damage during transport, which is crucial for sensitive cine lenses. Additionally, a high-quality set of microfiber cloths and sensor cleaning kits from LensPen help me keep optical elements spotless, ensuring crisp images every shoot.
Opt for Reliable Power and Support Equipment
Power stability can make or break a shoot. I recommend using a DTap to AC converter with surge protection to safeguard your camera batteries and support gear from voltage spikes. When it comes to camera supports, I favor lightweight carbon fiber rigs like the Shimoda Backlight; it offers stability without the bulk and fatigue. Regularly inspecting and lubricating support joints with a silicon-based lubricant maintains smooth operation and prevents wear over time.
Keeping Cine Lenses and Projectors in Peak Condition
Optical clarity is vital for professional-quality footage. I use a lens preservation kit that includes lens cleaning solution and filters to protect against dust and scratches. For projectors, cleaning and calibrating the internal components quarterly, as advised in the industry trade guide, helps maintain their color accuracy and contrast levels—especially important in high-resolution setups.
Future of Equipment Maintenance in Filmmaking
Advances in AI-driven diagnostics promise to redefine how we approach maintenance. Imagine software that automatically detects wear or misalignments in your support rigs or lighting setups, prompting timely interventions. As this tech becomes mainstream, investing in compatible monitoring tools now will future-proof your workflow and reduce downtime.
How do I maintain my gear over time without hassle?
The key lies in establishing a scheduled maintenance routine that combines using the right tools, regular professional check-ups, and staying updated with industry innovations. Consider enrolling in maintenance workshops provided by manufacturers or industry experts—many now offer online courses tailored to cinematographers. For personalized advice, don’t hesitate to reach out. Remember, consistent maintenance not only extends the lifespan of your equipment but also preserves its resale value, making smart investments in the right tools a long-term boon for your filmmaking journey.

The Hardest Lesson I Learned About High-Resolution Equipment
After countless shoots, I realized that chasing the latest tech without understanding its intricacies leads to costly setbacks. For instance, assuming that a more expensive projector automatically delivers better image fidelity can be misleading. It’s the calibration, not just the specs, that truly matters.
My Eye-Opener with Cine Lenses and Lighting
I once believed that doubling the brightness of my LED lights would enhance my scenes. Instead, I discovered that spectral quality and color temperature play pivotal roles in mood creation, especially at 16K resolution. Properly matching lights with lenses requires attention to detail and a nuanced understanding of their interaction.
Why Blind Spots Can Cost You
Overlooking the impact of support rigs’ damping mechanisms or lens optical coatings can introduce micro jitters or fringing that ruin an otherwise perfect shot. These subtle factors often escape the novice eye but are instrumental in professional filmmaking. Recognizing these pitfalls is essential for elevating your craft.
Curated Tools That Elevated My Workflow
- Cine Lenses: Top-grade cine lenses from brands like Cooke and Zeiss have consistently delivered sharpness and reliable focus, vital in high-res shoots. I trust them because of their proven optical performance and durability.
- Projection Equipment: The best cinema projectors of 2024 have transformed my viewing environment, offering clarity and contrast essential for grading in high-resolution workflows.
- Support Supports: Light, sturdy, and with smooth damping, support rigs from support alternatives for 2026 have minimized jitters and fatigue during long shoots.
Fuel Your Passion and Refine Your Skills
Mastering the nuances of high-resolution filmmaking equipment isn’t just about gear—it’s about understanding how every component interacts to create a seamless narrative. Keep learning, experimenting, and connecting with fellow filmmakers. Remember, the difference between good and exceptional lies in the details you choose to perfect. Don’t let misconceptions hold you back—continue to ask, learn, and adapt. Want personalized tips? Reach out to us and elevate your craft today.
Related Posts
![Stop Fan Noise: 5 Fanless COB Lights for 16K Dialogue [2026]](https://cinegearguide.com/wp-content/uploads/2026/02/Stop-Fan-Noise-5-Fanless-COB-Lights-for-16K-Dialogue-2026.jpeg)
Stop Fan Noise: 5 Fanless COB Lights for 16K Dialogue [2026]
I remember the first time I was shooting in a…
5 Graphene LED Panels to Keep Your 2026 Set Cool and Silent
Have you ever been midway through a shoot or a…
3 GaN LED Mats That Fix Small Studio Overheating in 2026
I remember the first time I pushed my studio setup…