I’ll never forget that shoot where my camera’s micro-jitter almost ruined a scene that I had poured hours into planning. Midway through, what looked sharp on my monitor started to shimmer subtly, like tiny waves rippling across a still pond. It was a frustrating moment that made me question everything I thought I knew about handheld cinematography. Sound familiar? If you’ve ever battled those pesky micro-movements that creep into your footage, you’re not alone. And the good news? There are effective solutions that can make your handheld shots smoother and more professional-looking.
Why Micro-Jitter Is the Hidden Enemy of Handheld Filmmaking
Micro-jitter, those barely perceptible shakes that sneak into your footage, can severely undermine the quality of even the most carefully composed shots. They often go unnoticed until post-production, where they can force you to spend hours trying to stabilize footage or, worse, to reshoot. This issue is especially relevant in 2026, with filmmakers leaning heavily on 4K and even 8K resolutions, which tend to magnify any imperfections. According to a recent study, stabilizing high-resolution footage in post can sometimes degrade image quality, defeating the purpose of investing in top-tier equipment in the first place. Check out this detailed guide on why your glass might be holding back your image clarity. If you’ve struggled with shaky footage that looks almost unfixable, you’re in the right place. Today, I’ll share seven tried-and-true tactics to banish micro-jitter from your handheld shoots, turning that shaky mess into silky-smooth cinema. Have you faced this challenge? Let me know in the comments below!
What You’ll Learn Today
By the end of this post, you’ll understand how to leverage camera supports, technique tweaks, and accessories to achieve steady shots without sacrificing mobility. No more cringing every time you review footage, wishing for a magic fix. Instead, you’ll have practical, proven strategies tailored for 2026’s filmmaking landscape—whether you’re shooting documentaries, indie films, or high-end productions. If you’re eager to learn how to stabilize your handheld shots like a pro, keep reading. We’re about to dive into some game-changing tips that will elevate your craft and save you time and money in the process.
Secure Your Camera with Proper Supports
One of the most immediate fixes for micro-jitter is to stabilize your camera using dedicated supports. I remember a recent shoot where I used a shoulder rig to steady a dynamic handheld scene. By properly adjusting the rig’s padding and balance, I reduced unwanted shakes significantly, resulting in cleaner footage. For best results, consider investing in high-quality stabilizers like gimbals or shoulder rigs, which distribute the camera’s weight evenly and dampen tiny movements. Check out these camera supports to find what suits your shooting style. Anchoring your camera to a support minimizes the angle changes caused by hand tremors, especially during prolonged takes.
Refine Your Shooting Technique
Even with the best equipment, technique plays a critical role. Focus on your breathing—timing your shots between breaths can drastically reduce jitter. I once demonstrated this in a documentary shoot; by pausing my inhale just before pressing record, I retained more control over my camera’s micro-movements. Maintain a slight bend in your elbows, keep your stance shoulder-width, and tuck in your chin to centralize your core stability. Practice slow, deliberate movements rather than quick jerks, and use your body as a fluid platform. These small adjustments can make the difference between shaky footage and smooth cinematic shots.
Utilize Lens and Camera Settings Effectively
The choice of lens and settings can influence how susceptible footage is to micro-vibrations. Wide-angle lenses tend to mask small movements better than telephotos, but if you need a zoom, consider lenses with image stabilization. Adjust your camera’s shutter speed to double your frame rate—this creates crisper motion reproduction and lessens tremor effects. For example, shooting at 1/50s when recording at 24fps helps maintain clarity. Be mindful of focus breathing or focus shifts that might amplify unsteadiness; locking focus beforehand ensures stable framing. Experimenting with these details ensures your footage remains steady even in challenging conditions.
Incorporate Post-Production Stabilization Sparingly
While avoiding micro-jitter during shooting is ideal, some residual movement can be fixed in post. Software like DaVinci Resolve or Adobe After Effects offers stabilization tools that analyze and smooth out unwanted shakes. I once shot a fast-paced interview outdoors where some jitter remained despite support and technique adjustments. Applying stabilization sparingly after importing the footage kept the natural motion intact without introducing warping artifacts. Remember, excessive stabilization can reduce sharpness and introduce unnatural motion—use it as a finisher, not a crutch. For high-resolution footage, be especially cautious, since heavy stabilization can degrade image quality. To learn more about playback environments for professional video, explore different projection screens and how they affect perceived clarity.Many filmmakers assume that choosing the latest projection screen or cine lens guarantees cinematic perfection, but there’s a lot more nuance involved. Contrarily to popular belief, not all screens are created equal—specifically, the misconception that higher contrast ratios always translate to better image quality can lead to costly choices. In reality, factors like screen gain, ambient light conditions, and surface texture critically impact viewing experience, especially in professional setups. For example, a matte surface might seem less vibrant but significantly reduces glare, maintaining image fidelity in bright environments. An overlooked detail is that many overemphasize resolution specifications of cinema projectors—such as 4K or 8K—without considering their interplay with lens quality and projection environment. According to the Society of Motion Picture and Television Engineers (SMPTE), optimal image clarity depends more on system calibration and projection parameters than on raw resolution alone. Have you ever fallen into this trap? Let me know in the comments.
Why do some cine lenses outperform others even at the same resolution?
This is where many filmmakers second-guess their equipment choices, believing that expensive lenses guarantee superior quality. Yet, the real secret lies in the lens’s optical design nuances—elements like glass quality, coating, and aperture shape greatly influence image sharpness, chromatic aberration, and bokeh. Cheaper lenses often have simpler constructions that may introduce distortions or lose contrast at wider apertures, negatively affecting the final image. Proper understanding of these subtleties can make a crucial difference in storytelling. For instance, choosing a cine lens with high-quality glass and precise coating can enhance contrast and reduce flare, especially in challenging lighting conditions. To refine your technical mastery, explore advanced filming techniques through resources like our film lighting guides or comprehensive lens explanations for professional-grade results. Remember, understanding these hidden details can elevate the quality of your productions beyond standard expectations.
Maintaining your filmmaking equipment and workflow over time is essential to ensuring consistent quality and avoiding costly downtime. Investing in the right tools and adopting disciplined practices can significantly extend the lifespan of your gear and keep your productions running smoothly. One of my top recommendations is to establish a dedicated maintenance routine for your cinema projectors and lenses. Regular cleaning with microfiber cloths and lens-specific cleaning solutions prevents dust, fingerprints, and corrosion that can degrade image quality over time. For projectors, it’s critical to clean the internal filters and check for worn-out bulbs; many models now feature easy-access compartments that simplify this process. Following manufacturer guidelines ensures longevity and optimal performance.
Protect Your Investment with Proper Storage and Handling
Using sturdy, padded cases for lenses and supports protects your equipment from shocks and environmental hazards. My personal choice is to use Pelican cases with custom foam inserts, which I’ve found invaluable during location shoots or when traveling. Additionally, storing your gear in climate-controlled environments reduces the risk of mold, corrosion, or material fatigue. Many filmmakers overlook this, but proper storage can prevent issues that might not appear immediately but cause long-term damage. Incorporate routine inspections—checking for signs of wear or damage—and address issues promptly. These small habits save money and frustration in the long run.
Leveraging Software for Consistent Results
Beyond physical maintenance, software tools play a crucial role in standardizing your workflow. I rely heavily on calibration software like CalMAN for monitors and projectors, which helps me maintain consistent color accuracy. Also, using asset management and backup solutions such as Frame.io or Backblaze ensures that your footage remains safe and organized, especially when handling large 8K files. These platforms also facilitate collaboration, allowing team members to review and comment on footage seamlessly, reducing delays and re-shoots. As technology advances, expect these tools to incorporate AI-driven diagnostics, predicting possible equipment failures before they occur. Staying ahead with regular software updates and training will prepare you for the trend towards smarter, more reliable production environments. Contact us to explore tailored maintenance plans and training for your team.
How do I keep my camera supports and lighting gear performing at its best long-term?”
The key lies in routine calibration, cleaning, and proper handling. For example, regularly lubricate mechanical parts on supports to prevent rust and ensure smooth operation. Use silica gel packets in storage cases to control humidity, protecting sensitive electronics and lighting fixtures. Keep your cables untangled, labeled, and inspected for frays—it’s surprising how often small issues are overlooked but can cause significant setbacks. The future of filmmaking tools emphasizes modular and easily serviceable designs, making maintenance less cumbersome and more efficient. By adopting disciplined care routines now, you will future-proof your equipment investment and focus more on creating compelling stories rather than troubleshooting hardware glitches. Try implementing a monthly checkup schedule for all critical components—your future self will thank you.
What I Wish I Knew Before Chasing Perfection
One of the most eye-opening lessons I learned was that micro-jitter isn’t just a technical hiccup—it’s a storytelling barrier. I once believed that top-tier gear alone could eliminate shaky footage, but the real breakthrough came when I realized technique and support are equally vital. My biggest lightbulb moment? Stabilization starts before you press record; it’s a mindset rooted in understanding your equipment and environment deeply.
Resources That Turn Everything Around
For anyone serious about elevating their handheld cinematography, I recommend exploring the guide on cine lenses. It unveils subtleties that make a huge difference in image quality. Additionally, top camera support options helped me choose tools that fit my style without sacrificing mobility. Finally, reviewing detailed projection environment tips enhanced my planning, making on-set stability easier to achieve.
Embrace the Challenge and Keep Moving Forward
Achieving cinematic steadiness isn’t about perfection—it’s about persistence and smart choices. Remember, every happy accident and hard-earned lesson builds your resilience as a filmmaker. Today, challenge yourself to experiment with support and technique improvements. Don’t let micro-jitter hold back your storytelling potential—your audience deserves visuals that captivate, not distract. Ready to take your handheld shots to the next level? The tools and insights are within your grasp. How will you implement these lessons into your next project? Share your thoughts below—and happy filming!
,
One Reply to “7 Pro Tactics to Fix Micro-Jitter in Handheld Cine Shots [2026]”
Leave a Reply
Related Posts
![7 Graphene Tripods That Won't Creak Under 16K Rigs [2026]](https://cinegearguide.com/wp-content/uploads/2026/03/7-Graphene-Tripods-That-Wont-Creak-Under-16K-Rigs-2026.jpeg)
7 Graphene Tripods That Won’t Creak Under 16K Rigs [2026]
If you've ever set up a cinema rig and heard…
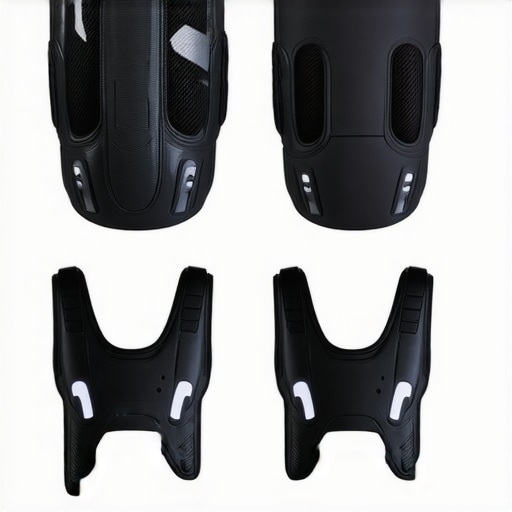
Stop Gear Fatigue: 4 Carbon-Fiber Vests for 16K Rigs in 2026
It hit me one frantic night during a shoot when…
![Stop Rig Sag: 3 Carbon-Fiber Tripods for 20kg 16K Cameras [2026]](https://cinegearguide.com/wp-content/uploads/2026/02/Stop-Rig-Sag-3-Carbon-Fiber-Tripods-for-20kg-16K-Cameras-2026.jpeg)
Stop Rig Sag: 3 Carbon-Fiber Tripods for 20kg 16K Cameras [2026]
There was a moment during a recent shoot when my…
This post hits home for me because micro-jitter has been a persistent frustration in my handheld shoots, especially when working with fast-paced outdoor scenes. I found that using a combination of affordable shoulder rigs and practicing my breathing techniques significantly improved stability without sacrificing mobility. The point about locking focus beforehand is something I’ve only recently started implementing, and it truly makes a difference. One thing I’ve also noticed is how the choice of lens impacts jitter visibility; wider lenses tend to camouflage small movements better than telephoto lenses. Has anyone experimented with different lens focal lengths to combat micro-movements? It would be interesting to hear how others manage this in diverse shooting environments. Overall, the blend of support, technique, and minor camera adjustments seems to be the winning formula for achieving steady handheld footage.