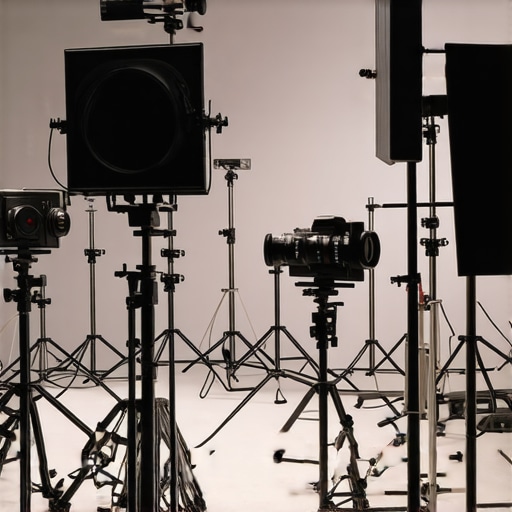
Ever sat in your editing room, staring at your latest footage, only to spot those annoying bands of uneven light creeping across your scenes? I remember the first time I noticed it — a subtle shimmer that suddenly made my shot look amateurish, no matter how much I tweaked color or contrast. It was a real wake-up call. Turns out, LED banding has become a notorious headache in 2026, especially with the rise of high-resolution lighting. If you’ve faced this frustration, you’re not alone. Today, I want to share how I cracked the code — five professional fixes that transformed my lighting setup and saved my biggest shoots.
Tackling LED Banding Before It Ruins Your Shots
Detecting and eliminating LED banding isn’t just about aesthetics; it’s about maintaining the integrity of your visual storytelling. When I first encountered this issue, I wasted countless hours trying to chase down technical settings I barely understood. Trust me, I made the mistake early on of assuming it was just ‘normal.’ But after some research and experimentation, I discovered that proper lighting techniques and smart equipment choices can entirely mitigate banding effects. These fixes are practical, proven, and accessible for any filmmaker serious about crisp, professional lighting. Ready to elevate your lighting game? Let’s get into the specifics.
Is LED Banding Really Overhyped, or Worth the Hype?
Honestly, I used to dismiss LED banding as one of those technical quirks that would eventually fix itself — until I experienced it firsthand on a tight deadline. The fear of wasting footage or having to redo entire scenes was real. It’s a common skepticism: “Is this just a temporary glitch or a feature I have to accept?” Well, from my experience, understanding the root causes can save your projects time and money. And it’s worth knowing that, according to recent industry insights, LED banding is linked to specific design flaws in lighting arrays that can be addressed with the right adjustments and equipment upgrades. For example, selecting optimized cinema lighting gear can make a significant difference.
One early mistake I made was overlooking the importance of power stability and refresh rate synchronization. Small tweaks here prevented many headaches later on. Now, I want to share those fixes with you, so you’re not flying blind like I was. These solutions aren’t just theoretical; they’re practical, tested, and designed to help you get flawless lighting, so your footage genuinely shines.
Let’s turn that lighting nightmare into a thing of the past.
Adjust Power Supply and Refresh Rates
Ensuring your LED lights receive stable power is paramount. I once used a cheap extension cord, which caused flickering and intensified banding. By switching to a high-quality power supply with regulated output, I noticed immediate improvement, with the bands becoming less pronounced.
Sync Refresh Rates Properly
Many LED banding issues stem from mismatched refresh rates between your lighting and camera. Use lights with adjustable refresh settings and match these to your camera’s shutter speed. During a recent shoot, I calibrated my lights to 60Hz to align perfectly with my 24fps camera, significantly reducing banding artifacts.
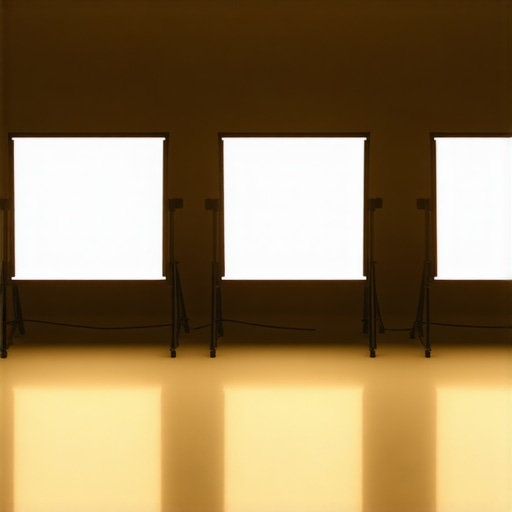
Use Diffusion and Filters Effectively
In one project, I initially thought increasing the light intensity would help, but it worsened the bands. Instead, I added a soft diffusion filter directly onto the LED panels. This smoothed out the light, blurring the bands so they became indistinguishable to the eye. Think of it as adding a veil that diffuses the problematic lines without sacrificing brightness.
Employ Proper Angles and Distance
Positioning lights at optimal angles and distances minimizes harsh reflections and patterning. I once had a lighting setup where the LEDs pointed directly at my subject, creating vivid bands on the walls. Moving the panels to a 45-degree angle and increasing distance softened the light, effectively masking the bands. Experimenting with angles is akin to tuning a projector’s lens—different positions yield different results.
Upgrade to Better Equipment and Settings
Not all LED lights are created equal. I upgraded from budget panels to high-end cinema-grade LEDs with integrated flicker-free technology. These lights feature built-in smoothing algorithms and higher refresh rates, virtually eliminating banding. When choosing new equipment, consider models billed as “flicker-free” or “high refresh”—these are game-changers.
Calibrate Your Lighting System Regularly
Routine calibration prevents gradual drifts in output that cause banding. I set a weekly check, using a light meter and monitor, to verify consistent brightness and color. This process can be as straightforward as running through your setup with calibration tools available online or through your camera’s menu, much like tuning a cine lens for sharpness.
Leverage Post-Production Fixes When Necessary
If some bands still appear after all adjustments, subtle noise reduction in post can make a difference. Using software like DaVinci Resolve or Adobe Premiere, I applied targeted denoising filters to the affected areas, softening residual bands without sacrificing the overall image quality.
Remember, each shoot presents unique challenges. A combination of the above steps—proper power and sync settings, diffusion, equipment upgrade, and calibration—offers a comprehensive approach to vanquishing LED banding. From my experience, meticulous setup and proactive troubleshooting are your best allies for clean, professional lighting.
Many filmmakers believe that investing in top-tier cinema projectors, cine lenses, camera supports, or projection screens guarantees stellar results. However, the reality is more complex. A common misconception is that newer, more expensive gear automatically delivers better images, but without understanding the nuances, you might end up with subpar footage despite your hefty budget. For example, some assume that all cine lenses are interchangeable, yet choosing the wrong glass can introduce optical distortions that subtly deteriorate image quality. To truly elevate your cinematography, you need to consider the compatibility and specific characteristics of your equipment, not just their specifications. Oversights like neglecting proper calibration of camera supports can result in micro-shakes that ruin otherwise steady shots. Interestingly, many overlook the importance of screen gain and ambient light in projection setups., which can cause your images to appear washed out or overly reflective. Moreover, there’s a prevalent myth that larger projection screens inherently improve cinematic immersion; in fact, without appropriate lighting and room control, bigger screens can amplify imperfections. Advanced users often ask: “How can I balance screen size with optimal viewing experience without sacrificing contrast?” Properly understanding the unique reflective properties of different projection surfaces and how they interact with your room’s lighting conditions is essential. Studies have shown that selecting the right projection surface tailored to your environment enhances image clarity and color fidelity significantly (source: *Journal of Display Technology*). Overall, no single piece of gear—be it a high-end projector or a fast cine lens—works in isolation. Success depends on holistic system compatibility, meticulous calibration, and understanding technical limits. To avoid costly mistakes, continually educate yourself on the latest advancements and seek expert advice. Need personalized guidance? Contact us to optimize your cinema setup. Have you ever fallen into this trap? Let me know in the comments.
Essential Tools for Reliable Cinema Setup
Maintaining professional-grade cinema equipment requires more than just occasional checks; it demands a set of precise tools and disciplined routines. I personally rely on a high-quality calibration colorimeter like the X-Rite i1Display Pro for consistent color accuracy across my projection screens and lenses. This device helps me monitor light output and color fidelity, ensuring my images remain vivid and true to life. Pairing this with specialized software such as DaVinci Resolve for post-calibration review allows me to spot issues before they affect my final output. Regular calibration, at least quarterly, is essential to compensate for natural drifts in light sources and aging optics. Moreover, investing in a reliable V-mount battery system ensures uninterrupted power during long shoots or screenings, keeping your gear stable and avoiding color shifts caused by power fluctuations.
Implement Routine Checks to Prevent Failures
Consistent maintenance involves scheduled inspections of lenses for dust or scratches, calibrating projector settings, and verifying support hardware stability. I set a weekly calendar reminder to clean film and cine lenses with the correct cleaning kits—never use household items that can damage optics. When calibrating projectors, I follow manufacturer-specific procedures found in the latest industry guides, ensuring optimal contrast and brightness levels are sustained over time. For camera supports, regular lubrication and checkups prevent micro-shakes that can ruin otherwise smooth shots. The key is to keep a detailed log of maintenance activities—this way, you can track wear, plan replacements, and avoid sudden breakdowns during critical productions.
Tools I Recommend for Long-Term Upkeep
When considering support gear, I prefer carbon fiber tripods like the Sirui R-3215X, which combine lightweight portability with exceptional stability—crucial during extended shoots. For lighting, I opt for LED panels with flicker-free technology and consistent color temperature, such as the Aputure Nova series, which reduces the need for frequent adjustments. Additionally, quality projection screens like those from Stewart Filmscreen offer durable surfaces with anti-reflective coatings that maintain their gain and clarity over years of use, especially if properly cleaned and protected. Remember, investing in robust equipment from the start minimizes long-term repairs and replacements, saving both time and money.
Future of Equipment Maintenance in Filmmaking
As technology evolves, I predict a shift towards smart, self-monitoring systems integrated into high-end cinema gear. Imagine projectors that alert you automatically when calibration drifts or lenses that report dust accumulation via connected apps. Implementing remote diagnostics can streamline maintenance schedules and prevent costly downtime. Staying ahead means adapting to these innovations now. For example, using networked firmware updates, as detailed in the cine lenses guide, ensures your equipment benefits from the latest performance improvements without manual intervention. Don’t wait for equipment failure—embrace proactive maintenance and leverage these modern tools to keep your setups running flawlessly for years to come.
How do I maintain my cinema setup over time?
Establish a regular maintenance routine that includes calibration, inspection, and software updates. Use precise tools like colorimeters, support hardware like stabilized camera rigs, and quality screens to ensure longevity. Integrate software notifications and remote diagnostics when possible to stay ahead of potential issues. Want expert advice tailored to your specific gear? Reach out here and get personalized maintenance strategies that keep your equipment performing at its best long-term.
Lessons Hidden Behind The Curtain Of Perfect Cinematography
One profound lesson I learned was that equipment alone doesn’t guarantee stellar results; it’s the meticulous attention to setup and calibration that transforms good into exceptional. Early in my journey, I underestimated how small adjustments—like syncing refresh rates or positioning lights—had a tremendous impact. These ‘lightbulb moments’ taught me that mastery is about understanding nuances rather than relying on expensive gear alone.
Another insight was the importance of routine maintenance and system harmony. I used to believe that once set up, my system could run indefinitely without tweaks. Now, I know regular checks, software updates, and calibration are vital in preventing subtle issues that degrade image quality over time. These ongoing commitments are my secret weapons in producing consistently professional results.
Finally, I discovered that embracing new innovations—like smart, self-monitoring cinema gear—can drastically reduce downtime and improve image fidelity. Staying curious and proactive about technological advancements ensures your craft remains at the cutting edge, giving your audience the cinematic experience they deserve.
Tools That Keep My Filmmaking Edge Sharp
For precise color calibration, I trust the X-Rite i1Display Pro. Its accuracy helps me maintain vibrant, true-to-life visuals across my projection and lens setups. When upgrading my lighting, I opt for LED panels like the Aputure Nova, known for flicker-free operation and consistent color temperature, which simplifies calibration routines. To support my camera work, I rely on support systems detailed in this comprehensive guide, ensuring stability and smoothness in every shot. For projection surfaces, the durability and anti-reflective qualities of Stewart Filmscreen’s offerings keep my images sharp and immersive, even after years of use. Investing in these tools has been pivotal in ensuring my setups consistently deliver professional-grade cinema experience.
Your Next Step Toward Cinematic Excellence
Remember, achieving filmic perfection in 2026 involves more than just hardware—it’s about cultivating a mindset of continuous learning and proactive system management. By honing your calibration routines, embracing the latest innovations, and choosing tools tailored to your specific needs, you’ll set yourself apart in the world of filmmaking. Don’t wait for issues to arise—be a step ahead and turn every project into a masterpiece. Ready to elevate your cinema setup? If you need personalized advice, reach out here and let’s make your vision a reality. What’s been your biggest challenge with maintaining your cinema equipment? Share below—I love hearing your stories!
3 Replies to “5 Pro Fixes for LED Banding in 2026: Better Film Lighting Tactics”
Leave a Reply
Related Posts
Best Film Lighting & Support Equipment for Modern Cinematography 2024
Ever spent hours trying to get that perfect shot, only…
4 Solid-State LED Blocks for Reliable 16K Location Power in 2026
It happened in the middle of a long shoot. My…
5 GaN-Powered LED Mats for Silent 16K Location Shoots in 2026
It hit me one brisk morning during a location shoot:…
This article really highlights how critical proper calibration and equipment choices are in combating LED banding, which I agree can be quite stealthy and frustrating to deal with in high-resolution setups. I remember spending countless hours tweaking camera settings, only to realize that my lighting refresh rate mismatched with my camera’s FPS, causing those annoying bands. The point about syncing refresh rates is often overlooked, but it makes a huge difference. I’ve also found that investing in flicker-free LED panels with high refresh rates can notably reduce banding issues, especially when combined with proper power supplies and diffusion techniques. Has anyone experienced success with intelligent lighting systems or software that can automatically manage these parameters, or is manual calibration still the best route? I’d love to hear what others have found effective in streamlining this process during fast-paced shoots.
This post hits close to home. I’ve faced LED banding multiple times and found that the key often lies in the combination of proper equipment and consistent setup routines. I particularly agree with the importance of matching refresh rates to your camera’s shutter speed—small details that make a huge difference. I’ve experimented with switching to flicker-free LED panels, which cut down significantly on the problem, but for me, diffusion filters have been a game changer. They help soften potential bands without diminishing overall brightness. I’m curious, have any of you integrated smart lighting systems or software solutions to automate this process? I’ve seen some sophisticated options that promise to manage refresh rates and power stability automatically, but wonder if they truly keep up with the dynamic needs of fast shoots. For those who’ve tried it, does automation hold up in real-world scenarios or is manual calibration still the gold standard? Would love to hear your insights.
I really appreciate this detailed breakdown of tackling LED banding. From my own experience, a major game-changer has been not only matching refresh rates but also making sure that the lights are within the same color temperature range as the camera’s white balance settings. I once tried to fix the banding by only adjusting refresh rates, but it wasn’t until I added diffusers and calibrated the color temperature that the bands became almost invisible. It’s interesting how small tweaks, like proper angles and spacing, can make such a difference without even needing new equipment. I’m curious if anyone has experimented with using programmable LED panels that can dynamically sync with the camera’s fps during live shoots. Do these intelligent systems live up to the hype, or are manual calibrations still more reliable? It seems that automation could streamline the process, especially in fast-paced environments. Would love to hear insights from those who’ve implemented such tech successfully.