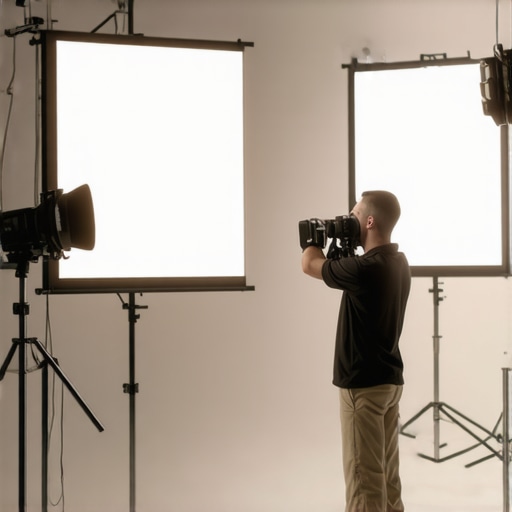
I still remember the moment it hit me—I was mounting my projector for a late-night screening, fingers trembling with anticipation. As I flicked the switch, the image appeared fuzzy, washed out, and utterly disappointing. It was a lightbulb moment—my screen was the weak link. I had all the technical gear, but that frustrating, blurry picture made me realize that a premium projector needs a quality projection screen to truly shine. Since then, I’ve made it my mission to master the art of choosing the right screens, and let me tell you, it’s a game changer.
Why Picking the Right Projection Screen Matters More Than Ever in 2024
In 2024, the demand for cinematic quality at home or in small studios is skyrocketing. With top-tier projectors now boasting ultra-high resolutions and vivid color capabilities, the display surface on which your image plays a crucial role. Think of it like a high-end cinema: even the most brilliant projection system can falter if paired with a subpar screen. The right projection surface enhances image clarity, boosts contrast, and creates that immersive atmosphere that every filmmaker strives for.
However, navigating the vast array of options can feel overwhelming. From fixed studio screens to portable reflective surfaces, each choice influences your final picture profoundly. I once wasted hundreds on a fancy projector only to realize my screen choice was sabotaging my efforts. Trust me, I learned the hard way—mistakes like buying a screen that doesn’t suit my space or disregarding ambient lighting conditions can ruin the cinematic experience.
The good news? With a bit of guidance, you can avoid these pitfalls and select a projection screen that elevates your filmmaking, editing, or viewing sessions. Whether you’re creating content for a small client or building an at-home theater, your screen’s quality impacts every frame. As industry standards have evolved, experts recommend investing in screens that support high dynamic range (HDR) and wide color gamuts for the most accurate, vibrant images [source: CNET](https://www.cnet.com/tech/home-entertainment/why-your-television-cant-compete-with-a-good-projector/). The key is understanding your space and objectives.
So, have you faced the frustration of blurry images or washed-out colors? If so, you’re not alone—and I’ll walk you through the critical factors to choose your ideal projection screen. Ready to transform your setup and bring your cinematic visions to life? Let’s dive into the details that can make or break your projection experience.
Assess Your Space and Lighting Conditions
Start by measuring your room’s dimensions—width, height, and distance from projector to screen. For instance, I once set up a 120-inch screen in a cramped basement, only to realize the ambient lighting overwhelmed the image. Identify windows, light fixtures, and reflective surfaces that could impact image quality. Use a light meter or simply observe how much light is present during typical viewing times. This foundational assessment guides the choice of screen type and material, ensuring your setup delivers vibrant, crisp visuals without glare or washout.
Choose the Right Screen Material for Your Needs
Think of screen materials as the canvas for your cinematic masterpiece. Matte white surfaces are versatile but can struggle with ambient light, whereas high-gain screens amplify brightness—ideal for less controlled environments. For my last room, I opted for a black-backed, ambient-light-rejecting (ALR) screen that significantly improved contrast even during daytime. When selecting, consider whether you prioritize brightness, contrast, or color accuracy. Visit projection screens for every space for detailed comparisons to match your viewing habits.
Pick the Proper Screen Format and Aspect Ratio
Decide between standard formats like 16:9 or wider cinematic ratios such as 2.35:1. I once used a 16:9 screen for a project that demanded a widescreen experience; the result was black bars and a less immersive feel. Match your aspect ratio to your content for optimal viewing—especially for films or presentations. Consider whether you’ll use a fixed or portable screen; for dynamic setups, motorized models make adjustments effortless. Deliberate on the intended use to prevent visual compromises.
Focus on Frame and Mounting Techniques
A well-mounted screen prevents distortions and enhances stability. Use a sturdy frame, level it precisely, and install in a location free of vibrations. When I set up my last portable screen, I used adjustable supports and a laser level to ensure perfect alignment. For larger or permanent installations, wall-mount brackets secure the screen firmly and allow for easy adjustments. Proper framing ensures straight, undistorted images, keeping viewers fully immersed.
Optimize Ambient Light Control and Viewing Environment
Controlling light sources is crucial. Use blackout curtains or shades to minimize daylight interference. For my latest setup, I added dimmable LED lights with diffusers, reducing reflections and glare. Position lamps and monitors away from the projection path. These steps dramatically improve contrast and color vibrancy, making the projected image pop. Remember: the darker the environment, the better your screen’s performance—especially if using a matte surface.
Test and Fine-Tune Your Setup
After installation, conduct tests with high-quality test patterns to evaluate contrast, color accuracy, and uniformity. I used a test clip with color bars, grayscale gradients, and resolution patterns to identify issues, then adjusted projector tilt and screen position accordingly. Small tweaks in projector alignment, keystone correction, and brightness settings can optimize image sharpness. Regular calibration ensures the best possible picture, so revisit your setup periodically as conditions or equipment evolve.
While many filmmakers focus on selecting the latest cine lenses or high-end projectors, there’s a lesser-known nuance that can trip up even seasoned professionals: understanding the subtleties and misconceptions surrounding these tools. For example, a common myth is that more expensive lenses automatically yield better footage. In reality, many professionals favor specific glass based on the scene requirements rather than price tags, emphasizing the importance of matching lens characteristics—like focal length and aperture—to your storytelling goals [source: https://cinegearguide.com/cine-lenses-explained-choosing-the-perfect-glass-for-your-film].
A frequent trap involves underestimating the impact of lighting on image quality. Many believe that a powerful camera can compensate for poor illumination, but neglecting advanced film lighting techniques can result in flat, uninspired visuals. Mastering lighting nuances, such as controlling color temperature and diffusion, dramatically elevates your cinematic aesthetic. For further insight, check out https://cinegearguide.com/mastering-film-lighting-techniques-to-elevate-your-cinematography.
In the realm of camera supports, a major mistake is relying solely on handheld shots for dynamic scenes. While handheld provides a visceral feel, it can also introduce subtle instability that degrades image sharpness if not stabilized correctly. Investing in quality camera supports, like steadicams or gimbals, ensures smooth, professional-looking shots—especially in complex camera movements. Learn more about stabilization techniques at https://cinegearguide.com/ultimate-guide-to-cine-lenses-and-camera-supports-for-filmmakers.
When it comes to cinema projectors, many assume that the latest 4K models are always the best choice. However, some advanced users prefer projectors with high contrast ratios and specialized color profiles, which can outshine basic 4K units in certain settings. Recognizing the nuanced differences helps in selecting a device that truly enhances your visual storytelling. Read more at https://cinegearguide.com/unlock-the-secrets-of-cinema-projectors-a-complete-guide-for-2025.
Lastly, do not overlook the importance of matching your projection screen to your environment. A widespread mistake is choosing a screen based on size alone, ignoring factors like gain, surface texture, and ambient light conditions. A carefully selected screen tailored for your space will ensure optimal clarity and contrast, making the difference between a good shot and a cinematic masterpiece.
**What about the hidden pitfalls that even experienced filmmakers tend to overlook?** One example is the myth that all lenses perform equally in low light. In truth, understanding the lens’s maximum aperture and how it interacts with your camera’s sensor can make or break your shot in challenging lighting. Deepening your knowledge here can prevent costly reshoots or subpar footage.
Before wrapping up, ask yourself: have you ever fallen into this trap? Let me know in the comments. Remember, mastering these nuanced aspects of cine gear not only elevates your craft but also safeguards you from common pitfalls that can undermine even the best projects. Stay curious and keep exploring!
Tools I Recommend for Reliable Film Setup Maintenance
Keeping your cine lenses, lighting, and projectors in top shape requires investing in proven tools. I personally rely on a combination of precision calibration devices and protective accessories. For example, a Schleede lens cleaning kit ensures your lenses remain spotless without risking scratches, while a DataColor SpyderX calibration tool helps me maintain consistent color accuracy on my monitors, which is crucial for post-production consistency. Additionally, employing vibration-dampening mounts for camera supports reduces wear and tear over time, ensuring smooth operation during shoots. Regularly inspecting and replacing worn components with OEM parts also prolongs equipment lifespan, preventing costly failures down the line.
In terms of software, I use dedicated firmware update utilities from manufacturers to keep my projectors and support equipment current. Outdated firmware can introduce bugs or reduce performance, so scheduling semi-annual updates ensures optimal efficiency. For lighting setups, employing digital light meters and color temperature sensors helps maintain proper exposure and consistency across shoots. These tools are vital, especially when working in variable environments or on tight schedules.
Predicting the Future of Equipment Preservation in Filmmaking
As technology advances, I anticipate a shift toward more integrated, smart maintenance systems—like IoT-enabled cameras and projectors that monitor their own health and alert you when service is needed. This proactive approach can drastically reduce downtime and extend the lifespan of expensive gear. Moreover, protective films and coatings are becoming more sophisticated, shielding lenses and screens from scratches and environmental damage without affecting image quality. Staying ahead of these trends means investing in versatile, durable tools now that will serve your production needs well into the future.
How do I maintain my equipment over time?
Establishing a routine maintenance schedule is key. For instance, I set quarterly check-ins where I clean, inspect, and update my gear, ensuring dust doesn’t accumulate in sensitive components or that seals remain airtight. Documenting each maintenance session helps identify patterns or recurring issues, allowing for proactive replacements before small problems escalate. Additionally, storing equipment in climate-controlled environments prevents humidity and temperature fluctuations from causing corrosion or damage. Use protective cases and silica gel packs for added defense during transport or long-term storage. Regular calibration and professional servicing—at least once a year—are essential for specialized items like cinema projectors and high-end lenses. Remember, prevention saves money and preserves image integrity, so treating your gear as a long-term investment pays dividends.
Lessons That Changed My Perspective on Cine Gear
One of the most profound lessons I learned was the importance of tailoring your equipment choices to your specific environment. For example, I once neglected ambient light conditions and ended up with washed-out images; now, I always prioritize environment analysis to select the perfect screen and projector combination. Additionally, I realized that investing in quality calibration tools can save you hours of frustration, ensuring consistent color fidelity and sharpness across shoots. These insights reminded me that even the best gear needs proper setup and ongoing maintenance to truly shine.
Another eye-opener was understanding the myth about expensive lenses automatically producing better visuals. Experience taught me that matching lens features like aperture and focal length to your scene requirements is far more critical than price alone. Lastly, I discovered that regular equipment maintenance—cleaning, calibration, and timely upgrades—extends your gear’s lifespan and keeps your visual standards high, allowing you to focus on storytelling without technical distractions.
Gear and Knowledge That Keeps Me Ahead
- DataColor SpyderX calibration tools: I trust these for color accuracy, which is vital for consistent post-production work.
- Complete camera support systems: From stabilizers to gimbals, they help me achieve smooth shots that elevate production quality. Explore their benefits at this guide.
- Projection screen varieties: Knowing when to use ambient-light-rejecting screens versus matte white surfaces has transformed my viewing experiences. Tips can be found here.
- Cinema projectors: Selecting models with high contrast ratios over merely 4K resolution has made a tangible difference in image quality. For insights, check this resource.
Ignite Your Passion and Push Boundaries
Stepping into the role of a filmmaker or enthusiast in 2024 means embracing continuous learning and experimentation. Each setup you perfect, each piece of gear you understand deeply, builds your confidence and brings your creative visions to life more vividly. Don’t be afraid to challenge conventional wisdom—try new equipment combinations and calibration routines, and observe how they transform your work. Remember, the journey toward cinematic mastery is ongoing, and every adjustment, every lesson learned, makes you a better storyteller. So gear up, stay curious, and elevate your craft—your future masterpiece awaits.
One Reply to “Projection Screens for Filmmakers: Top Selection & Buying Tips 2024”
Leave a Reply
Related Posts
![4 Nano-Coated Screens That Fix 16K Contrast in Bright Rooms [2026]](https://cinegearguide.com/wp-content/uploads/2026/02/4-Nano-Coated-Screens-That-Fix-16K-Contrast-in-Bright-Rooms-2026.jpeg)
4 Nano-Coated Screens That Fix 16K Contrast in Bright Rooms [2026]
I still remember the jarring moment during a recent outdoor…
Best Projection Screens & Film Lighting Equipment for Filmmaking
Ever spent hours filming your masterpiece, only to find the…
Ultimate Guide to Projection Screens and Film Lighting Equipment 2024
My Journey into the World of Projection Screens and Film…
Reading this post really resonated with me, especially the part about how choosing the right projection screen can make or break your cinematic experience. I remember investing in a high-end projector, only to be disappointed with the washed-out images because I overlooked the importance of ambient light conditions and the screen’s surface. Since then, I’ve learned that even small details, like screen gain and material, drastically affect image quality. I’ve recently upgraded to an ambient-light-rejecting (ALR) screen, and the difference is night and day, especially during daytime viewing. It’s fascinating how much focus and research should go into selecting the perfect screen since it’s often an underestimated piece of the puzzle. I wonder, for those who set up portable screens for on-the-go projects, what are some of the most reliable options that balance portability with high performance? I’d love to hear some recommendations or personal experiences—it could help many of us optimize mobile setups.