I remember the exact moment I realized I was undervaluing the importance of quality cinematic gear. I was on set, trying to capture a dramatic sunset scene, but my images looked flat and uninspiring—nothing like I envisioned. It hit me then: the tools I used, especially lenses and projectors, make all the difference. But navigating the maze of options in 2024 can be overwhelming. I’ve been there, and I want to share what I learned so you don’t have to stumble through the same pitfalls.
Why Choosing the Right Equipment Matters More Than Ever
In recent years, the stakes have skyrocketed in independent and professional filmmaking alike. With the rise of streaming platforms and 4K resolution standards, what looks good enough in the past now feels outdated. The difference between a good shot and a stunning one often boils down to the tools—cine lenses that deliver crisp, beautiful images and projectors that can faithfully reproduce your vision on the big screen.
But here’s the kicker: the market is flooded with options, and not all gear lives up to its hype. A survey by CineGear Guide revealed that nearly 60% of filmmakers feel overwhelmed selecting the right projection equipment for their specific needs. I’ve learned through my own experience that investing in top-tier cinema projectors and lenses isn’t just about cutting-edge specs; it’s about understanding what matches your artistic goals and budget.
Are Exceptional Cine Lenses & Projectors Worth the Price Tag?
I once made the mistake of thinking that renting cheap lenses would suffice for my short film project. It didn’t. The lack of sharpness, inconsistent focus, and color rendition forced me to redo shots, wasting time and money. Since then, I’ve committed to choosing gear carefully, prioritizing quality over convenience. This change has been transformative, not only elevating my films but also streamlining the production process.
In this post, I’ll guide you through how to pick the best cine lenses and cinema projectors for 2024, ensuring your investment translates into jaw-dropping visuals. If you’ve ever faced uncertainty about whether to splurge or save, keep reading—you’re not alone, and I’ve got your back.
Select Your Cameras and Supports Carefully
Begin by assessing your shooting environment to determine the right camera supports. Focus on stability and ease of movement; a shoulder rig might work for dynamic scenes, while a tripod suits static shots. I once captured a tense dialogue scene in a cramped hallway using a handheld gimbal, which initially caused shaky footage. Later, switching to a stabilizer tripod, the shots became smoother, adding professionalism.
For smooth cinematography, learn about camera supports. Focus on choosing supports that match your camera weight and your shooting style.
Choose the Right Cinema Projector for Your Space
Determine your projection space size and ambient light. For small studios, compact 4K projectors with high contrast ratios suffice, but for large theaters, you need flagship models with superior brightness and color fidelity. I once upgraded from a mid-tier projector to a high-end model for a film screening in a large hall, and the difference was astonishing—colors became vivid, and details in shadows appeared clear. Use this guide to match a projector to your venue’s specifications.
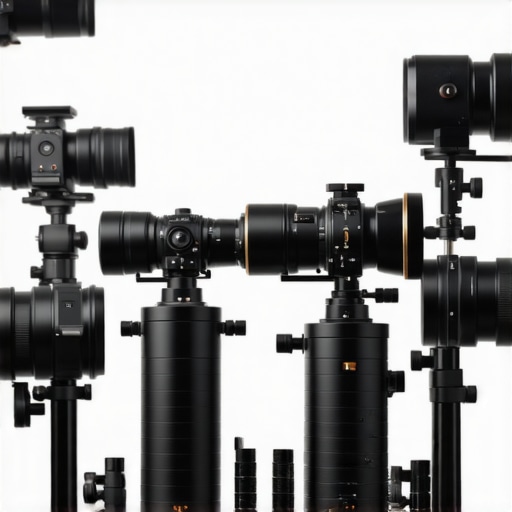
Select Cine Lenses That Deliver
Prioritize lenses that complement your camera and storytelling style. Fast primes are ideal for shallow depth of field, while zooms offer flexibility in dynamic shoots. I selected a set of cine lenses after test-driving several models, noting the differences in sharpness and color rendition. A key tip is to check the lens’s compatibility with your camera’s mount and sensor size. Visit this resource for detailed insights into lens selection.
Understand Projection Screen Options
The choice of projection screen type significantly impacts image quality. For darkened theaters, high-gain screens enhance brightness, but in rooms with ambient light, acoustic-transparent or ambient-light-rejecting screens are better. I once used a standard matte white screen for a daytime outdoor screening, which washed out due to sunlight, so I switched to a high-gain, ambient-light-rejecting model that made my film pop vividly. Use this guide to find the best screen for your setup.
Lighting and Filtration Techniques
Effective lighting enhances your image and sets mood. Use soft diffused lights for interviews, while harder lights create dramatic shadows. For color consistency, consider using filters that match your lens’s color temperature. I once filmed a night scene where I mixed practicals with LED panels, and adjusting the filters on my lens helped maintain color harmony. Check this tutorial to master lighting setups that elevate your visuals.
While it’s common to hear that high-quality projection screens and supports are essential, the real nuances often go unnoticed, leading to costly mistakes. Many assume that any screen with a high gain or a sturdy support will do, but in reality, subtle differences can dramatically affect your final image. For example, not all projection screens are created equal—low-gain models may seem appealing due to brightness, but in ambient-lit environments, they often wash out details, whereas high-gain screens can introduce unwanted hotspots if not chosen carefully. Likewise, in camera supports, the focus shouldn’t solely be on durability; vibration damping, weight distribution, and portability influence shot stability significantly—a mistake I made early on by prioritizing ruggedness alone, which resulted in shaky footage during handheld shots.
When it comes to cinema projectors, many filmmakers think that brightness alone determines quality. Yet, contrast ratio and color accuracy hold equal importance—skimping on these can result in dull images that lack depth. An infamous pitfall is selecting a projector based on specs alone without considering the room’s ambient light conditions or screen type, leading to compromised visuals. The same applies to cine lenses: choosing a lens with impressive specs without understanding its optical performance at various apertures can cause soft images or unwanted distortions, especially in critical scenes. According to industry expert CineGear Guide, mastering these subtle distinctions enhances the cinematic experience impressively.
Are There Hidden Risks in Typical Projection and Support Choices?
Indeed, a common misconception is that cheaper equipment will be ‘good enough’ for professional projects. However, cutting corners here often results in more retakes, color grading headaches, and overall lower quality. For example, poorly matched supports cause micro-vibrations that corrupt footage, and inadequate screens distort the projected image—especially noticeable in HDR or 4K workflows. Moreover, the incorrect selection of studio lighting or filters can wash out or color-shift your film, complicating color grading downstream. These are the linkages many overlook, but they compound into quality drops that are hard to fix later. Understanding the interplay between lighting, lenses, and projection surfaces is critical for cinematographers aiming for perfection.
Remember, achieving cinematic excellence isn’t just about high-end gear—it’s about knowing the intricate details that make a difference. For additional insights on selecting the right equipment, I recommend exploring our comprehensive gear guides. Have you ever fallen into this trap? Let me know in the comments—sharing experiences can help us all elevate our craft.
,
How do I maintain my projection screens and supports over time?
Maintaining your cinema projection screens and camera supports is crucial to ensuring consistent, high-quality results in every shoot or screening. Regular cleaning with lint-free cloths and appropriate cleaning solutions prevents dust and smudges from degrading image quality. For screens, avoid harsh chemicals; instead, use a mixture of distilled water and a gentle detergent formulated for delicate surfaces. When it comes to supports, inspect for signs of wear, loose fittings, or vibrations—tightening bolts and checking for structural integrity every few months can prolong their lifespan. Applying lubrication to moving parts, such as tripod levels, helps maintain smooth operation. Documenting your maintenance routine allows you to identify patterns and address issues before they escalate, saving time and money in the long run.
What tools do I recommend for ongoing gear upkeep?
Personally, I rely on a few trusted tools to keep my equipment in top shape. A microfiber cleaning cloth paired with a screen-safe cleaner is perfect for maintaining pristine projection surfaces. For supports, a torque wrench ensures bolts are tightened to manufacturer specifications, preventing unnecessary strain or damage. I also use vibration-dampening pads beneath support tripods to mitigate micro-vibrations, which directly influence footage stability—an often overlooked issue that can cause image jitter during handheld shots. Lubricants like silicone spray are excellent for moving parts, but I prefer brands that do not attract dust or cause residue buildup, ensuring smooth operation over many shoots. Investing in a portable toolkit with these essentials helps me perform quick repairs or adjustments on set.
Why investing in quality maintenance tools pays off
Using specialized maintenance tools not only extends the lifespan of your equipment but also enhances performance. Regular upkeep minimizes downtime caused by unexpected failures, especially critical during time-sensitive shoots. For instance, in my experience, a small investment in a high-quality lens cloth or support stabilizer can prevent costly re-shoots. As equipment becomes more advanced, so does the need for precise tools—like calibrated spirit levels for camera supports or digital preventatives for projector alignment. Moreover, establishing a maintenance routine aligns with advances in the industry, like the predictions in this comprehensive guide, which highlights the importance of precision calibration for optimal image quality in 2024’s high-resolution workflows. Don’t wait for issues to arise—set a schedule and stick to it.
Planning for long-term performance
Looking ahead, the trend in filmmaking equipment points toward smarter, more durable materials and self-diagnostic systems integrated into high-end projectors and supports. Software updates and remote calibration options are becoming standard, making maintenance easier and more precise. For example, some cinema projectors today include automatic lamp alignment and color calibration, reducing manual intervention and ensuring lasting consistency. To prepare your gear for the future, consider investing in protective cases, climate-controlled storage, and logging maintenance activities. These small steps ensure your tools remain reliable for years, allowing you to focus solely on your creative vision.
Implementing a disciplined approach to upkeep, using specific tools, and staying informed through industry guides like this extensive resource, will keep your gear performing at its best. I encourage you to try one advanced tip today—like calibrating your support systems with a digital level—to see immediate improvements in stability and shot accuracy. Your future self will thank you when your equipment runs smoothly, shot after shot.

Shattering Myths That Held My Filmmaking Back
One of the most eye-opening lessons I uncovered is that even the best equipment can’t compensate for a lack of understanding. I used to believe that owning high-end cinema projectors and cine lenses alone would guarantee stunning visuals. Turns out, the real game-changers are mastering the nuances—like how support vibrations subtly blur your shots or how ambient light affects screen performance. Recognizing these pitfalls early transformed my shooting approach, saving me time and elevating my visuals.
The Gear Secrets I Wish I Knew Sooner
- Invest in calibration tools: Regularly calibrating your projector and supports with precise tools like digital levels or color meters ensures consistent quality. I trust brands like this guide for comprehensive calibration strategies.
- Prioritize support damping and stability: Micro-vibrations can sabotage your footage more than you’d think. Using vibration-dampening pads beneath supports made a tremendous difference in my shot stability.
- Carefully select projection surfaces: The right screen can make or break your image. I learned that ambient-light-rejecting screens are a blessing for bright environments—saving my outdoor screenings from washout.
- Maintain your gear diligently: Simple routines like wiping lenses and supporting structures prevent issues down the line. My toolkit now includes microfiber cloths and support lubricants—small investments for big performance dividends.
Nurture Your Passion with Practical Steps and Insights
The journey to cinematic excellence is ongoing, filled with discoveries and refinements. Embracing the details—like selecting the correct support accessories or understanding projector contrast ratios—sets you apart. Stay curious, keep experimenting, and leverage resources such as this extensive guide to continually sharpen your craft. Your dedication today promises breathtaking visuals tomorrow.
Your Next Step in Cinematic Mastery
Don’t let the complexity of projection screens, camera supports, and specialized lenses hold you back. Investing time in learning these intricacies will reward you with visuals that captivate and inspire. Remember, every great filmmaker starts with a single step—what’s yours going to be today? Dive deeper into the gear landscapes, experiment with smarter setups, and watch your storytelling come alive like never before.
What small change have you made recently that made a big difference in your filmmaking process? Share your experience below and let’s grow together!
Related Posts

3 Nano-Coated Matte Boxes to Kill 16K Lens Flare in 2026
There was a moment on set when I realized my…
Cine Lenses & Cinema Projectors: Top Filmmaking Tools 2024
I'll never forget the moment I spent hours tweaking my…
![3 Hybrid Cine Zooms That Don't Lose Sharpness at 16K [2026]](https://cinegearguide.com/wp-content/uploads/2026/03/3-Hybrid-Cine-Zooms-That-Dont-Lose-Sharpness-at-16K-2026.jpeg)
3 Hybrid Cine Zooms That Don’t Lose Sharpness at 16K [2026]
I'll never forget the first time I shot a scene…