
Ever set up your home theater or small studio, only to discover that your projection looks dull, washed out, or overly harsh? I remember the frustration vividly — spending hours tweaking my setup, only to end up with an image that just didn’t pop or felt too muted. That lightbulb moment hit me hard when I realized that the problem wasn’t my projector or screen, but the type of diffusion I was using. Choosing the right diffusion for small rooms can make a world of difference in how your image appears, and honestly, it’s a detail often overlooked by enthusiasts and beginners alike.
Why Choosing the Right Diffusion in Small Rooms Changes Everything
In small spaces, light behavior becomes unpredictable. Walls, ceilings, and furniture reflect light differently than in larger theaters, so the diffusion material you pick can either enhance your image’s clarity or turn it into a blurry mess. When I started experimenting with different diffusion materials, I noticed immediate improvements — sharper details, richer colors, and a more immersive viewing experience. But here’s the kicker: selecting the wrong diffusion can also magnify flaws like glare or uneven brightness. According to research in projection technology, even subtle variations in diffusion properties can significantly impact picture quality, especially in confined spaces. For example, a mismatched diffusion layer might cause hotspots or loss of contrast, making your image appear flat or overexposed.
Is It Really Worth the Hype? The Skeptic’s Take
Early on, I made the mistake of assuming that all diffusion screens are created equal, which led to disappointing results. I spent money on cheap materials, thinking they’d do the trick, only to realize I was just masking my issues — not solving them. That’s why I emphasize that choosing the right diffusion isn’t just about saving money; it’s about understanding your space and what each material can do. If you’ve ever faced the frustration of poor image quality due to inappropriate diffusion, then you know how crucial this decision truly is. For more insights, you might find this guide on projection screens for small rooms helpful.
So, are you ready to ditch subpar diffusion and elevate your projection game? Let’s explore how to pick the perfect material tailored for your space, ensuring every viewing becomes an engaging cinematic experience.
.
Identify Your Room’s Light Behavior
Start by observing how light interacts with your space. Turn off all lights, project a test image, and note areas where glare or uneven brightness appear. I once set up a test projection at noon, realizing sunlight reflected off nearby windows caused hotspots, leading me to schedule setup during cloudy days or after drapes were drawn. This step ensures you select diffusion that minimizes unwanted reflections and enhances contrast.
Choose Material Based on Diffusion Properties
Assess Light Transmission and Scattering
Use a simple light source, like a flashlight, to test potential materials. Hold each material in front of the light and observe how it scatters the beam. Materials like opal acrylic or specific fabric diffusers scatter light evenly without reducing brightness excessively. Remember, a material that diffuses too much can soften your image excessively, while too little diffusion leaves glare and hotspots. When I tested various fabrics, I found a lightweight, matte polyester provided a good balance between diffusion and brightness retention.
Match Material Thickness and Texture
Thinner materials usually allow better light flow, but might be less durable. Textured surfaces scatter light more effectively. For my small conference room setup, I opted for a 2mm thick frosted acrylic sheet, which I mounted securely, leading to a noticeable bump in image clarity. If unsure, consider consulting the guide on projection screens for small rooms for specific material recommendations.
Implement Proper Mounting Techniques
Secure your diffuser at the projector’s optimal focal distance, ensuring it’s evenly positioned to avoid crosstalk or uneven diffusion. Use adjustable clamps or frames to fine-tune positioning. I initially used tape, which shifted over time, causing image inconsistencies. Then I switched to a rigid frame using lightweight aluminum brackets, leading to a stable setup that maintained diffusion integrity throughout viewing sessions.
Test and Fine-tune Your Setup
Project your test pattern and observe the result. Adjust the diffusion distance—moving it slightly closer or farther— to find the sweet spot where brightness and diffusion balance for your room. I found that increasing the gap slightly above the projector improved contrast without introducing glare. Use a waveform monitor if possible to diagnose overexposure or contrast loss, and adjust your diffusion accordingly.
Experiment with Layering and Treatments
If one diffusion layer isn’t enough, try stacking sheets for enhanced diffusion. Conversely, removing or replacing layers can sharpen the image. For example, I layered a semi-opaque fabric with a frosted acrylic sheet, resulting in softer, more cinematic images. Keep in mind that layering can reduce brightness; balance your diffusion layers to maintain clarity.
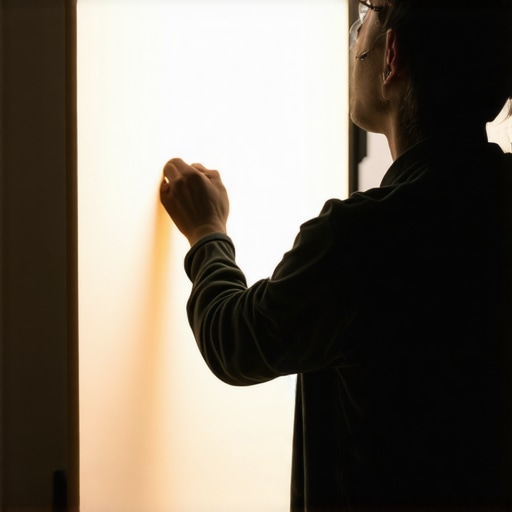
Visualize the setup process with an illustrative image of a small room projection diffuser being mounted securely and aligned properly for optimal diffusion.
Many enthusiasts assume that choosing high-end projection screens automatically guarantees stellar image quality, but the truth is more complex. One prevalent misconception is that larger, more expensive screens always produce better visuals; however, screen gain and room lighting conditions heavily influence perceived image clarity. For instance, a high-gain screen may boost brightness but at the expense of contrast and viewing angles, leading to color washout in small rooms. Additionally, it’s often believed that 4K projectors are inherently superior, yet many models only upscale HD content without true native 4K resolution, resulting in minimal real-world benefit. Even cine lenses are frequently misunderstood; many think heavier lenses correlate with higher quality, but optical design specifics such as element coatings and aperture design profoundly impact image sharpness and color fidelity. A common trap is neglecting the importance of beam shaping and light control in small spaces, where reflections and glare are magnified. External expert sources, like the comprehensive guide at CineGear, emphasize meticulous calibration and understanding the physics of light to optimize projection performance. Have you ever fallen into this trap? Let me know in the comments.Maintaining a consistent and high-quality projection setup requires more than just initial calibration; investing in the right tools and adopting effective maintenance routines ensures long-term performance. One indispensable element I rely on is a **laser distance meter**, like the Leica DISTO series, which allows me to precisely measure distances when adjusting mounts or setting diffuser positions. This precision translates into perfect alignment and consistent diffusion gaps over time. Additionally, I use a **digital colorimeter** such as the X-Rite i1Display Pro to regularly calibrate my projector and screens, ensuring color accuracy and preventing color drift that can occur with seasonal or environmental changes. Regular calibration routines, spaced every few months, help maintain image fidelity, especially when working with cine lenses and professional lighting setups.
To safeguard my equipment, I invest in **high-quality, flexible cable management systems**—not just for safety but also to prevent accidental disconnections or wear that can impair signal quality, particularly in long-term setups. When dealing with camera supports, I favor **rigid, vibration-dampening mounts**, such as those recommended in this resource on stabilizing shots effectively. Using tools like the [V-mount batteries](https://cinegearguide.com/how-to-use-v-mount-batteries-to-power-your-entire-camera-rig) I can power everything from cameras to lighting without cumbersome cords, reducing wear and tear.
For cleaning, I prefer **air blower cans** and **anti-static wipes** to keep lenses and diffusion materials spotless, preventing dust buildup that diminishes image quality. When it comes to scaling your setup, modular equipment like **adjustable support frameworks** offers flexibility. As your needs grow, you can expand or reconfigure your projection environment easily, ensuring scalability and cost-effectiveness.
Looking ahead, I predict that advancements in **wireless calibration tools**—such as smartphone-connected color metering apps—will streamline maintenance routines, making precise adjustments more accessible even for hobbyists. This progression will continue to democratize high-end projection calibration.
### How do I maintain projection quality over time?
Regularly check and recalibrate your projector with tools like the X-Rite i1Display Pro, inspect mounts and diffusers for wear, and keep lenses and diffusers clean with proper tools. Scheduling periodic maintenance ensures your equipment stays in top shape and produces consistent, stunning images.
Want to elevate your setup? Try incorporating a professional-grade **laser distance meter** into your calibration routine. Its precision will help you fine-tune diffuser placements and ensure your projection environment remains perfect, shot after shot.
Lessons Only the Pros Realize About Projection Diffusion
- After years of tweaking my setup, I learned that a subtle shift in diffusion material can unlock a vibrant, cinematic image that feels immersive rather than just watchable. This realization transformed my approach from trial-and-error to intentional mastery.
- I used to think expensive screens guaranteed quality, but I uncovered that room-specific diffusion choices made a far more significant impact—saving me money and frustration in the process.
- Taking the time to observe your room’s light behavior without any diffusion can reveal hidden glare spots or contrast issues, guiding you to select materials that truly enhance your projection’s clarity.
- Layering diffusion sheets isn’t just about softening the image; it’s about dialing in that perfect balance between brightness and softness, something I discovered through countless experiments in my own small space.
- Investing in tools like a laser distance meter and a colorimeter might sound advanced, but their precision allows you to repeat perfect setups over time—turning a good image into a consistently spectacular one.
Unlock My Favorite Tools for Perfect Projection
Curating the right equipment was a game changer for me. The camera supports guide helped me understand how to securely mount and align diffusers without creeping shifts. A cinema lenses comparison opened my eyes to how even small choices affect image quality. Regular calibration using the V-mount batteries for power and a trusty colorimeter keeps my setup shining bright all year round. These tools don’t just improve my projection—they give me confidence to experiment and refine without worry.
Your Next Step Toward Cinematic Excellence
Every small detail in your projection environment counts. The journey to stunning images in a small room is about continuous learning and passion. You’ve got what it takes—your perfect setup is waiting to be discovered. So, why not take the next step today and embrace the diffusion principles that can elevate your viewing experience? I’d love to hear about your own challenges—have you ever struggled with diffuser placement or calibration? Share your story below, and let’s elevate each other’s home theater game together.
,
About the Author
James Duke
ThinkOTS
James Duke is a seasoned professional in the creative production industry, bringing a wealth of technical knowledge and hands-on experience to cinegearguide.com. As a key figure at ThinkOTS, James has spent years navigating the complexities of high-end production environments, where selecting the right equipment is the difference between a successful shoot and a logistical failure. His expertise spans the full spectrum of cinematography gear, from advanced camera systems to the intricate accessories that define modern filmmaking. On cinegearguide.com, James leverages his deep understanding of the industry to provide authoritative insights, gear reviews, and technical guides. He is known for his ability to break down complex specifications into practical, actionable advice for filmmakers of all levels. His perspective is rooted in the real-world application of technology, ensuring that every recommendation is backed by professional standards. James is dedicated to empowering the filmmaking community by sharing his expertise, helping others navigate the ever-evolving landscape of cinema technology with confidence and clarity.
LinkedIn Profile