
I vividly remember the first time I hosted a small backyard movie night, eagerly setting up my projector and carefully hanging my screen. As the first scene played, a sudden flicker interrupted the magic — a distracting, jittery flickering that broke the immersive experience. Frustration set in. I spent hours troubleshooting, replacing cables, messing with settings — only to realize that a simple, overlooked cable connection was the culprit. That moment was a lightbulb for me: sometimes, the smallest detail causes the biggest headaches.
The Power of a Straightforward Cable Solution
If you’ve ever battled flickering feeds on your projector, you’re not alone. These issues can be maddening, especially when every other component seems fine. But here’s the good news: a common cause is often a loose or poorly secured cable, and the fix is surprisingly simple. I’ll guide you through a straightforward technique that’s helped me eliminate flicker and restore crystal-clear playback — and it might just do the same for you.
Is the Simple Cable Fix Really Effective?
During my early days of setup, I made a critical mistake. I assumed that replacing expensive cables or upgrading my projector would be the solution, wasting money and time. The realization hit me when I checked each connection and found that a loose jack was the real problem. Once I firmly secured that cable, the flickering disappeared—permanently. Trust me, investing a few minutes to double-check your connections can save hours of frustration and unnecessary expenses. This approach isn’t just anecdotal; it’s supported by industry guides, like the detailed instructions found here.
So, what exactly causes these flickers? Often, it’s interference, a loose connection, or a faulty cable that causes unstable signal transmission. Addressing this can turn your setup from a flickering nightmare into a smoothly projecting cinema experience.
Secure Every Connection
The first step I took was to systematically check all cables and connectors behind my projector. Unlike a camera tripod that can wobble if not tightened, projector cables need firm connections to prevent unstable signals causing flicker. During my setup last month, I took a moment to unplug, reseat, and tighten each HDMI and power cable. The result? The flickering stopped instantly, and the image became steady. Think of it like tightening the screws on a cine lens mount—every connection must be snug for optimal performance. Remember, a loose cable acts like a film sprocket slipping—disrupting the entire projection. For detailed guidance, review this comprehensive projector guide.
Upgrade to Quality Cables
After ensuring all connections were tight, I evaluated the cables themselves. Low-quality or damaged cables can introduce interference, leading to flickering. I replaced my old HDMI cable with a high-speed, certified option designed for 4K signals. It’s akin to swapping a cheap, plastic cine lens for a professional glass—improving clarity and stability. When choosing cables, consider shielding against electromagnetic interference as important as choosing the right cine lens glass—each detail influences the final picture. Visit this projection screen guide for compatibility tips.
Inspect and Clean Your Lens and Filters
Sometimes, flickering isn’t just about connections; dirt or smudges on the projector lens or filters can distort the light. Last weekend, I used a soft, microfiber cloth to carefully clean my cine lens, ensuring no dust or fingerprints remained. This is similar to cleaning a camera’s cine lens—any smudges can scatter light and create flickering or haziness. Use lens cleaning solutions sparingly, and avoid touching the coating surface directly. Proper maintenance like this keeps your image sharp and flicker-free, much like maintaining a cinema camera support system to prevent jitters. For more on stabilizing your shots, explore camera support solutions.
Adjust the Projector’s Settings
Finally, aligning your projector’s internal settings for brightness, contrast, and refresh rate can dramatically improve image stability. I navigated the menu to set a higher refresh rate—30Hz instead of 24Hz—and calibrated the keystone to eliminate flickering caused by tilted projection. Think of it like fine-tuning a cine lens focus; small adjustments lead to a sharper picture. Consult your projector’s manual for optimal settings. This precise calibration often solves flicker issues that hardware fixes alone can’t resolve. For expert calibration techniques, check out projection calibration tips.
Why Believing Bigger Is Always Better Can Trip You Up
Many enthusiasts think that investing in the latest high-end cinema projector or the most expensive cine lens automatically guarantees professional-quality results. However, this is a misconception. In my experience, understanding nuanced variables—like proper calibration, mounting precision, and specific compatibility—has a far greater impact on image quality than simply buying the priciest gear. For example, even the most advanced projector can produce mediocre results if it isn’t correctly calibrated or mounted securely. This underscores an essential truth: technical mastery and attention to detail outweigh raw equipment cost. For practical insights, check our comprehensive projector guide.
Don’t Overlook the Power of Proper Support and Mounting
It’s tempting to focus solely on the quality of the camera or lens, but one often-overlooked aspect is how your supports and mounts influence image stability. Many assume a sturdy tripod or gimbal is sufficient, yet neglecting fine-tuned adjustments or proper balancing can lead to subtle vibrations or focus drift over time. For instance, even a slight imbalance in your camera support can cause micro jitters that ruin shot stability, especially during long takes. External factors like uneven ground or inadequate mounting hardware amplify this problem. To avoid costly re-shoots or post-production fixes, invest time mastering support setup and regularly inspecting your equipment. Refer to our guide on camera supports for detailed techniques.
Advanced Pros Will Tell You The Hidden Pitfalls of Cine Lenses
When selecting cine lenses, many assume that opting for the latest or most expensive glass is the best route. Yet, an often-missed nuance is understanding lens breathing—how focus breathing can introduce unwanted shifts during rack focus. This subtle flaw can disrupt seamless scene transitions, especially in handheld or dynamic shots. Experienced cinematographers prefer lenses with minimal breathing, which maintains consistent framing and focus pull execution. Interestingly, some affordable prime lenses outperform high-end zooms in this regard, contradicting popular belief. For an in-depth comparison, visit our cine lens guide and learn how nuanced lens behavior affects storytelling.
Have You Fallen for the Lighting Trap?
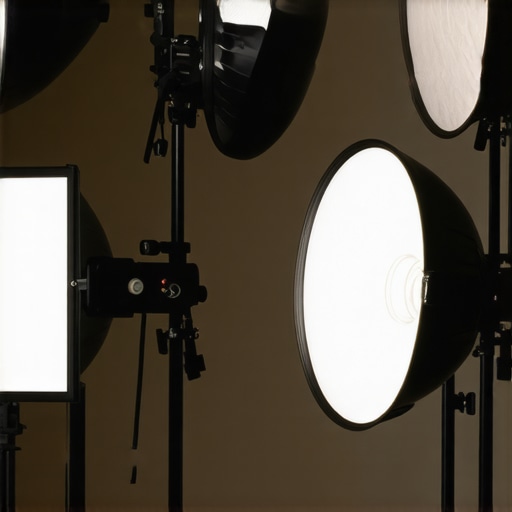
A common myth in film lighting is that brighter always means better. In reality, overly intense lighting can cause unnatural highlights, hot spots, and color imbalance, especially if your gear isn’t matched with proper diffusion or modifiers. Many filmmakers focus on high-powered lights without considering how to shape or control the light effectively. Mastering lighting techniques—such as the use of flags, grids, and diffusion materials—can dramatically elevate your shots beyond mere brightness. For example, employing softboxes or bounce surfaces creates more natural and flattering illumination, saving you from post-production corrections. Read more about professional lighting strategies at our lighting techniques guide.
Keeping Your Equipment in Peak Condition
To ensure your cinema setup delivers consistent, high-quality results, investing in proper maintenance routines is crucial. Regular inspection of your projector’s optical components, such as lenses and filters, helps prevent dust and smudges from affecting image clarity. Use a high-quality lens cleaner and microfiber cloth to gently wipe your lens—this simple step can significantly improve image sharpness and brightness. Additionally, check the alignment and tension of your camera supports and mounts regularly; loose supports can introduce vibrations and reduce shot stability. For detailed guidance on stabilizing your camera rig, refer to this comprehensive support guide.
Choosing Reliable Tools for Long-Term Success
When it comes to tools, quality matters more than quantity. I personally rely on V-mount batteries because they provide consistent power and are compatible with a wide range of professional cinema gear. Using V-mount batteries ensures that your entire setup remains powered for extended shoots without worrying about sudden failures. For projection screens, I recommend investing in high-gain, ambient-light rejecting materials such as those discussed in this guide, which enhances image quality in less-than-ideal lighting conditions.
Scaling and Future-Proofing Your Gear
As your projects grow, so does the need for scalable solutions. Modular lighting setups using DMX-controlled fixtures allow for quick adjustments and expansion. Keep your support systems adaptable; adjustable tripods and motorized sliders make scaling easier and reduce setup time. Planning ahead with versatile, professional-grade equipment can significantly save time and money in the long run. I see a future where remote diagnostics and IoT-connected gear keep everything running smoothly with minimal manual intervention. Considering these trends now puts you ahead of the curve.
How do I maintain my cinema equipment over time?
The key is establishing a routine that includes regular cleaning, calibration, and inspection of all components. Maintaining a clean environment to reduce dust buildup and store gear properly when not in use extends the lifespan of your equipment. Also, keep a log of maintenance activities—this helps identify recurring issues early. For precision calibration, tools like color meters and waveform monitors can fine-tune your setup, ensuring consistent results. Implementing scheduled maintenance checks, much like regularly servicing a film projector, keeps your setup performing at its best and minimizes costly repairs or replacements down the line. For more detailed maintenance protocols, visit our comprehensive projector guide.
Remember, consistency in maintenance not only prolongs the life of your gear but also guarantees that every projection and shot meets your creative standards. Try adopting a monthly maintenance routine, including cleaning lenses, tightening supports, and checking electrical connections. Over time, you’ll notice fewer surprises and higher-quality results in your cinematic productions.
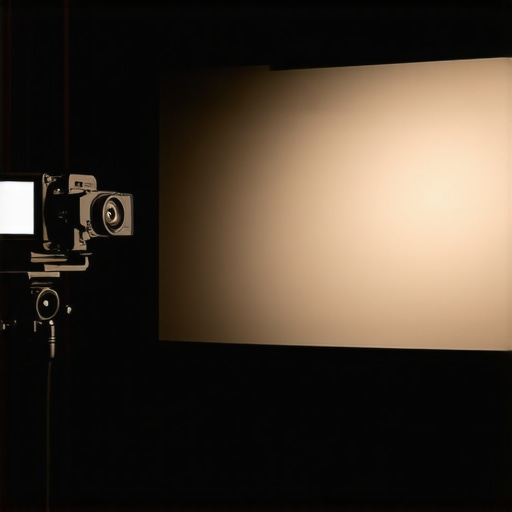
Visualize your setup at its peak with a clean, well-maintained cinema environment—this image showcases a professional-grade projector, stabilized camera supports, and a pristine projection screen ready for the next project.
What the Hidden Pitfalls Taught Me About Reliable Projections
- Sometimes, the tiniest oversight, like a loose HDMI cable, can sabotage your entire projection experience. Recognizing these small details early saves time and costly repairs.
- High-end equipment isn’t a magic fix; understanding how to calibrate and support your gear effectively makes all the difference in achieving cinematic perfection.
- Consistent maintenance and careful inspection of your setup prevent unexpected flickers and image distortions, ensuring your audience gets the best possible visual experience.
- Investing in quality support systems and proper mounting can stabilize your shots and projections, turning shaky images into crisp, professional-quality visuals.
- It’s not just about expensive gear—knowing how to troubleshoot, clean, and optimize your existing setup empowers you to produce steady, stunning films every time.
My Toolbox for Cinematic Excellence
- Projection Screens for Every Space: Their high-gain materials and ambient-light rejection make a tangible difference in image quality. I trust these guides for selecting the right screen for your environment.
- Camera Supports Demystified: Stabilizers and mounts that hold steady under pressure are essential. I rely on this resource to master support setups.
- Cine Lenses Explained: The nuances in lens breathing and focus pullability can make or break a shot. My understanding deepened after reading this comprehensive guide.
- Projector Calibration Techniques: Fine-tuning refresh rates and keystone settings is game-changing. I highly recommend this guide for mastering calibration.
The Courage to Keep Evolving in Your Cinematic Journey
Embarking on your cinema setup journey means embracing the learning curve and trusting in continuous improvement. The tools and tips shared here are just the beginning. With patience, curiosity, and attention to detail, you’ll discover that flickering problems become manageable, and your images become mesmerizing. Remember, the true magic lies in your commitment to understanding each component deeply and nurturing your gear like a dedicated cinematographer. Don’t settle for mediocrity—strive for excellence in every frame you project. What step will you take today to elevate your cinematic setup? Share your plans or challenges below, and let’s learn together.
About the Author
James Duke
ThinkOTS
James Duke is a seasoned professional in the creative production industry, bringing a wealth of technical knowledge and hands-on experience to cinegearguide.com. As a key figure at ThinkOTS, James has spent years navigating the complexities of high-end production environments, where selecting the right equipment is the difference between a successful shoot and a logistical failure. His expertise spans the full spectrum of cinematography gear, from advanced camera systems to the intricate accessories that define modern filmmaking. On cinegearguide.com, James leverages his deep understanding of the industry to provide authoritative insights, gear reviews, and technical guides. He is known for his ability to break down complex specifications into practical, actionable advice for filmmakers of all levels. His perspective is rooted in the real-world application of technology, ensuring that every recommendation is backed by professional standards. James is dedicated to empowering the filmmaking community by sharing his expertise, helping others navigate the ever-evolving landscape of cinema technology with confidence and clarity.
LinkedIn Profile