
I remember the first time I shot with my anamorphic adapter, eagerly expecting that ultra-cinematic width and beautiful flare. But instead, I got a blurry mess around the edges. It was frustrating, almost disheartening, thinking I might have wasted money or that my gear was faulty. That moment was a real eye-opener. Turns out, those blurry corners aren’t always a snafu in your camera or lens—they often stem from simple setup mistakes or misunderstandings about how an anamorphic adapter functions.
Pinpointing the Cause: Why Are My Corners Blurry?
Over my years of experimenting and troubleshooting, I learned that blurry edges in anamorphic footage can be deceptive. It’s not necessarily a defect; more often, it’s an indicator that something’s off in your setup. Common culprits include improper lens alignment, focusing issues, or mismatched gear compatibility. For instance, I once used an adapter that wasn’t perfectly seated, which caused distortion at the frame’s edges—something that could be corrected with a bit of tinkering. According to industry experts, even small misalignments can dramatically impact image quality, especially in the corners of your frame (source).
Have You Faced This Exact Problem?
If you’ve ever been disappointed after reviewing footage and noticed blurry corners, you’re not alone. Many filmmakers struggle with this because they don’t realize that setup and calibration are crucial when working with anamorphic adapters. It’s a dive into technical details, sure, but that’s what separates good results from blurry disappointments.
What We Will Cover Today
In this post, I’ll share the practical steps I’ve taken that significantly improved my image sharpness at the corners. From correct adapter placement to focusing techniques, these tips can save you countless hours on post-production or re-shoots. And most importantly, I’ll help you understand the common mistakes that cause blurry edges—so you won’t have to learn the hard way like I did. Ready to sharpen up your footage? Let’s dive in and get those corners crystal clear!
Align Your Adapter Precisely
Start by ensuring your anamorphic adapter is perfectly seated and aligned with your lens. I once faced blurry edges because I loosely attached my adapter, causing shifts during shooting. Tighten all screws and verify alignment through a test shot on your camera’s monitor. Use a loupe or focus puller to double-check the adapter’s position, preventing the slightest tilt that can distort the image (source).
Calibrate and Focus Systematically
Focus accuracy is paramount. Use a high-contrast chart at your shooting distance and set your focus manually, zooming into the corners to confirm sharpness. I recommend using a focus peaking feature or magnified view for precision. Remember, autofocus can be unreliable with anamorphic adapters, so manual focus is your best bet. Periodically refocus during setups, especially after any adapter adjustments.
Check Lens Compatibility and Corrections
Not all lenses play well with every adapter. Confirm your adapter matches your lens’s mounting system and optical specifications. I once used an incompatible pair that caused vignette and softness at the edges. Consult compatibility guides or forums before purchasing. Also, consider implementing de-squeezing in post-production or via camera settings to evaluate whether the optical setup is truly sharp (related).
Use a Stable Support System
Camera shake amplifies blurriness in the corners. Secure your camera on a sturdy support—tripod, gimbal, or slider—with firm locks. I learned this the hard way; a loose tripod head caused subtle shifts that blurred the edges. Check stability before every shot, especially with heavier adapters or lenses. For complex setups, consider a rig with counterweights to balance the weight and minimize movement (support tips).
Adjust Your Shot Composition
Sometimes, a slight crop or composition tweak can hide minor softness at the edges. Frame tighter or shift the camera slightly to exclude problematic zones during filming. I did this once when a corner remained blurry despite technical tweaks, and it saved hours of post-processing. Using a tilt-shift lens or a flexible matte box can also help control peripheral distortions.
Perform Routine Maintenance
Clean your lens, adapter, and camera sensor regularly. Dust or smudges can cause foggy or blurry edges. Use a blower, microfiber cloth, and lens-cleaning solution, and avoid touching the optical elements directly. Dirty optics often mimic poor focus, leading to unnecessary retakes and frustrations.
Test and Tweak Before Shooting
Always run a test shoot after assembling your setup. Review footage on a high-resolution monitor, checking corners zoomed in. If issues persist, revisit alignment and focusing steps. I recommend creating a quick test sheet with specific focus points to systematically evaluate each aspect. The ability to catch and correct issues early prevents major setbacks during critical shoots.
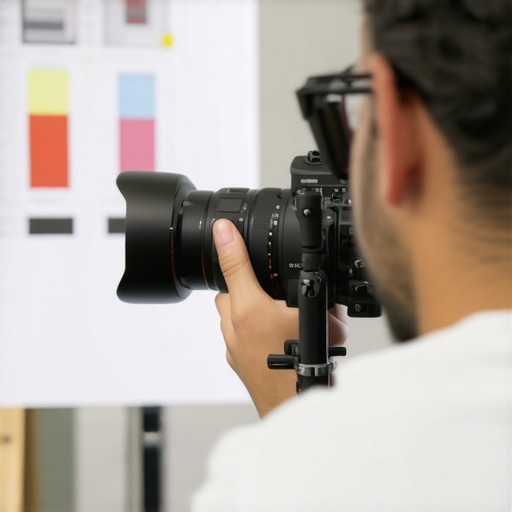 While most filmmakers focus on choosing the right gear, many overlook subtle but impactful details that can make or break a production. For example, the common perception is that cinema projectors simply require high lumens for a sharp image, but the truth is, the type of projection technology—DLP, LCD, or LCoS—affects color accuracy and contrast more profoundly than raw brightness. DLP projectors excel in high contrast and black levels, essential for immersive cinematic experiences, but they can introduce rainbow artifacts if not properly calibrated (source). Many enthusiasts fall into the trap of undervaluing lens quality, assuming any high-end cine lens will suffice for sharp focus across the frame. However, cheaper lenses often suffer from focus breathing and longitudinal chromatic aberration, subtly diminishing image fidelity. Investing in well-crafted glass can yield noticeable improvements, especially when shooting wide or at close distances (more).
Does your lighting setup really serve your creative vision?
Film lighting is more than just illuminating your subject; it shapes mood and enhances storytelling. A common misconception is that more light equals better footage. In reality, overlighting can flatten contrast and wash out textures, reducing depth. Advanced cinematographers manipulate light quality—soft versus hard, diffused versus focused—to craft nuanced atmospheres. Using flags, bounce boards, or grids can control spill and create purposeful shadows, giving your scene a cinematic edge. Remember, meticulous control over lighting nuances can elevate your visuals from good to captivating (source ).
Beware of the Biggest Support Mistake
Think all camera supports are created equal? Think again. Many filmmakers underestimate the importance of precision in support equipment. Cheap tripods or shaky monopods might seem adequate, but they introduce micro-movements that ruin stable shots, especially with wide or zoom lenses. A sturdy, well-maintained support system—rigid dollies, fluid heads, and damping systems—ensures smooth motion and sharp focus. Skimping here can result in subtle shake and jitter that are only obvious in post-production, costing you time and money. For an in-depth look at stabilizing your shots, check out this guide.
Projection Screens: Beyond the Surface
Many assume that any white wall or simple screen will do, but the choice of projection surface hugely impacts image clarity and color rendition. Matte white screens are popular but suffer from ambient light reflections, reducing contrast. High-gain screens might boost brightness but can cause hotspots and unevenness. For controlled environments, acoustically transparent screens with specialized surface textures can offer balanced light diffusion and minimal distortion. Don’t overlook the importance of screen material and gain; these nuanced details could be the difference between an immersive cinematic experience and a flat, washed-out image (more info).
Navigating the complex world of cinema technology involves much more than surface-level choices. Often, it’s the subtle refinements—calibrating your projector precisely, selecting the right lens for your shoot, balancing light quality, or choosing the ideal support system—that distinguish amateur setups from professional-grade cinematography. Be aware of common traps, such as overlooking the importance of support stability or underestimating the impact of projection surface nuances. Mastering these details will help elevate your craft and deliver truly cinematic results. Have you ever fallen into this trap? Let me know in the comments.
Keep Your Gear Running Smoothly with Precision Maintenance
Maintaining high-end cinema equipment demands more than routine cleaning; it involves a strategic approach to calibration, cleaning, and repairs. Personally, I rely on specific tools and software to ensure consistent performance. For instance, I always keep a high-quality lens cleaning kit, including microfiber cloths, appropriate cleaning solutions, and lens brushes, to prevent dust and smudges from compromising image clarity. Regularly inspecting and calibrating your projection system with a projection calibration kit ensures optimal image sharpness and color accuracy over time. Additionally, adopting a systematic maintenance schedule helps identify potential issues early, saving time and costly repairs down the line.
Favorite Tools for Longevity and Reliability
I recommend investing in a digital waveform monitor for precise exposure control and ensuring your camera settings are consistent, which is vital when working with cine lenses and lighting setups. For physical support, I prefer rigid support systems—fluid heads and adjustable tripods—that provide stability during shoots, especially when working with heavy anamorphic lenses or projection equipment. Using quality cable management tools keeps your setup tidy, prevents accidental disconnection, and prolongs equipment life. Remember, regular firmware updates for your camera and projector firmware can also enhance compatibility and fix known bugs, so stay connected with manufacturer channels.
Future Trends and Long-Term Planning
As technology advances toward AI-driven calibration and maintenance diagnostics, expect equipment to self-monitor and alert you to forthcoming issues, drastically reducing downtime. In the realm of projection screens, innovations like ambient light-rejecting surfaces and modular designs will make large-scale cinema more adaptable and easier to maintain.
How do I keep my equipment reliable over time?
Implementing routine checks—like periodically testing light sources with a light meter—and maintaining support systems with high-quality support gear ensures longevity. It’s vital to use tools designed specifically for cinema-grade equipment; generic solutions often fall short. For example, high-end cine lenses require careful handling with proper support and cleaning, documented thoroughly in technical manuals. Moreover, keeping detailed maintenance logs helps track wear and anticipate when replacements or recalibration are needed. Investing time and resources into preventive maintenance pays dividends in consistent, professional results.
Good support and regular calibration not only extend the lifespan of your gear but also guarantee that each shot maintains its intended cinematic quality. For example, high-end projection systems like DLP or LCoS projectors benefit greatly from scheduled filter replacements and optical cleaning, preventing deterioration in contrast and color fidelity. Remember, staying proactive with maintenance tools and techniques leads to fewer surprises during critical shoots. Ready to start implementing advanced maintenance routines? Use a digital waveform monitor to fine-tune your exposure today and experience immediate improvements in image quality.
Lessons the Pros Don’t Talk About
- One of the most eye-opening lessons I learned was how seemingly minor alignment tweaks in anamorphic adapters could dramatically improve corner sharpness, saving me hours of post-production correction. It’s these subtle details that often separate amateur results from professional, cinematic quality.
- I discovered that regularly calibrating my projection system with a precision light meter not only extended my equipment’s lifespan but also ensured consistent, stunning image quality. Overlooking this routine led to inconsistent brightness and compromised contrast, especially as my setup aged.
- In my journey, I found that investing in quality support gear isn’t just about stability—it’s about preserving focus integrity during complex shots. Upgrading from cheap tripods to fluid head systems drastically improved my camera movements and reduced micro-shakes that ruin sharpness.
- Sometimes, the biggest game-changer was learning how to manipulate lighting angles and diffusion techniques. Using flags and reflectors effectively added depth and dimension, elevating my scenes beyond flat lighting setups and truly embracing cinematic storytelling.
- Finally, maintaining a detailed maintenance schedule—including sensor cleaning, support checks, and firmware updates—helped me catch potential issues early, preventing costly downtime and ensuring each shoot maintained its cinematic standard.
Tools That Made the Difference for Me
My essential toolkit for cinematography includes a precision light meter to calibrate projectors accurately, ensuring vibrant images without crushing blacks. I rely on a rigid support system for stability, especially with heavy anamorphic lenses, which keeps my focus sharp and consistent. To keep my lenses pristine, I use a professional lens cleaning kit that prevents dust and smudges from dulling image clarity. Lastly, I harness digital waveform monitors for precise exposure control, ensuring my footage remains well-exposed every time, regardless of lighting conditions.
Time to Elevate Your Cinematic Approach
Remember, mastering the art of cinema equipment isn’t just about acquiring the latest gear; it’s about understanding and maintaining it to unlock its full potential. Each step—meticulous alignment, regular calibration, thoughtful lighting, and diligent maintenance—contributes to the cinematic magic you promise your audience. Don’t hesitate to refine your craft; the road to professional-quality filmmaking is built on attention to these crucial details. Ready to put these insights into practice and elevate your cinematic game? Your next masterpiece is just a tweak away.
What’s the most surprising technical detail you’ve discovered that improved your footage? Share your story below—I’d love to hear your experiences!
,
About the Author
James Duke
ThinkOTS
James Duke is a seasoned professional in the creative production industry, bringing a wealth of technical knowledge and hands-on experience to cinegearguide.com. As a key figure at ThinkOTS, James has spent years navigating the complexities of high-end production environments, where selecting the right equipment is the difference between a successful shoot and a logistical failure. His expertise spans the full spectrum of cinematography gear, from advanced camera systems to the intricate accessories that define modern filmmaking. On cinegearguide.com, James leverages his deep understanding of the industry to provide authoritative insights, gear reviews, and technical guides. He is known for his ability to break down complex specifications into practical, actionable advice for filmmakers of all levels. His perspective is rooted in the real-world application of technology, ensuring that every recommendation is backed by professional standards. James is dedicated to empowering the filmmaking community by sharing his expertise, helping others navigate the ever-evolving landscape of cinema technology with confidence and clarity.
LinkedIn Profile