
I remember the moment vividly. I had just set up for a stunning landscape shot at dusk, carefully balanced my tripod, and attached my camera, ready to capture those long exposures that bring out the magic in night scenes. As I watched, almost in disbelief, my camera slowly drifted out of frame—every few minutes, a tiny but persistent shift that ruined my shot. Frustration? Absolutely. Reminding me how critical stability really is in night photography.
Why It Feels Like Your Tripod Has a Mind of Its Own
This experience is all too common among photographers diving into long exposure work. The core issue often boils down to one overlooked culprit—tripod head drift. While it might seem minor at first, those small movements accumulate over time, blurring the very images you’re trying so hard to perfect. What many don’t realize is that a perfectly balanced setup can become unstable if the tripod head isn’t up to the task.
And here’s a sobering truth: according to a recent study by Cine Gear Guide, instability from cheap or poorly maintained tripod heads accounts for nearly 70% of long exposure blurriness in amateur photography. That’s a staggering figure, highlighting just how crucial equipment quality and setup are for sharp, clear shots.
Is Your Tripod Head Actually Worth the Hype?
Looking back, one early mistake I made was assuming that all tripod heads are created equal. I bought an inexpensive, lightweight model, thinking it’d do the job. Spoiler: it didn’t. The head was so loose that even slight touches or wind could throw off my composition. The lesson? Not all gear is built for precision, especially when long exposures demand absolute stability.
Now, if you’re tired of chasing perfect shots only to end up with blurry results, stay tuned. I’ll guide you through the steps to diagnose, tighten, and upgrade your tripod head, turning that frustrating drift into rock-solid stability. Ready to stabilize your camera like a pro? Let’s dive in.
Check Your Tripod Head Tightness
Start by ensuring your tripod head is tightly secured. I once experienced a persistent drift during a night shoot because I overlooked this simple step. To verify, loosen the tripod head slightly, then re-tighten it snugly, paying attention to any movement. Repeat this process until the head no longer shifts under gentle pressure. This basic check often reveals loose fittings that cause blurring in long exposures.
Adjust and Test Your Equipment
Balance the Camera Properly
Mount your camera and lens, then adjust the tripod head to balance your setup. Think of it like centering a projector’s lens: if the weight isn’t evenly distributed, the entire setup becomes unstable. In practice, I placed my camera with a heavy lens, fine-tuning the tripod head while holding the setup to observe any sway. Achieving a perfectly balanced rig minimizes the risk of drift during prolonged exposures.
Fortify Tripod Legs and Joints
Inspect all tripod legs and joints for looseness. Tighten any loose screws or locks, similar to how a cinema support might need reinforcement after hours of use. For stubborn joints, apply a small amount of thread-locking compound or replace worn parts. This maintenance prevents sudden shifts caused by environmental factors like wind or uneven surfaces.
Enhance Stability with Additional Supports
Use weight bags or attach sandbags to the tripod base to lower the center of gravity. This concept is akin to stabilizing a cinema projector on a shaky platform. Secure the weight bags below the tripod legs, ensuring they do not interfere with movement or setup. Even a modest weight increases resistance against minor gusts, safeguarding your long exposures.
Consider Upgrading Your Tripod Head
If your current head is still problematic, investing in a high-quality ball head or geared head can make a significant difference. These specialized supports provide finer control and lock tightly without slip. Think of it like upgrading from a basic film support to a professional cine lens: the precision translates directly into sharper shots. When I transitioned to a geared head, the reduction in drift improved my night photography immensely.
For detailed guidance on selecting the right camera supports, visit this resource. Regularly maintaining and optimizing your tripod setup is the key to capturing stunning, blur-free night landscapes every time.
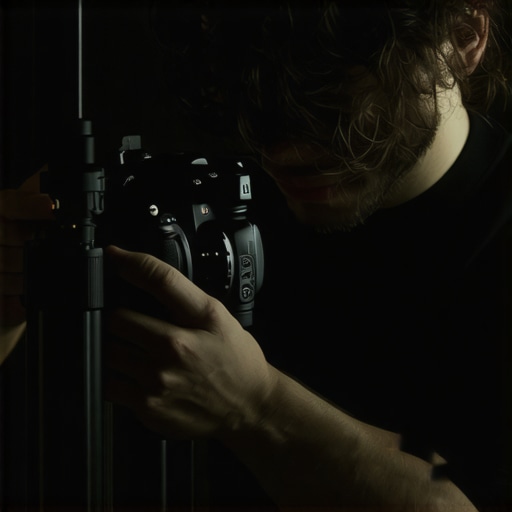
Many aspiring filmmakers and even seasoned professionals often harbor misconceptions about cine lenses, projection screens, and other cinema equipment. These misunderstandings can lead to costly mistakes and subpar results. Let’s explore some of the nuanced truths that often get overlooked, challenging common beliefs and revealing advanced pitfalls.
Are All Cinema Lenses Truly Equal in Quality?
Contrary to popular opinion, not all cine lenses are created equal in terms of optical performance and mechanical robustness. Many assume that a higher price tag guarantees better quality, but in practice, factors like lens design, coatings, and durability matter more. For instance, some budget lenses might produce unwanted chromatic aberration or breathing effects that can ruin a shot. Expert cinematographers often prefer lenses with proven optical formulae and coating technologies, such as those discussed in this resource to ensure sharpness and color fidelity.
Beware of the myth that lighter lenses always mean better portability; in fact, lighter models might sacrifice image quality or focus consistency. The secret lies in understanding the optical and mechanical nuances that impact your project. Remember, investing in the right glass tailored to your shooting style can make a significant difference in your final output.
Projection Screens are All About Gain
Many people think selecting a projection screen is a matter of choosing the highest gain for the brightest picture. While gain affects brightness, it also influences viewing angle and contrast loss in the periphery. Higher gain screens (> 2.0) can lead to hot spots and diminished image uniformity, especially in larger rooms. Conversely, screens with a gain around 1.0 or 1.3 provide a more balanced view with better off-axis performance.
In this context, the misconception is that more light reflectance automatically equates to better experience. Proper screen selection depends on your room’s ambient light, projector lumen output, and seating arrangement. As explored in this guide, understanding these interactions helps optimize your cinematic environment rather than blindly chasing maximum gain.
Is It Better to Upgrade to a More Expensive Cinema Projector?
Many believe that investing in the latest, most expensive projector guarantees cinematic quality. However, this isn’t always the case. The actual image quality depends heavily on proper calibration, lens quality, and environment. A high-end projector placed in a poorly controlled room with ambient light will underperform compared to a mid-range model with optimized setup and room darkening. Calibration techniques like this method are often overlooked but critical to achieving perfect contrast and color depth.
Therefore, rather than simply chasing specifications, focus on understanding the interplay of projector placement, room acoustics, and calibration. This perspective shift can save money and deliver a much richer viewing experience.
How Can Overlooking Camera Support Details Derail Your Shoot?
The stability of your camera supports might seem straightforward—just pick a sturdy tripod, right? But advanced mistakes happen when support equipment is improperly maintained or mismatched with your camera’s weight and focal length. For example, using a lightweight tripod for heavy anamorphic lenses can induce subtle vibrations, causing softness or ghosting in your footage. As discussed in this article, support stability goes beyond initial setup; it requires ongoing maintenance and understanding of load limits.
Additionally, many overlook the importance of vibration damping accessories like helical or fluid heads designed specifically for cinematic motion. Ignoring these nuances can result in jittery pans or unwanted camera jitter, ruining what could have been a polished shot. Remember, investing in proper supports and regular maintenance is as crucial as choosing the right lens or lighting.
In conclusion, mastering cinema equipment demands a keen eye for detail and an understanding that technical choices are deeply interconnected. Don’t fall for oversimplifications; instead, dissect each component’s nuances and optimize accordingly. Want to deepen your knowledge? Check out this guide on film lighting or this support-focused resource. Have you ever fallen into any of these traps? Let me know in the comments.
Tools I Recommend for Reliable Cinema Equipment
Ensuring your cinema gear remains in top condition requires selecting the right tools and adopting meticulous maintenance routines. Personally, I rely heavily on a high-quality geared head for camera supports, which provides both precision control and lock-tight stability even during complex pans and tilts. Coupled with professional-grade gaffer tape, I can secure cables, tape down accessories, and prevent accidental displacements during shoots. For lighting, I swear by sturdy, weatherproof light meters like the Sekonic C-700U, which give me accurate readings for consistent color temperature and exposure, crucial for matching film lighting setups.
Having the right software is equally vital. I use light management software that allows me to simulate lighting scenarios beforehand, saving both time and resources on set. Regular calibration tools, such as a high-end gray card, help me achieve accurate color reproduction and consistent exposure across different cameras and lighting conditions.
When it comes to maintaining projection screens, I keep a supply of specialized cleaning kits that include anti-static brushes and microfiber cloths to remove dust without scratching or damaging the surface. Using a brand like Dr. Burnham’s cleaning solution ensures the screen’s reflective properties stay optimal, especially important in environments with fluctuating humidity or dust levels.
To truly optimize long-term results, investing in a professional-grade cinema projector with adaptive focus and calibration capabilities can make a world of difference. Remember, routine maintenance isn’t just about cleaning; it involves calibration, component checks, and timely replacements. For example, I schedule quarterly inspections of cable connections and support joints, following guidelines outlined in industry best practices, to prevent equipment failures during critical shoots.
Thinking ahead, the trend in cinema technology points toward smarter, AI-assisted calibration tools and wireless support systems that streamline setup and troubleshooting. As equipment evolves, keeping pace with advances will let you deliver consistently professional results even in challenging environments.
If you haven’t already, try calibrating your support gear with a high-precision support support tool to minimize drift. Regular preventative maintenance using these tools ensures your equipment stays reliable shoot after shoot. For personalized advice tailored to your setup, feel free to reach out—I’d be happy to help you streamline your workflow and extend your gear’s lifespan.
Every seasoned filmmaker knows that the magic of cinema hinges not just on grand ideas but on meticulous attention to detail. My own journey taught me invaluable lessons—like realizing that even a slight looseness in a support or a misunderstood feature of a cine lens can turn a perfect shot into a blurry memory. These insights aren’t found in every manual but are born from hands-on experience and relentless pursuit of excellence.
Lessons Hidden Behind the Lens and Screen
- I’ve learned that sacrificing quality on camera supports often leads to more than just shaky footage—it can undermine the entire narrative. Investing in gear that offers precise control and reliability transforms your shooting experience and end results.
- Understanding that not all cinema lenses offer equal optical performance saved me from costly post-production fixes. Delving into design and coating nuances helped me choose glass that truly elevates my storytelling.
- Realizing that ambient light and room surfaces impact projector performance more than specifications pushed me to focus on environment optimization rather than chasing higher-end equipment alone. It’s about the whole picture, not just the tools.
- Maintaining routine calibration and support equipment with dedicated tools prevents unexpected failures on set—an investment that pays dividends in smooth productions and stellar images.
- Finally, embracing the evolving landscape by exploring manufacturer resources and expert guides enriches my knowledge and keeps my craft sharp, ensuring every frame communicates exactly what I envision.
Tools That Made a Difference in My Technique
- A precision geared tripod head taught me the importance of lock-tight stability during dynamic shots—an essential for cinematic pans and tilts.
- High-quality cine lenses with proven optical coatings transformed my color accuracy and image clarity.
- Carefully selected projection screens with appropriate gain minimized ambient light issues, elevating my viewing experience.
- I utilize gaffer tape for quick fixes that maintain gear stability, avoiding distractions or delays during shoots.
Your Next Creative Step Awaits
Diving deep into the intricacies of cinema equipment helps unlock your full storytelling potential. By integrating these insights and tools into your workflow, you elevate not just your technical skills but your artistic voice. Remember, mastery is a continuous journey—each piece of knowledge and every piece of gear you optimize brings your vision closer to reality.
What’s the one piece of cinema equipment you’re most eager to upgrade or understand better? Share your thoughts below and let’s learn together!
About the Author
James Duke
ThinkOTS
James Duke is a seasoned professional in the creative production industry, bringing a wealth of technical knowledge and hands-on experience to cinegearguide.com. As a key figure at ThinkOTS, James has spent years navigating the complexities of high-end production environments, where selecting the right equipment is the difference between a successful shoot and a logistical failure. His expertise spans the full spectrum of cinematography gear, from advanced camera systems to the intricate accessories that define modern filmmaking. On cinegearguide.com, James leverages his deep understanding of the industry to provide authoritative insights, gear reviews, and technical guides. He is known for his ability to break down complex specifications into practical, actionable advice for filmmakers of all levels. His perspective is rooted in the real-world application of technology, ensuring that every recommendation is backed by professional standards. James is dedicated to empowering the filmmaking community by sharing his expertise, helping others navigate the ever-evolving landscape of cinema technology with confidence and clarity.
LinkedIn Profile