Have you ever spent hours setting up a projector, only to be disappointed by dull colors or flickering images that ruin your entire screening? I know I have. There was a time when I thought all projectors were created equal—big mistake. That realization hit me hard during my first few indie film screenings, where my equipment simply couldn’t do justice to my work. It was frustrating enough to want to give up, but I stuck with it—and learned a lot along the way.
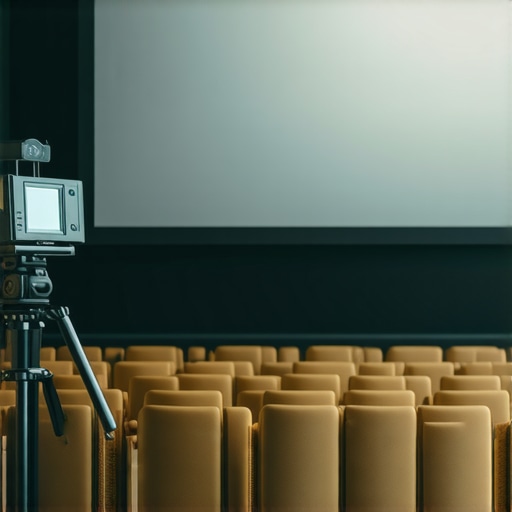
Why Choosing the Right Cinema Projector Matters More Than Ever
In 2024, the world of filmmaking is more competitive and visually demanding than ever. Whether you’re screening for clients, festival juries, or your own team, the quality of your projection can make or break your reputation. A subpar projector can turn a passionate audience into a sleepy crowd, and that’s a risk no filmmaker should take. But here’s the good news: with the right knowledge, you can avoid costly mistakes and find a projector that elevates your work instead of diminishing it.
Have You Faced This Dilemma Before?
If you’ve ever wondered whether investing in a high-end cinema projector is worth the expense or if you’re just falling for marketing hype, you’re not alone. I made this mistake early on—buying what looked good without understanding the technical specs or how they translate into real-world performance. Trust me, that led to more frustration and wasted money. But over time, I discovered some key principles that can help you make smarter choices—principles I’ll share today.
To truly master your projection setup, you need to understand what features matter most and how to evaluate different models. I’ll guide you through the essentials, from brightness and contrast to resolution and color accuracy. Plus, I’ll show you how to avoid common pitfalls, like choosing a projector based solely on specs or ignoring the viewing environment. If you’re ready to stop guessing and start projecting with confidence, keep reading—this guide is designed to turn you into a projection pro.
And if you’re curious about how to improve your overall filmmaking gear, check out this article on cine lenses or explore lighting techniques to elevate your cinematography. Mastering these elements, along with choosing the right projector, can truly elevate your filmmaking game.
Now, let’s dive into what makes a projector worth your investment in 2024.
Choose the Right Brightness for Your Space
Start by assessing your screening environment. Brightness, measured in lumens, determines how vivid your image appears. For small, dark rooms, a projector with 1,500 to 2,500 lumens might suffice. But for larger or well-lit spaces, aim for 3,000 lumens or more. I once tried a 2,000-lumen projector in my garage, only to realize that ambient light washed out the image. Upgrading to a 3,500-lumen model instantly made my footage pop, proving the importance of matching lumens to your environment.
Match Resolution to Your Content and Screen Size
Resolution defines how sharp your image appears. For most filmmaking purposes, 1080p (Full HD) is a solid baseline, but if you’re working on high-resolution projects or large screens, consider 4K. I once experimented with a 720p projector for a documentary shot on a high-end camera. The low resolution was glaringly obvious on my big screen, undermining the visual quality. Always align your projector’s resolution with your final output and screen size to avoid pixelation or blurriness.
Evaluate Contrast for Depth and Detail
Contrast ratio controls the difference between dark and bright areas. A higher ratio yields richer blacks and more detail in shadows. I once borrowed a projector with a 10,000:1 contrast ratio for a test screening. The depth I saw in dark scenes was incredible, making my film look more professional. When shopping, prioritize contrast ratios of at least 10,000:1 for cinematic quality, especially if your scenes rely heavily on lighting and shadow play.
Assess Color Accuracy and Coverage
Color performance influences how true-to-life your images appear. Look for projectors with good color coverage, ideally supporting standards like BT.709 for HD content or wider gamuts for HDR. I tested two projectors—one with basic color support and another with full coverage—and the difference was striking. The richer, more vibrant colors on the latter made my footage feel more immersive. Don’t overlook color, especially if you’re working on projects where visual fidelity matters.
Optimize Your Viewing Environment
Even the best projector falters without proper setup. Use a quality projection screen suited to your space; a matte, non-reflective surface minimizes glare. I once tried projecting onto a painted wall, but reflections caused flickering. Switching to a dedicated projection screen improved clarity dramatically. Position your projector at the correct distance and height—use the zoom and keystone correction tools to align the image perfectly. Regularly clean your lens and filters to prevent dust from degrading image quality.
Test and Calibrate Before Critical Screenings
Always run calibration tests before your main event. Adjust brightness, contrast, and color settings to match your content and environment. Use test patterns or even your own footage to fine-tune the image. I once skipped this step and faced a washed-out picture during a festival screening. After calibration, the visuals were much more vibrant, and the audience’s reaction improved significantly. Calibration is your secret weapon for professional results.
Leverage Accessories for Better Results
Invest in a sturdy, adjustable mount to keep your projector stable and aligned. Consider blackout curtains to control ambient light, especially in multi-purpose spaces. Use external audio systems if your projector’s built-in speakers are weak. These small upgrades can elevate your projection quality and user experience, making your screenings truly cinematic.
Remember, mastering your setup isn’t a one-time task. Regularly revisit and adjust your equipment as your space or project requirements evolve. For more detailed insights on projection screens and accessories, check out this guide on projection screens. By following these concrete steps, you’ll ensure your films are presented at their best, impressing clients, juries, and audiences alike.
Many filmmakers and enthusiasts fall prey to misconceptions when selecting a cinema projector, often based on surface-level specs or marketing hype. Let’s dig deeper into what most people get wrong and uncover the hidden nuances that can make or break your projection quality.
Why the Resolution Debate Is More Complex Than You Think
It’s a common belief that higher resolution always equals better image quality. While 4K offers sharper details, this isn’t the whole story. Factors like lens quality, contrast, and color accuracy can overshadow resolution in perceived image quality. I’ve seen projects shot in 1080p look stunning on a well-calibrated projector, whereas some 4K models underperform due to poor color coverage or low contrast ratios. Remember, resolution is just one piece of the puzzle. For advanced users, understanding how to calibrate your projector to maximize its native resolution can be a game-changer. Check out this guide for more insights.
Beware of the Brightness Fallacy
Everyone insists on buying the brightest projector possible, but more lumens aren’t always better. In fact, excessive brightness in a small, dark room can lead to washed-out images and loss of contrast. Conversely, a too-bright projector in a large, well-lit space might seem ideal, but if it’s not matched with proper screen material and ambient light control, the image still suffers. The key is balancing lumens with your environment. An often-overlooked mistake is ignoring the projector’s lumen output relative to your screen size and room lighting — a miscalculation that can ruin your viewing experience. For detailed recommendations, see this buying guide.
Advanced Question: How Do Contrast and Color Gamut Interact to Impact Image Realism?
This is a nuanced area many overlook. Contrast ratio determines how well your projector can display dark and bright details simultaneously, but color gamut defines the range of colors it can reproduce. A projector with high contrast but limited color coverage may produce deep blacks but dull colors, reducing realism. Conversely, a wide color gamut with poor contrast may produce vibrant colors but flat images. The ideal setup balances both elements, ensuring your footage retains depth, vibrancy, and authenticity. According to industry experts, calibrating both contrast and color coverage together enhances the immersive experience—something that’s worth investing time into. For more technical details, visit this comprehensive guide.
In summary, avoid relying solely on specs like resolution or lumen counts. Instead, consider the holistic performance, calibration, and how your environment influences perceived quality. Many common mistakes stem from shallow understanding — but with a little deeper knowledge, you can select a projector that truly elevates your filmmaking. Have you ever fallen into this trap? Let me know in the comments.
Maintaining your filmmaking gear is crucial for consistent performance and long-term investment protection. Over the years, I’ve found that a few specialized tools and disciplined routines can significantly extend the lifespan of your equipment and ensure reliable results every shoot. Whether you’re working with cameras, lenses, projectors, or lighting setups, having the right maintenance approach is non-negotiable.
How do I keep my gear working smoothly over time?
First, invest in a high-quality sensor cleaning kit for your cameras. I personally prefer the VisibleDust Arctic Butterfly because it uses a gentle electrostatic charge to remove dust without risking scratches. Regular cleaning prevents dust buildup that can cause image degradation or sensor damage. For lenses, I rely on microfiber cloths and lens cleaning solutions like Zeiss Lens Cleaning Fluid. Always clean lenses in a dust-free environment and avoid touching the glass with your fingers to prevent smudges and scratches.
To protect your equipment during shoots and storage, use proper camera supports and cases. I recommend the Manfrotto MT190XPRO4 tripod for stability and durability, especially when shooting in unpredictable environments. Regularly inspecting and tightening tripod screws and mounts ensures your shots stay steady and your gear remains safe.
Power management is another critical aspect. Use surge protectors and uninterruptible power supplies (UPS) like the APC Back-UPS Pro to safeguard your electronics against voltage spikes and outages. I’ve experienced costly gear failures due to power surges, so investing in reliable power solutions is a no-brainer. Additionally, always turn off equipment properly and avoid abrupt power-offs that can corrupt data or damage components.
For digital storage, I recommend maintaining an organized backup system. Use external drives like the Samsung T7 SSD for fast, reliable data transfer, and keep multiple copies in different locations. Regularly verify your backups to ensure data integrity. Also, consider cloud backups for off-site security, especially for important project files.
As technology advances, I predict that smart maintenance tools, integrated with AI, will become more prevalent. These tools can automatically detect issues, schedule cleaning, and even suggest repairs before problems escalate. Staying ahead of these trends involves adopting compatible accessories and software that can interface with your gear for real-time diagnostics.
What about software and calibration tools?
Calibration is key to maintaining consistent image quality. I use the X-Rite i1Display Pro for monitor calibration and the Datacolor SpyderX for projectors. These tools ensure your displays and projection outputs stay true-to-life, which is vital when color grading or screening. Regular calibration—every few months—helps catch drift in color accuracy or brightness that can occur over time.
Finally, don’t forget to review your equipment’s firmware and software updates regularly. Manufacturers often release patches that fix bugs and improve performance. Set a quarterly reminder to check for updates on your camera, projector, and lighting control systems.
Implementing these maintenance routines and tools is an investment in your craft. Try setting up a dedicated maintenance schedule and see how your gear performs better, lasts longer, and saves you time and money in the long run. For more in-depth insights into protecting your valuable equipment, check out this guide on cinema projectors.
The Hardest Lesson I Learned About Cinema Projectors
One of my biggest realizations was that specs like resolution and lumens don’t tell the full story. I once bought a projector with the highest contrast ratio, only to find that its color coverage was limited, making my visuals look dull. It taught me that balancing contrast with color accuracy is what truly creates cinematic depth. I also learned to calibrate my projector regularly, because even the best equipment drifts over time, reducing image fidelity. These lightbulb moments shifted my entire approach from chasing numbers to understanding how different features interact to produce stunning images.
My Essential Toolkit for Better Projection
Over the years, I’ve relied on tools like the Ultimate Guide to Cinema Projectors for in-depth reviews and comparisons. For calibration, the X-Rite i1Display Pro has been a game-changer, helping me ensure my colors are true-to-life. Additionally, investing in a sturdy mount and blackout curtains has dramatically improved my viewing environment. These tools and accessories have become my go-to arsenal for consistent, professional-quality screenings, whether for screening festivals or client presentations.
2 Replies to “Ultimate Guide to Cinema Projectors for Filmmakers 2024”
Leave a Reply
Related Posts
Top Cinema Projectors & Screens for Filmmakers in 2024
My Personal Journey into Choosing Top Cinema Projectors & Screens…
![5 Liquid-Cooled 16K Projectors That End Fan Noise [2026]](https://cinegearguide.com/wp-content/uploads/2026/04/5-Liquid-Cooled-16K-Projectors-That-End-Fan-Noise-2026.jpeg)
5 Liquid-Cooled 16K Projectors That End Fan Noise [2026]
I remember the exact moment it hit me—standing in the…
Ultimate Guide to Cinema Projectors & Cine Lenses in 2024
Ever spent hours tinkering with your home cinema setup only…
Reading through this comprehensive guide really made me think about the nuances of choosing the right projector for filmmaking. I agree that specs like resolution and lumens are important, but they can be deceiving if not considered alongside other features like color accuracy and contrast. When I set up my small studio space, I initially went for a high-lumen projector, thinking more brightness would always be better, but I realized that in my dim environment, a slightly lower lumen model with better contrast and color support actually made a noticeable difference. Calibration became a crucial step for me to get the most out of my setup. Has anyone here experimented with newer calibration tools or software that automatically fine-tune projector settings? I’d love to hear about experiences with those, especially in terms of saving time and improving image fidelity. It’s fascinating how small adjustments can make such a big difference in how your project’s visuals are perceived—truly a game-changer for indie filmmakers or anyone serious about their projection quality.
This article really highlights the importance of comprehensive calibration and understanding your projection environment, which I think often gets overlooked in favor of flashy specs. I remember a time when I was tempted to buy a projector based solely on resolution and lumens, but after a few missteps, I realized that even a 4K projector can underperform if it doesn’t have good contrast or accurate color reproduction. Calibration software and tools like the X-Rite i1Display Pro have truly changed the game for me, allowing much finer control over picture quality. The challenge I often face is maintaining calibration over time, especially when environment or equipment settings change. Do any of you have experience with automation or software that can auto-calibrate or assist in regular recalibration? I’d love to hear what tools or routines work best for keeping projection quality consistent over long periods. It’s such a relief to know that with proper setup and maintenance, you can create a consistently cinematic experience, whether for festivals or client screenings.