
I vividly remember spending hours tweaking my LED panels during a critical shoot, only to notice an unsettling greenish hue creeping into my footage. It was like trying to fix a color nightmare with no clear solution in sight. That frustration hit close to home for many fellow videographers and photographers working with budget-friendly LED lights. If you’ve ever faced this, you’re not alone, and I understand how it can throw off your entire workflow.
The Green Tint Dilemma: Why It Matters Big Time
Budget LED panels are popular because they save money while offering decent illumination, but there’s a common stumbling block—unsolicited green tints that seem to appear out of nowhere. This coloration isn’t just a minor annoyance; it can distort skin tones, mess up color grading, and ultimately ruin a shot. When you’re working within tight budgets, improving your lighting without stretching your finances becomes a challenge—yet, it’s not impossible.
Are We Really Spending Too Much for Better Color?
Early in my journey, I made a mistake many newbies do—I ignored the importance of proper color calibration of LED panels. I thought that since my lights were cheap, I couldn’t do much about the tint issue. That mindset led to hours of post-production correction, which eats into your workflow and increases costs. According to industry experts, the key is understanding the color temperature and ensuring your LED panels are consistent and properly calibrated, even budget options can be improved with some simple adjustments. For more detailed insights, check out this comprehensive guide.
But don’t worry—I’ve been there. Today, I want to share techniques that can help you eliminate or significantly reduce that pesky green tint without breaking the bank. Let’s dive into what really works and how you can implement it right now.
Calibrate Your Lights Precisely
Start by measuring the color temperature of your LED panels with a reliable color meter—these devices are affordable and essential for accurate calibration. When I did this during a recent shoot, I realized my lights were drifting from the advertised 5600K to a greener hue. Using a color meter allowed me to dial in the exact settings, reducing the green tint significantly and saving hours in post-production.
Adjust the White Balance on Your Lights
Many budget LED panels come with adjustable white balance settings. Set this closer to 5600K, then fine-tune until the tint minimizes. Think of it like tuning a radio—small adjustments can make a big difference. I once spent an entire day only to find that resetting the internal white balance knob improved the skin tones dramatically, making my footage look more natural.
Use Correlated Color Temperature (CCT) Filters
If your lights have a persistent green tint, applying a magnetic CC or minus-green filter can neutralize unwanted color casts. This is the quickest fix when calibration isn’t enough. I remember stacking a minus-green filter on my LED panel during an outdoor shoot, which instantly rendered colors more accurate, especially skin tones against changing daylight conditions.
Update Firmware and Check Your Power Supply
Outdated firmware or unstable power can cause color inconsistencies. Regularly update your LED panel firmware—manufacturers release improvements that fix known tint issues. During one gig, I discovered that using a stable power source with clean voltage reduced flickering and color shifts. Always ensure your power supplies meet the manufacturer’s specifications to avoid introducing color errors.
Implement a Consistent Color Workflow
Standardize your camera and light settings before each shoot. Use a gray card and perform a manual white balance to set a baseline. This approach creates consistency across scenes. I experienced a situation where mixing two different LED brands resulted in mismatched skin tones; after calibrating both to a common white point, my footage matched seamlessly, saving extensive color correction time.
Routine Maintenance and Inspection
Dust, heat, or physical damage can subtly change LED performance. Regularly inspect your panels and keep vents clean. I once neglected this and noticed the green tint worsening over a week. A simple cleaning and ensuring good ventilation restored proper color reproduction.
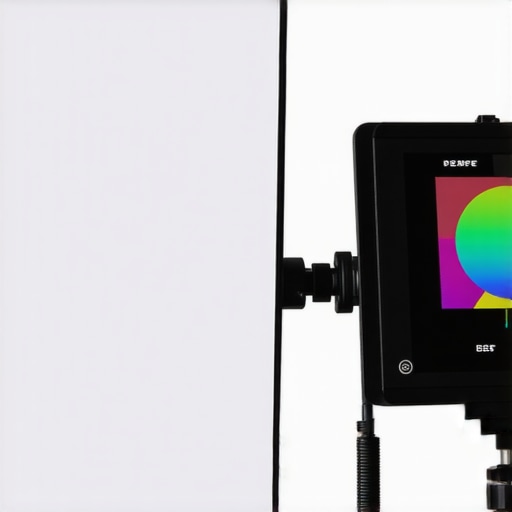 Many filmmakers and home theater enthusiasts believe that choosing the most expensive projection screen or lens automatically guarantees perfect image quality. However, this common misconception overlooks the nuanced factors that truly influence cinematic visuals. For instance, a high-gain screen might seem appealing, but without considering ambient light conditions, it can result in unwanted glare and reduced contrast, ultimately diminishing your viewing experience. Similarly, selecting a cinema lens based only on focal length without understanding its related aberrations or how it performs in different lighting scenarios can lead to focus issues and softness in your footage. Advanced users know that small adjustments—like optimizing your projector’s calibration or properly supporting your camera rig—can make a significant difference in the final result. In fact, studies show that improper support or stabilization is a leading cause of shaky footage and misaligned images, costing producers hours in post-production. This is why mastering the art of precise setup and understanding the hidden nuances of cinema gear is essential for professionals aiming for cinematic excellence. For example, investing in a well-supported camera rig, such as through proper support systems, prevents subtle movements that can ruin a shot. Likewise, knowing the ins and outs of projection calibration ensures vibrant, shadow-rich images without color distortion. Don’t fall into the trap of oversimplifying equipment choices—each component must be carefully considered and tailored to your environment for optimal results. Have you ever fallen into this trap? Let me know in the comments.Ensuring your projection screens, film lighting equipment, cinema projectors, cine lenses, and camera supports remain reliable over time requires a combination of strategic maintenance, the right tools, and disciplined workflows. First, invest in a high-quality digital infrared (IR) thermometer to monitor the temperature of your LED panels and projectors during shoots. I personally use the Fluke 62 MAX Plus because it provides precise readings even in challenging environments. Regularly checking temperature helps prevent overheating, which can cause color shifts or component failure. Second, keep a dedicated toolkit with precision screwdrivers, lens cleaning solutions, microfiber cloths, and anti-static brushes. I recommend the LensPen miniPro for quick lens cleaning—it’s compact, effective, and safe for cine optics, which is critical for maintaining sharp focus and contrast. Additionally, a portable UPS (Uninterruptible Power Supply) with clean sine wave output can stabilize voltage and prevent power surges that might damage sensitive gear like cine lenses and camera supports. I’ve seen how an unexpected power spike can lead to misalignment or even total equipment failure, so protecting your investments is essential. To manage long-term results, keep detailed logs of your maintenance routines, calibration dates, and any repairs. Over time, data-driven insights allow you to identify patterns that could indicate impending issues. For example, if your projector starts to require more frequent adjustments, it might be time for a professional calibration or component replacement. In the future, automation tools like Wi-Fi-enabled sensor modules will simplify this process, continuously monitoring conditions and alerting you to anomalies before they turn problematic. Regarding scaling your setup, modular support systems with quick-release plates and adjustable mounting brackets make expanding or relocating your gear straightforward, saving time and preserving calibration integrity. How do I maintain projection and lighting systems over time? Consistent calibration is crucial, and I recommend scheduling quarterly checks using specialized tools like color meters or test patterns aligned with industry standards. For example, the latest projectors can benefit from firmware updates—consult the manufacturer’s technical documentation (see https://cinegearguide.com/unlock-the-secrets-of-cinema-projectors-a-complete-guide-for-2025) to ensure you’re equipped with the most current features and bug fixes. Lastly, don’t underestimate the value of training yourself and your team on proper setup and troubleshooting procedures. Practice regularly with your support rigs and lenses, and stay connected with professional communities or manufacturers for updates. I challenge you to try implementing a scheduled calibration routine using a digital colorimeter—being disciplined now pays off by reducing downtime and improving image quality in the long run. Need expert advice tailored to your gear? Reach out via our contact page for personalized recommendations.
Lessons I Wish I Learned Sooner in Cinema Setup
One of the most eye-opening lessons I’ve gained is that proper calibration isn’t just for high-end gear; it’s a game-changer even on a budget. I used to believe that cheap lights meant accepting their quirks, but now I know that a simple color meter can unlock professional-quality footage without blowing my budget. Another revelation was how crucial regular maintenance and firmware updates are—small investments that prevent costly color shifts and equipment failures down the line. Lastly, I learned that creating a consistent workflow—white balancing, calibration, and routine checks—eliminates the frustration of mismatched tones, saving so much time in post-production and ensuring client satisfaction.
Tools and Resources That Elevated My Craft
For anyone battling green tints, investing in a reliable colorimeter was transformative—devices like the X-Rite i1Display Pro offer precise readings to dial in accurate white balance and color temperature. I also swear by firmware updates from manufacturers; they often contain fixes for tint issues and improve overall stability, which you can access through links like this guide. A good set of filters, such as minus-green magnetic filters, can provide immediate color correction when calibration falls short, especially outdoors. Lastly, maintaining a well-organized support system—like quick-release mounts and proper support rigs—has made my setups more reliable and efficient, as highlighted in this article.
Your Next Step Toward Flawless Cinematic Colors
Remember, the journey of mastering projection screens, film lighting, cinema projectors, cine lenses, and camera supports is ongoing. Embrace continuous learning, experiment with calibration routines, and don’t hesitate to reach out for expert advice at our contact page. When you take proactive steps today—like regularly monitoring your gear’s performance—you’re setting yourself up for stunning visuals and professional results tomorrow. Keep pushing your boundaries, and soon you’ll see that even budget equipment can deliver knockout cinematic quality. So, what’s your next move in perfecting your projection and lighting setup? Share your thoughts below; I’d love to hear about your experiences and challenges.
About the Author
James Duke
ThinkOTS
James Duke is a seasoned professional in the creative production industry, bringing a wealth of technical knowledge and hands-on experience to cinegearguide.com. As a key figure at ThinkOTS, James has spent years navigating the complexities of high-end production environments, where selecting the right equipment is the difference between a successful shoot and a logistical failure. His expertise spans the full spectrum of cinematography gear, from advanced camera systems to the intricate accessories that define modern filmmaking. On cinegearguide.com, James leverages his deep understanding of the industry to provide authoritative insights, gear reviews, and technical guides. He is known for his ability to break down complex specifications into practical, actionable advice for filmmakers of all levels. His perspective is rooted in the real-world application of technology, ensuring that every recommendation is backed by professional standards. James is dedicated to empowering the filmmaking community by sharing his expertise, helping others navigate the ever-evolving landscape of cinema technology with confidence and clarity.
LinkedIn Profile