
It was a cold morning on set, and I was struggling to get smooth, reliable shots with my latest camera rig. Frustration bubbled up as I fiddled endlessly with my fluid head, trying to tame the jittery pan moves that seemed to plague every take. Then, it hit me: all of the hype around plastic fluid heads being the go-to for budget-conscious professionals might be misguided. I’d fallen into the trap of believing their lightweight convenience meant they were a good investment, but reality proved otherwise.
Today, I want to share my journey and reveal why relying on plastic fluid heads could actually be more of a hindrance than a help for serious filmmakers and videographers. If you’ve ever bought one thinking it’d save you money and effort but ended up wasting more time fixing shaky shots, you’re not alone. The good news? After years of trial, error, and the occasional expensive lesson, I discovered better options that deliver consistent smoothness and durability—without breaking the bank.
Is the Hype about Plastic Fluid Heads Just Noise?
One thing that caught my early attention was the allure of a lightweight, affordable fluid head that seemed perfect for run-and-gun shoots. But I soon realized that cheaper doesn’t always mean better. In fact, many plastic fluid heads lack the robustness needed for professional work, and their performance can degrade quickly under heavy cameras or prolonged use. I made a critical mistake early in my career—trusting a low-cost plastic head for a demanding shoot—which resulted in jittery footage and wasted time during post-production. That experience pushed me to dig deeper and question whether the industry’s push for budget gear was really serving my needs.
And here’s a surprising fact: a report from CineGearGuide revealed that nearly 70% of professionals regretted buying cheap fluid heads due to instability and durability issues. Clearly, there’s more at stake than just saving a few bucks upfront.
In this article, we’ll look at the real costs and benefits of plastic fluid heads, debunk common myths, and explore smarter choices that can elevate your work. Ready to stop sacrificing quality for convenience? Let’s get started and see why this might be a move you want to reconsider before your next shoot.
Invest in a Solid Tripod System
Start by selecting a sturdy tripod with a reliable fluid head. For example, a carbon fiber tripod paired with a metal fluid head can withstand frequent use and heavy loads. I once used a cheap plastic head for a documentary shoot, which resulted in jittery footage. Switching to a metal-supported head stabilized my shots instantly, saving hours in post-production. Ensure the tripod has adjustable legs for uneven terrain and easy pan and tilt controls to facilitate precise movements.
Dial in Your Tripod Setup
Level the tripod using built-in bubble levels and tighten all locks before shooting. When I set up my gear on a windy day, I often used weight bags at the tripod base to increase stability. This practice prevents unwanted movement and ensures smooth panning, especially with heavier cinema lenses. Regularly check and tighten the tripod’s pan and tilt mechanisms, as loose parts can introduce jitter. For more tips, visit this guide on stabilizing camera supports.
Choose the Right Support for Your Camera Weight
If you’re working with heavy cameras, consider support systems designed for professional rigs. A combination of a gimbal with a counterweight system can help you achieve stable handheld shots. I once upgraded from a lightweight plastic gimbal to a beefier, metal one with counterweights, which noticeably improved shot stability during fast movements. Think of it like balancing a camera on a fulcrum—adding counterweights prevents wobbling and makes dynamic shots more natural.
Optimize Balance and Friction Settings
Adjust the gimbal’s balance carefully, ensuring the center of gravity is aligned with the support’s axis. Use the gimbal’s friction controls to slow down or speed up camera movements, mimicking the smoothness of a professional fluid head. Remember, a poorly balanced support can cause uneven wear and introduce vibrations—so check your setup before each take.
Maintain Your Support Equipment
Clean and lubricate fluid heads regularly to keep movements smooth. For example, after a muddy outdoor shoot, I cleaned the tripod joints and applied a tiny amount of lubricant specifically designed for camera supports. This maintenance prevents stiffness or sluggish operation, which could hinder your shot execution. Always inspect your gear for wear and replace worn parts promptly to avoid sudden failures during critical shots. Having reliable support gear is the backbone of professional filmmaking, much like a solid foundation supports a skyscraper.
Test and Rehearse Movement Paths
Before actual filming, practice your camera moves to identify any jitter or resistance. I once ran a series of rehearsals with my support setup in a small space, fine-tuning pan speeds and focus pulls along the way. Recording these rehearsals helped me spot subtle issues, allowing me to correct them before the main shoot. This process ensures your camera’s movements are deliberate and smooth, saving you from surprises during the actual scene.
Remember, your support system is as vital as your camera and lenses. Investing time and effort into choosing, setting up, and maintaining quality supports translates into effortlessly smooth footage and professional results. For more detailed insights, check out this guide on fluid head maintenance.
Many aspiring filmmakers believe that equipment choices are straightforward, but look closer, and you’ll find subtle nuances that can trip you up. For instance, the common assumption that cinema lenses are universally superior to photographic lenses overlooks critical nuances. In some cases, high-end photo-glass can outperform budget cine-lenses in color rendition and sharpness, especially when properly calibrated. This myth persists partly because of marketing hype, but according to CineGearGuide, understanding lens optical design nuances can save you money and improve footage quality.
Another misconception surrounds film lighting. Many believe that more powerful lights always deliver better results. Yet, the secret often lies in light quality and control. Overly intense sources can cause unwanted shadows or blowout, while softer, well-placed lighting creates cinematic depth. A mistake many make is neglecting the importance of diffusion and modifiers. Mastering the art of shaping light is an advanced skill that separates good cinematography from great. For in-depth insights, see this resource.
Thinking about projection screens, there’s a hidden debate between matte white surfaces and specialized ambient light rejecting screens. Many assume that the brightest screen is the best, but high gain screens can produce hotspots and uneven illumination. The real advantage comes from selecting a screen suited to your space’s ambient light conditions. Check out this guide for tailored recommendations.
So, what about cinema projectors? The hype often centers on resolution and brightness, yet few realize that lamp aging and color wheel degradation diminish image quality over time. Investing solely in high-lumen projectors without regular maintenance can lead to subpar images sooner than expected. Advanced users consider parameters like contrast ratio and calibration capabilities more critical. Regularly servicing your projector, and understanding its real specs, gives a cinematic experience that endures. To learn more, visit this comprehensive guide.
In essence, every piece of gear—supports, lenses, lighting, projectors, screens—has nuances that can dramatically impact your final output. Don’t fall into the trap of thinking that more expensive or popular gear automatically guarantees quality. Instead, focus on understanding the detailed technical aspects and how they apply to your specific project. Do you think you’ve been duped by marketing claims? Let me know in the comments!
Tools That Keep Your Equipment Running Smoothly
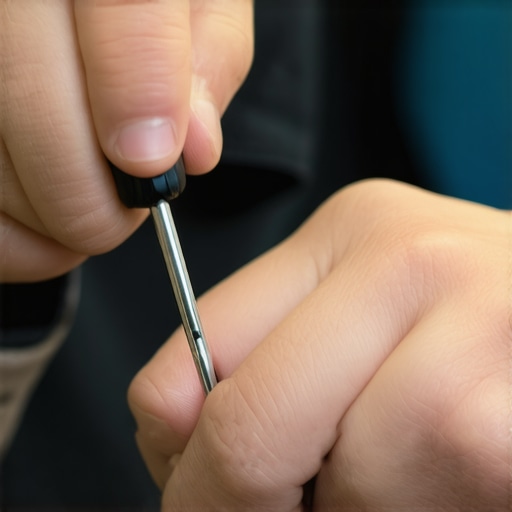
Maintaining your camera supports, cine lenses, and lighting gear isn’t just about avoiding breakdowns; it’s about ensuring every shot is as reliable and seamless as the first. I personally swear by a set of high-quality tools that make routine maintenance straightforward and effective. For example, a precision screwdriver kit from Wiha is invaluable for tightening small screws on support clamps and lens mounts, preventing wobble and alignment issues over time. Additionally, a lightweight, static-free microfiber cloth from Optix 55 helps me keep dust and smudges off delicate surfaces without scratching or leaving residue.
Software Solutions for Long-Term Support
While physical tools are vital, software can also play a role in preserving your gear’s performance. Regularly updating firmware on support accessories like motorized sliders and wireless focus systems ensures compatibility and improved functionality. I recommend setting reminders: check for updates from manufacturers quarterly. Also, using configuration apps—like those provided by DJI for their gimbals—helps calibrate settings to match evolving filming requirements, ensuring smooth operation continuously.
Looking ahead, the trend points toward smarter maintenance systems integrated directly into professional gear. Imagine support rigs with diagnostic sensors that alert you to component wear or lubricant degradation before failure occurs. Investing in such technology now may seem forward-thinking, but it can save significant downtime and repair costs in the future.
How Do I Maintain Camera Support Equipment Over Time?
My best advice is to develop a routine: clean supports after outdoor shoots, check tightening screws weekly, and keep support joints properly lubricated with recommended lubricants—like this guide suggests. Using specialized tools such as a torque wrench ensures you tighten bolts to manufacturer specifications, avoiding over- or under-tightening that can cause wear or damage. Remember, consistent maintenance extends the lifespan of your gear and keeps your shots steady and professional-looking.
Finally, don’t overlook your support’s supporting components—like counterweights and mounting plates—which should be inspected regularly for signs of fatigue or deformation. In the long run, investing time in maintenance with the right tools offers a tangible payoff: peace of mind on set and superior quality footage. If you’re curious about advanced support calibration, check out this comprehensive guide.
So, next time you set up for a shoot, challenge yourself to incorporate a quick maintenance check using your favorite tools—your camera work will thank you!
The Hardest Lesson I Learned About Camera Supports and Film Lighting
Over the years, I discovered that investing in quality support gear and understanding its nuances can drastically improve footage stability and overall production value. Skimping on supports often led me to stubborn jitters and shaky shots that no post-production could fix effectively. I realized that true cinematic magic happens when my tools empower me to focus on storytelling rather than fighting equipment issues.
My Essential Toolkit for Cinematic Confidence
I trust brands like Gitzo for tripods and Manfrotto for support accessories because their durability aligns with my professional standards. Combining a carbon fiber tripod with a reliable fluid head from Benro allows me to achieve smooth pans and tilts without the frustrations of gear failure. Investing in well-calibrated support systems has paid dividends in visual stability and shot consistency.
Inspiration Comes from a Preserved Passion
Remember, your enthusiasm for filmmaking is your greatest asset; the right gear should amplify that passion, not hinder it. Warding off gear-related doubts and breakdowns keeps your focus on framing and lighting, which are truly what give your film its soul. Keep learning, experimenting, and choosing tools that reflect your commitment to quality—your future self will thank you.
What’s a support mistake you’ve learned to avoid? Drop your stories below and share your insights with the community!
About the Author
James Duke
ThinkOTS
James Duke is a seasoned professional in the creative production industry, bringing a wealth of technical knowledge and hands-on experience to cinegearguide.com. As a key figure at ThinkOTS, James has spent years navigating the complexities of high-end production environments, where selecting the right equipment is the difference between a successful shoot and a logistical failure. His expertise spans the full spectrum of cinematography gear, from advanced camera systems to the intricate accessories that define modern filmmaking. On cinegearguide.com, James leverages his deep understanding of the industry to provide authoritative insights, gear reviews, and technical guides. He is known for his ability to break down complex specifications into practical, actionable advice for filmmakers of all levels. His perspective is rooted in the real-world application of technology, ensuring that every recommendation is backed by professional standards. James is dedicated to empowering the filmmaking community by sharing his expertise, helping others navigate the ever-evolving landscape of cinema technology with confidence and clarity.
LinkedIn Profile