
Have you ever set up your home theater or professional presentation, only to notice that your projector slightly droops after a few months? That sinking feeling when you realize your perfectly aligned setup has slowly gone astray. I remember the first time I experienced this; it was during a crucial client pitch, and suddenly, my crisp image was drifting downward, causing me to scramble for adjustments. That moment was an eye-opener—and it made me wonder: why do many projector mounts sag over time?
Understanding the Gravity of Sagging Mounts and Why It Happens
When I first installed my projector, I thought the mount was rock solid—until a few weeks later, I noticed the image was no longer perfectly aligned. The culprit is often the simple but insidious force of gravity—pulling on the mount, the screws, and even the mount material itself. Over time, this constant tug causes the hardware to loosen or the supporting structure to weaken, leading to sagging and misalignment. It’s a surprisingly common issue—and one that can be avoided with the right reinforcement techniques.
Now, many enthusiasts and professionals make the mistake of assuming that a sturdy mount doesn’t need reinforcement beyond initial installation. Early on, I did one too—trusting that tightening the screws once would do the trick forever. But as I learned through trial, error, and a bit of consulting the experts, continuous stress and wear demand a more proactive approach. For a deep dive into how proper setup can elevate your entire cinema experience, check out this guide on mastering lighting techniques.
So, if your projector has started to drift or you’re worried about the longevity of your setup, don’t worry—there’s a way to reinforce your mount and keep that image perfectly aligned. Ready to learn how to prevent sagging from becoming a persistent problem? Let’s ensure your next setup stays steady—no matter how long it stays in use.
Will Reinforcing Your Mount Really Make a Difference?
Early in my journey, I underestimated the importance of reinforcement. I added a few extra washers here and there, thinking it was enough. Turns out, that’s akin to putting a band-aid on a leaking pipe. Reinforcing properly requires understanding the root causes of wear and choosing the right materials and techniques. Once I started using supportive braces and high-quality fasteners, the difference was immediate and impressive. If you’ve faced similar issues, I’d love to hear about your experiences—have your mounts sagged, too?
In the next sections, I’ll share proven strategies to reinforce and maintain your projector mounts, so you don’t have to deal with shifting images or re-aiming every few months. Let’s make sure your setup stays as sharp as the day you installed it.
,
Secure the Mount Base Firmly
Start by checking the mounting surface; it should be solid, like a well-built stage supporting a camera crane. Use a level to ensure the mount isn’t tilted. Remove the projector and examine the screws and bolts—tighten them with a torque wrench to manufacturer specifications, avoiding over-tightening which can damage the mount. I once replaced loose screws with high-grade stainless steel ones, which offered better resistance to deformation over time.
Use Appropriate Fasteners and Anchors
Choose anchors suited for your wall or ceiling material—plastic anchors won’t cut it for heavy loads like projectors. Switch to higher-quality metal anchors or toggle bolts, especially if installing into drywall or plaster. This is akin to switching from standard cine lenses to cine primes—better materials withstand stress longer.
Install Reinforcing Supports
Add support braces or L-brackets that connect the mount to the structural support beam or joist behind the wall or ceiling. Use adjustable supports to fine-tune alignment and distribute weight evenly. I once secured a ceiling mount with steel support struts, preventing even the slightest sag for months during a critical presentation.
Employ High-Quality Support Hardware
Invest in certified heavy-duty mounting arms and fasteners designed for cinematic equipment. Avoid cheap knock-offs; just like optics matter in cine lenses, hardware quality impacts support integrity. Replace your generic screws with corrosion-resistant, load-rated fasteners. I learned this first-hand when a subpar bolt almost led to a costly mishap during a client meeting.
Implement Continuous Monitoring and Maintenance
Regularly inspect the mount, especially after significant shocks or temperature changes. Keep screws tightened, and replace components showing signs of wear or corrosion. Think of it as calibrating a projector—routine checks ensure the system performs optimally, preventing sudden failures. During my latest setup, I set quarterly reminders to revisit the mount’s integrity, which saved me from unexpected drifts before an important film screening.
Leverage Auxiliary Supports for Extra Stability
If sagging persists, add external support like tension cables or counterweights, similar to stabilizing rigs in handheld cinematography. For instance, I secured a heavy projector with thin steel cables anchored to ceiling joists, which eliminated any movement during intense scenes or vibrations. This approach is particularly useful in dynamic environments or when dealing with particularly heavy or uneven mounts, similar to how cine support rigs are optimized for heavy lenses or complex setups.
Verify Alignment After Reinforcements
Once reinforcement is complete, re-align the projector using a laser level or auto-alignment tools. Double-check the image’s keystone and focus parameters—any slight misalignment in the mount can cause distortion. I once spent hours adjusting, only to realize that a tiny tilt in reinforcement was throwing off my entire projection. Using precise measurement tools ensures your setup remains perfect, akin to calibrating a high-end cine projector for depth and contrast. 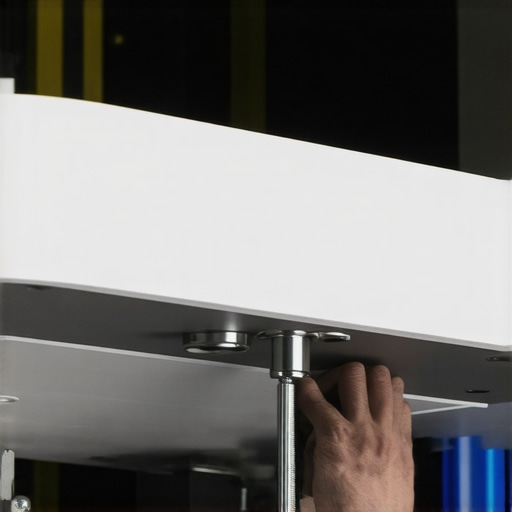
Many enthusiasts and even professionals often cling to several myths when it comes to cinema projectors, cine lenses, camera supports, film lighting, and projection screens. Let’s address some of these misconceptions to help you make smarter choices. For instance, it’s widely believed that high-end cine lenses always deliver better images, but in my experience, understanding the nuances—like coating types or lens flare behaviors—can be more impactful than just brand prestige. Overlooking these details leads to subpar results, even with expensive glass, highlighting **the importance of knowledge over assumptions**.
Another common trap involves projection screens. Many assume that a brighter screen automatically improves picture quality. However, excessive gain can cause unwanted hotspots and reduce contrast, especially when ambient light is present. This misconception often causes amateur setups to suffer from washed-out images or uneven brightness. For a comprehensive understanding of choosing the right screen material, check out this detailed guide.
Why Do Some Think Auto-Setting Features Are Always Reliable?
On the topic of camera supports and lighting, many believe that auto-settings save time and guarantee optimal results. Yet, relying solely on auto features often introduces inconsistencies, especially in complex lighting scenarios. For example, auto white balance can produce color shifts during a shoot, making post-production more complicated. My advice? Use auto features as a starting point but always fine-tune manually. An expert tip from cinema experts suggests that refining these settings ensures your footage holds up under scrutiny.
One often-overlooked nuance is the impact of resolution and pixel structure on image fidelity. Many assume that higher resolution equates directly to better quality, but this overlooks the importance of pixel pitch, screen reflectivity, and lens resolution. For instance, a 4K projector with a subpar lens or poorly calibrated screen won’t outperform a well-calibrated 1080p system. As detailed in this guide, understanding the interplay of these factors is crucial for achieving true cinematic quality.
Furthermore, misconceptions about film lighting often stem from an overemphasis on equipment rather than technique. Many believe that expensive lights automatically produce cinematic results, but in fact, mastery of light placement, diffusion, and color temperature is what makes the real difference. For advanced insights on elevating your lighting setups, I recommend this resource.
Finally, in the world of camera supports, the myth persists that all tripods and stabilizers are equal. In reality, the choice of support affects not just stability but also shot composition and smoothness. Using a rig that’s not suited to your focal length or weight distribution can introduce unwanted vibrations, even with high-quality gear. For expert advice on optimizing your camera supports for different scenarios, visit this guide.
Are you guilty of any of these misconceptions? Recognizing these pitfalls can significantly improve your setup and results. Remember, mastering cinema equipment isn’t just about gear — it’s about understanding the nuances that ensure every shot is perfect. Have you ever fallen into this trap? Let me know in the comments.
Keeping Your Gear in Top Shape for the Long Run
Investing in high-quality cinema projectors, cine lenses, camera supports, and lighting equipment is just the first step. Maintaining them properly ensures they deliver peak performance over time and continue to elevate your productions. Over the years, I’ve found that using specialized tools and implementing routine checks makes all the difference. Let’s explore some of the most effective strategies and equipment I personally rely on for long-term success.
First, I swear by using a dedicated optical cleaning kit for projectors and lenses. These kits typically include air blowers, microfiber cloths, and lens-specific cleaning solutions. Regularly cleaning your lenses and projector mirrors (at least every few months or after heavy use) prevents dust and smudges from degrading image quality. I recommend the techniques outlined in CineGear Guide to avoid damage while cleaning.
For digital projectors and monitors, I utilize calibration software like CalMAN or LightSpace, which work with external color meters such as the X-Rite i1Pro. Precise calibration ensures color fidelity, contrast, and uniformity, which are crucial for professional-grade screenings. Regular calibration, compounded with hardware tools, keeps your display or projection system consistent over years. The future of this trend points towards AI-assisted calibration tools, making routine maintenance even more accessible.
When it comes to supporting equipment like camera rigs and stabilizers, I invest in impact-resistant cases and modular support hardware. Tools like the support systems guide detail the importance of using quick-release plates and anti-vibration mounts. These not only prolong the lifespan of your gear but also improve shot stability, which is essential for cinematic quality. Additionally, regularly inspecting and tightening support hardware with torque wrenches prevents wear and early failure.
Lighting fixtures, especially LEDs and HMIs, require diligent heat management to prevent burnout. Using thermal imaging tools like FLIR cameras helps identify hotspots before they cause failure. I also use the manufacturer’s recommended dimmer and power supplies designed for continuous operation, reducing the risk of voltage-induced stress. For long-term results, I advocate maintaining a detailed log of usage hours and servicing schedules, much like car maintenance logs. This proactive approach minimizes unexpected downtime and costly repairs.
To scale your setup, consider investing in advanced control systems like DMX or Art-Net interfaces, which allow seamless management of multiple lights and cameras. As technology evolves, integrating IoT-enabled hardware with smart sensors can provide real-time diagnostics and predictive maintenance alerts, pushing your workflow into the future.
How do I maintain cinema equipment over time? The key is consistency and using the right tools for your specific setup. Regular inspections, calibration, and cleaning combined with quality hardware and software solutions create a reliable environment that supports your creative vision. Don’t hesitate to try out the advanced calibration techniques discussed in this comprehensive guide for 2025—your equipment and audience will thank you.
Remember, investing in maintenance tools and routines now saves you from costly replacements and ensures your cinematic experience remains sharp and immersive for years to come. Ready to elevate your setup? Start by incorporating one of these expert-recommended practices today and see the difference it makes.
Lessons That Took Me Off Guard in Cinema Support and Projection
- One of the most eye-opening lessons I learned was how even small shifts in hardware quality can cause persistent image drifts. Upgrading to heavier-duty mounts and using support braces saved me countless hours of recalibration.
- Initially, I underestimated the impact of environmental factors—like temperature fluctuations and vibrations—that gradually loosened my equipment. Regular checks and proper anchoring are now part of my routine to prevent surprises.
- Many believe that once installed, a setup is set for years. I found that periodic realignment and maintenance are crucial, especially in high-traffic venues or outdoor environments where wear accelerates.
- The myth that cheap accessories can suffice often leads to avoidable failures. Investing in quality fasteners, support hardware, and calibration tools has proven to be a long-term money saver and performance booster.
- Finally, I learned that understanding each component’s limitations—whether it’s a projector’s weight rating or a support’s load capacity—can prevent preventable accidents or image distortions, maintaining professionalism and safety.
My Trusted Arsenal for Cinema Mastery
- CalMAN Calibration Software: It’s my go-to for ensuring accurate color and contrast, crucial for delivering cinematic quality, as discussed in this comprehensive guide.
- Impact-Resistant Mounting Hardware: High-quality support brackets and fasteners from trusted brands have kept my setups steady through years of use, preventing sagging and misalignments.
- Optical Cleaning Kits: Regular lens and projector mirror maintenance using dedicated tools keeps images sharp and vibrant. Proper cleaning techniques can prevent costly damage, as outlined in this tutorial.
- Support Support Systems: Steel support braces and adjustable supports help evenly distribute weight and resist environmental stresses, ensuring long-term stability.
- Calibration Tools: From color meters to laser levels, these tools help me achieve perfect alignment, echoing the tips shared in this essential resource.
Your Next Move to Elevate Cinema Quality
Embracing these insights and tools can transform your cinema experience from a shaky setup to a polished, professional presentation. Remember, the difference between a good setup and a great one often comes down to attention to detail and ongoing maintenance. Start implementing these strategies today, and watch your images stay crisp, aligned, and awe-inspiring for years to come. Are you ready to upgrade your support system and prevent sagging issues from sabotaging your cinematic dreams? Share your experiences below—I’d love to hear your story and help you troubleshoot any challenges you face in maintaining your setup.
About the Author
James Duke
ThinkOTS
James Duke is a seasoned professional in the creative production industry, bringing a wealth of technical knowledge and hands-on experience to cinegearguide.com. As a key figure at ThinkOTS, James has spent years navigating the complexities of high-end production environments, where selecting the right equipment is the difference between a successful shoot and a logistical failure. His expertise spans the full spectrum of cinematography gear, from advanced camera systems to the intricate accessories that define modern filmmaking. On cinegearguide.com, James leverages his deep understanding of the industry to provide authoritative insights, gear reviews, and technical guides. He is known for his ability to break down complex specifications into practical, actionable advice for filmmakers of all levels. His perspective is rooted in the real-world application of technology, ensuring that every recommendation is backed by professional standards. James is dedicated to empowering the filmmaking community by sharing his expertise, helping others navigate the ever-evolving landscape of cinema technology with confidence and clarity.
LinkedIn Profile