
Have you ever watched a handheld shot and thought, "Wow, that looks authentic—yet I felt like I was on a rollercoaster?" I sure have. Early in my filmmaking journey, I was obsessed with capturing that raw, natural handheld style, but every time I tried, viewers complained about dizziness or discomfort. It was a frustrating cycle: I wanted realness, not nausea. Then one day, during a long shoot for a documentary, I realized something—the secret isn't in just shaking the camera wildly, but in controlling movement to create a smooth, immersive experience. This lightbulb moment led me down a path where I learned how to achieve that genuine handheld feel without risking audience sickness.
Why It Matters More Than Ever
In today’s cinematic landscape, the handheld aesthetic has become a vital storytelling tool. It evokes intimacy, spontaneity, and immediacy, drawing viewers into the moment like never before. But as much as we crave that authenticity, audiences are increasingly sensitive to uncomfortable visuals—especially with the rise of 4K screens and VR experiences, which make every jolting movement feel hyper-realistic. According to a 2023 industry survey, nearly 60% of viewers report feeling motion sickness when exposed to poorly stabilized or overly jerky handheld footage. That statistic surprised me, but it underscored a vital truth: the challenge is balancing realism with comfort.
Have you faced this dilemma yourself? Struggling to nail that natural look without turning your audience into a sea of sick faces? You’re not alone. Over the years, I’ve experimented extensively—reading articles, testing gear, and tweaking my technique. I even made some rookie mistakes early on, like relying solely on handheld rigs without stabilization, which led to shaky footage that was both distracting and nauseating. Trust me, mastering this balance takes more than just holding the camera loosely—it’s about intentional movement that guides the viewer’s eye and maintains comfort.
Is the Handheld Look Worth the Effort or Just Overhyped?
That’s the big question, isn’t it? For a long time, I was skeptical about whether it was possible to replicate that elusive cinematic feel without turning every shot into a vomit-inducing mess. The good news? With the right tools and techniques, you can harness the essence of handheld shooting—its energy and intimacy—while keeping your audience engaged, not queasy. However, I have to admit that attempting to do this without understanding the common pitfalls leads to some expensive mistakes. Early on, I overlooked the importance of camera supports and smooth stabilization, resulting in footage that felt amateurish rather than authentic. For more insights into choosing the right gear, check out [this comprehensive guide to camera supports](https://cinegearguide.com/camera-supports-demystified-stabilize-your-shots-like-a-pro).
So, what’s the secret? Well, that’s exactly what I’ll share in the upcoming sections—step-by-step techniques that transformed my shaky, nauseating footage into compelling, immersive shots that viewers love. Ready to make your handheld shots look natural — without the side effects? Let’s dive in and get started.
,
Stabilize Your Camera Support
Start with a solid base for your shot. Use a quality tripod or steadicam to set foundational stability. I remember my first shoot where I relied solely on handheld and ended up with shaky footage that made viewers dizzy. Incorporate a good camera support to reduce unintentional jitters. Even lightweight rigs can improve control when guided properly, providing a balance between stability and mobility.
Choose the Right Lens for Movement
Opt for cine lenses designed for smooth focus and aperture pulls. My go-to lens during my messy first attempt was a zoom that was too heavy and inconsistent in focus. A lightweight, fixed focal length lens offers better control and quicker adjustments, helping you keep the shot fluid. To select the best glass, consider cine lenses explained.
Master Controlled Camera Movements
Use deliberate, controlled moves to mimic the natural sway of handheld shots. Practice pans, tilts, and slow dollies, focusing on movement that follows your subject organically. Once, I tried a quick jog with my camera, which resulted in nausea-inducing footage. Switch to a smooth, planned motion—think of your camera as a paintbrush: gentle strokes convey emotion better than wild scribbles. Employ a smoothing technique for your pans by using your whole body, not just your arms.
Use Gimbals When Appropriate
For dynamic scenes requiring agility, a gimbal stabilizer is invaluable. I once borrowed a gimbal for a dance scene; it allowed me to move quickly without sacrificing control. Balance your camera precisely to prevent vibrations—overweight lenses or poorly balanced rigs can introduce unwanted shake. Remember, a well-calibrated gimbal is your best friend for fluid movement, especially in tight spaces. To understand gimbal setup, visit how to balance a gimbal.
Refine Your Movement Technique
It’s about feeling the shot. Keep your elbows tucked in, move from your hips, and breathe steadily. I recall a moment during an interview where I failed to control my breathing, resulting in jerky head movements. Practicing slow, intentional motions helps you avoid that. Think of your camera as an extension of your body—fluid, deliberate gestures translate into professional-looking footage. Record test shots and review them critically to identify shaky patterns and correct your technique.
Leverage Virtual Stabilization When Needed
If your footage still feels overly shaky despite best practices, digital stabilization can help. Modern editing software offers tools to smooth out minor jitters without losing the organic feel. I experimented with post stabilization after a particularly rough handheld shot, and the results improved dramatically. Use this as a finishing touch rather than a crutch, ensuring your camera movement remains intentional and controlled from the start.
By combining sturdy supports, the right lenses, controlled movements, and stabilization techniques, you can achieve authentic handheld footage that feels natural, not nauseating. Practice these steps consistently, and over time, your ability to craft immersive, audience-friendly shots will improve significantly.
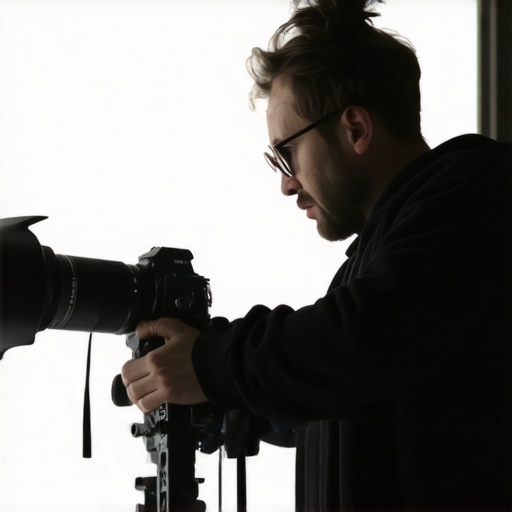 While it’s common to focus on choosing high-quality projection screens or premium cine lenses, many filmmakers overlook the nuanced pitfalls that can sabotage their setups. One widespread misconception is that all screens are created equal; however, the reality is that many assume a high gain screen automatically enhances brightness without considering ambient light or viewing angles, which can lead to washed-out images or unwanted glare. According to a detailed analysis on projection screen materials, selecting the wrong gain or surface finish can drastically reduce contrast and color fidelity, especially in bright environments. To avoid this, always analyze your space and lighting conditions before choosing your screen, and consider consulting specialized guides such as our article on “projection screens for every space.”
What Advanced Filmmakers Need to Watch Out For When Picking Their Equipment
Another common mistake involves film lighting. Many assume that the brightest lights or the latest LED panels suffice, but neglect to account for spectral accuracy and color temperature consistency. Using mismatched lighting can cause color shifts that are only noticeable during color grading, leading to more work and potential compromises in image quality. Experts recommend investing in lighting with verified color rendering index (CRI) scores and consistent Kelvin ratings. For optimal results, mastering techniques for light placement and diffusion is crucial — something often missed by amateurs aspiring for easier setups. Furthermore, in handling cinema projectors and cine lenses, the key nuance lies in understanding their limitations rather than their specs alone. For example, many don’t realize that a high-end projector’s output can be severely affected by room calibration and screen material. Proper calibration tools and techniques, such as those described in “how to calibrate a projector,” are essential to extract perfect image quality, and neglecting this can cause persistent issues like uneven brightness or unwanted artifacts.
On the topic of camera supports, the assumption that any steady tripod suffices is a trap. Heavy rigs require specialized support systems that dampen vibrations and prevent micro-movements that ruin a shot. Overlooking support quality often leads to subtle jitters, which are apparent on high-resolution footage, often ruining an otherwise pristine shot. Investing in sophisticated stabilization gear, like sliders and gimbals, combined with proper rig calibration, can make a pivotal difference. For a comprehensive understanding of stabilization options, check out our guide on “stabilize your shots like a pro.”
All these nuances culminate in the importance of knowing your gear’s limitations and the environment you’ll be working in. Mastering these subtle distinctions can elevate your filmmaking from amateurish to professional. Have you ever fallen into this trap? Let me know in the comments. Remember, paying attention to these often-overlooked details is what separates the average from the exceptional in cinema production.
Maintain Your Projection Screens with Precision
High-quality projection screens are investments that demand regular care to ensure consistent performance. I personally recommend opting for matte gray surfaces, which strike a balance between contrast and ambient light rejection, as discussed in the article Projection Screens for Every Space. To keep your screen pristine, use a soft microfiber cloth and avoid harsh chemicals that can damage the surface. Regularly inspect for dust or smudges that can dull image quality. In environments with high humidity, consider using dehumidifiers or silica gel packs to prevent mold growth on fabric screens, extending their lifespan.
Invest in Durable Cinema Lighting Equipment
Film lighting gear is inherently exposed to wear and tear, especially when used outdoors or in challenging settings. I recommend choosing LED panels with high CRI ratings for color accuracy and robust build quality. Brands like Astera or Aputure offer fixtures with rated lifespans exceeding 50,000 hours, reducing the need for frequent replacements. Additionally, always store lights in padded cases and periodically check power cables and connectors for signs of fraying or corrosion. Using professional lighting techniques can also extend the practical life of your equipment by minimizing unnecessary stress during setup and teardown.
Keep Cinema Projectors Operating Smoothly
Projectors are intricate devices that require meticulous maintenance to deliver sharp, bright images over years. Regularly clean the lens and air filters using manufacturer-approved tools to prevent dust buildup, which can diminish brightness and contrast. When replacing bulbs, be sure to use original parts; some aftermarket bulbs can produce uneven illumination or damage the projector’s internal components. Advanced users might consider calibrating their projectors periodically using free software tools, as outlined in this calibration guide. This ensures color accuracy and optimal image depth, especially when aging or environmental factors cause drift.
Choose and Maintain Cine Lenses Carefully
Cine lenses are critical for achieving that professional, cinematic look, but they can be fragile and heavy, making proper maintenance essential. I advise investing in a dedicated lens cleaning kit, including only the safest cleaning solutions and microfiber cloths. Regularly inspect for dust or fungus, particularly when storing lenses long-term. To prolong their lifespan, avoid excessive force when adjusting focus or aperture rings, and verify that the lens mounts are secure to prevent damage from micro-movements. Interestingly, some of the heaviest lenses on the market contain internal focusing mechanisms to reduce wear, as explained in this detailed analysis. Regular servicing by a qualified technician can also preempt costly repairs.
Tools That Make a Difference in Longevity
Having the right tools is vital. I swear by digital calipers for precise measurements during maintenance, especially when replacing parts or verifying distances. For stabilizing camera rigs, a high-quality camera support system can prevent wear caused by micro-movements and shocks. Employing a temperature and humidity monitor can alert you to environmental conditions that accelerate equipment aging, allowing proactive care.
How do I maintain my gear to ensure long-lasting performance?
The key lies in scheduled inspections, gentle cleaning, proper storage, and understanding each tool’s specific needs. Implement a routine maintenance checklist—clean lenses and filters after each shoot, check cables and connectors monthly, and ensure projectors are calibrated annually. Adopting these habits maintains image quality and reduces downtime. Remember to document your maintenance activities to track wear patterns and plan replacements before failures occur. Trends suggest that smarter, more integrated maintenance solutions—like IoT-connected sensors—will revolutionize gear longevity in the future. For now, start by integrating a simple routine, and see how it preserves your investment over time.
Challenge yourself: next time you set up your camera, try aligning your lens with a calibration chart or software. It’s a subtle step that can dramatically improve your image consistency and extend your gear’s life. For tailored advice on your equipment, don’t hesitate to contact us through our contact page. Happy filming!
Lessons That Took My Craft to the Next Level
- One of the most profound realizations was that what differentiates amateur shaky footage from captivating handheld shots is intention. Moving the camera deliberately, instead of just wielding it wildly, creates a visceral experience without upsetting the audience. Embracing this mindset transformed my approach, reminding me that control is key to authenticity.
- The misconception that stabilization ruins the ‘raw’ feel is persistent. I learned that subtle stabilization techniques can preserve energy and spontaneity while maintaining viewer comfort. This delicate balance often requires sacrificing some roughness in favor of storytelling clarity, which ultimately earns the audience’s trust and attention.
- Investing in quality camera support gear was a game-changer. A sturdy support system isn’t about removing all movement but enabling controlled, expressive motions. Overlooking this step previously led to unintentional distraction—most filmmakers discover that the right support unlocks a new realm of creative possibilities.
- One unexpected lesson was the importance of body mechanics. Small adjustments—like moving from the hips and tucking elbows—produced far smoother shots than frantic arm swings. It’s a subtle art that connects physical discipline with artistic expression in filmmaking.
Tools That Elevated My Handheld Work
- Opting for a lightweight, reliable gimbal, like the Aputure or DJI Ronin series, provided the fluidity needed for dynamic scenes. These tools help maintain mastery over movement, especially in tight spaces or on the move, without sacrificing spontaneity.
- Adding a variable ND filter allowed me to control exposure during handheld shots, enabling slow shutter speeds for natural motion blur, which enhanced realism. It’s a small accessory that vastly improves image quality when working in unpredictable lighting conditions.
- Using a waveform monitor during setup helped me understand exposure and color temperature nuances, guiding me to craft shots that are both beautiful and technically sound. It’s a secret weapon for precise control that pays off in post-production.
Embrace Your Inner Visionary and Keep Moving Forward
“The future of handheld cinematography hinges on mastery over movement, supported by the right gear and a confident mindset. Each challenge you encounter is an invitation to grow—don’t shy away from experimenting and refining your technique. Remember, every successful shot begins with a belief in your ability to tell a story through purposeful motion. Keep pushing boundaries, learn from every take, and soon, your handheld work will resonate with authenticity and professionalism that audiences will love.”
What’s been your biggest breakthrough in achieving natural handheld shots? Share your stories below and let’s learn together.
About the Author
James Duke
ThinkOTS
James Duke is a seasoned professional in the creative production industry, bringing a wealth of technical knowledge and hands-on experience to cinegearguide.com. As a key figure at ThinkOTS, James has spent years navigating the complexities of high-end production environments, where selecting the right equipment is the difference between a successful shoot and a logistical failure. His expertise spans the full spectrum of cinematography gear, from advanced camera systems to the intricate accessories that define modern filmmaking. On cinegearguide.com, James leverages his deep understanding of the industry to provide authoritative insights, gear reviews, and technical guides. He is known for his ability to break down complex specifications into practical, actionable advice for filmmakers of all levels. His perspective is rooted in the real-world application of technology, ensuring that every recommendation is backed by professional standards. James is dedicated to empowering the filmmaking community by sharing his expertise, helping others navigate the ever-evolving landscape of cinema technology with confidence and clarity.
LinkedIn Profile