
Ever been mid-shoot, trying to secure a loose cable or hide a pesky light stand, only to realize your equipment keeps slipping or revealing unwanted distractions? That moment of frustration hit me hard when I first discovered how a simple roll of black gaffer tape could have saved me hours of headaches. It’s a humble tool, but its versatility and reliability make it the unsung hero behind every successful set.
The One Tool I Never Leave Behind
For years, I relied on complex gear and high-end accessories, thinking they were the secret to professional results. But the real game-changer was a roll of black gaffer tape. I remember an early shoot where a misplaced cable nearly tripped someone, risking both safety and footage quality. That sticky black tape kept everything in place, discreetly blending into the darkness, and saved the scene from unintentional chaos. It was a wake-up call—sometimes, the simplest solutions are the most effective. Today, I’ll share exactly why this unassuming tool should be your top priority and how to get the most out of it in your productions.
The Skeptic’s Doubt: Is Gaffer Tape Really That Important?
I get it—at first glance, gaffer tape might seem like just another tape. But early in my career, I made the mistake of dismissing it as a mere temporary fix. That decision cost me time, re-shoots, and unnecessary stress. It wasn’t until I learned how versatile and dependable this tape is that I truly appreciated its value. From securing cables to patching up flagging backdrops, gaffer tape becomes an extension of your creativity and problem-solving toolkit. If you’ve ever faced the chaos of a last-minute on-set emergency, you know how crucial having the right tools at hand truly is. And that’s precisely what I want to show you: how this simple roll can dramatically improve your workflow and peace of mind.
So, have you ever faced a sticky situation on set where you wished you had something reliable? Stick around, because I’m about to reveal everything I’ve learned about mastering gaffer tape for professional results. Let’s dive into why it stands out and how to make it work for you.
To get deeper insights on how to optimize your gear and production techniques, consider exploring mastering film lighting or choosing the right lenses. Ready to become a real pro? Let’s get started!
Ensure Your Projection Screen Is Properly Tensioned
Start by selecting a high-quality, tensioned screen that remains flat and free of wrinkles. Use a spring-tensioned frame to achieve uniform tautness, preventing distortion during projection. When I set up my last virtual production scene, I double-checked the tension with a tension gauge, ensuring crisp, undistorted images throughout the shoot.
Secure the Frame Correctly
Anchor the screen frame firmly to prevent sagging. Use wall mounts or ceiling hooks that can withstand the weight and tension. During a shoot in a rented studio, I used heavy-duty anchors and checked alignment with a level; this kept the screen perfectly flat, resulting in sharp images and minimal keystone correction needed later.
Optimize Your Projection Surface Material
Choose a screen material suited to your environment and projection type. For ambient light conditions, gain-reducing matte surfaces are ideal. In my experience, using a high-contrast material like acoustically transparent screens allowed me to run transparent speakers behind the screen, enhancing audio-visual integration.
Select the Right Finish for Clarity and Contrast
Matte white is versatile, while grey screens improve black levels in ambient-lit rooms. When I upgraded my setup, switching to a velvet border enhanced contrast by absorbing stray light, making images pop, especially during high-dynamic-range (HDR) content.
Position Your Projector for Optimal Image Quality
Place the projector on a stable support, aligned to the center of the screen. Use a tripod or a dedicated projector mount, and employ a spirit level for precise horizontal alignment. I once misaligned a projector, leading to a distorted image; after adjusting with a laser alignment tool, the picture was perfectly rectangular, reducing post-processing efforts.
Fine-Tune Keystone and Focus
Use keystone correction sparingly to maintain aspect ratio integrity. Focus the projector carefully, employing a test pattern with fine details. During my last shoot, I utilized a waveform monitor to check for uniform focus across the entire image, ensuring that no part was out of focus, which is crucial for high-resolution films.
Manage Ambient Light and Reflections Effectively
Control ambient light by dimming or blocking windows with blackout curtains. Add velvet borders or wall treatments to absorb spill light and prevent reflections that diminish contrast. I observed that reflections from nearby windows washed out my projection during daytime shoot, so I added a velvet border around the screen and adjusted room lighting, which restored deep blacks and vibrant colors.
Use Proper Filters and Gels
Apply color correction gels to match projector output with scene lighting, especially for creative effects. During a shoot requiring warm atmospheric lighting, I used CTO gels on the projector, matching the indoor scene’s warmth and avoiding unnatural color shifts.
Test and Calibrate Regularly
Consistently check for alignment, focus, and color accuracy using calibration tools like colorimeters or test patterns. When I last calibrated my setup, running a calibration software ensured consistent results across multiple shoots, saving time and maintaining visual fidelity.
Document Your Settings
Keep a record of optimal configurations for different environments and projectors. This practice quickens setups in new locations. I maintain digital notes with focus distances, keystone values, and color profiles, enabling swift adjustments for recurring setups, especially useful when working across various venues.
Mastering these core techniques ensures your projection setup remains sharp, bright, and reliable, elevating the cinematic experience for your audience. For more advanced guidance, explore projection screen optimization and calibration methods.
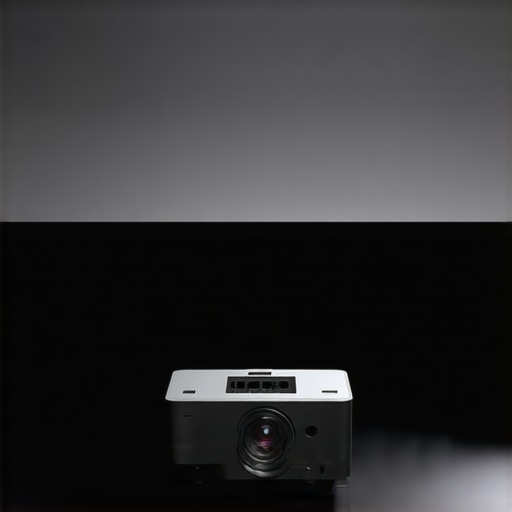 Many practitioners assume that choosing a high-quality projection screen or a premium cinema projector alone guarantees perfect visuals, but this is a misconception rooted in oversimplification. The reality is that the details—like the screen’s gain, the ambient lighting, and even the lens characteristics—are pivotal. For instance, a common myth is that brighter projectors always outperform in ambient-lit environments; however, studies indicate that screen gain and room reflectivity often outweigh raw lumen output in influencing image quality. This nuance can trip up even seasoned professionals if overlooked.
Another overlooked aspect is the impact of lens choice on image sharpness. While many focus solely on the projector’s resolution, the lens’s aberrations, distortions, and mounting stability play a decisive role. Using a cine lens with superior optical quality and maintaining proper support can prevent focus and alignment issues that degrade the viewer’s experience. For advanced setups, understanding how different lenses affect the image, especially in ultra-high-definition contexts, is crucial. Consult resources like this guide on cine lenses for deeper insights.
Switching gears, many underestimate the importance of proper screen support and tensioning. A poorly tensioned or uneven support frame can introduce wrinkles and distortions, which are highly noticeable in high-fidelity projections. Avoid the trap of believing that a simple, inexpensive frame suffices—investing in a tensioned, stable support system ensures uniform image quality and longevity. For more technical advice, see this article on tensioned screens.
Are you optimizing your setup for maximum image fidelity?”
Beyond equipment, lighting setup is paramount. Many overlook how ambient light and reflections interact with screen gain and material. For example, using high-gain matte surfaces in a space with uncontrolled ambient light leads to glare and reduced contrast. Instead, tailored room lighting and selecting the right screen finish, such as velvet borders or low-gain matte screens, can improve contrast ratio significantly. See this guide on projection contrast for tips.
Furthermore, projector placement and keystone correction, often rushed in hurry, introduce subtle optical distortions. Advanced users measure and calibrate their setup meticulously, understanding that even slight misalignments can cause blurring or keystoning artifacts. Regular calibration tools and software, like those discussed in our calibration guide, are essential for maintaining visual precision.
In essence, mastering projection isn’t just about buying high-end gear but understanding and fine-tuning every element involved. Have you ever fallen into this trap? Let me know in the comments.
How to Maintain Your Projection Equipment for Lasting Performance
Investing in quality projection screens, cinema projectors, and cine lenses is only part of the equation. Ensuring these assets stay reliable over time requires deliberate maintenance and smart tool choices. Regular calibration of your projector, for instance, is crucial; using free software like calibration tools can keep your images crisp and color-accurate. Additionally, protecting your lenses from dust and scratches by employing high-quality lens wipes and proper storage prevents degradation of image quality. For cine lenses, routinely checking for fungus or misalignment—especially in humid environments—is essential; storing them in cooled, low-humidity conditions prolongs their lifespan. As projection setups grow more complex, incorporating tools like a keystone correction calibration device can help mitigate distortions that wear on the image quality over time. Looking ahead, the trend points toward automated calibration systems integrating AI, which promise to simplify maintenance by offering real-time corrections. To stay ahead, consider investing in such devices now, or at least stay informed via resources like upcoming industry guides. Remember, consistent maintenance extends the life of your equipment and guarantees a premium viewing experience for years to come.
How do I maintain my cinematic projection gear effectively over the years?
Start with scheduled cleanings of lenses and screens using microfiber cloths and anti-static sprays. Regularly inspect your projector’s lamp and replace it before it burns out completely, which minimizes downtime. Keep a detailed log of calibration settings and maintenance routines; this documentation helps you troubleshoot issues swiftly and ensures consistent results. Use specialized support tools like vibration dampers for projector mounts to prevent misalignment from physical shocks. Incorporate environment control measures—like humidity monitors and dust filters—to protect sensitive components. Finally, stay informed about the latest advances through industry resources and consider upgrading components—like cine lenses or projection surfaces—that can directly influence image fidelity. With diligent upkeep, your investment will deliver stunning visuals season after season. Don’t forget to check out projection screen tips and tricks to optimize your environment. Ready to elevate your setup? Try calibrating your projector with a test pattern today and notice the difference in image clarity and color accuracy.
The Hardest Lessons I Learned About projection screens,cinema projectors,film lighting,camera supports,cine lenses
One of the most profound realizations in my journey was how often I overlooked the significance of meticulous setup over high-end gear. I once believed that a brighter projector or a more expensive lens would solve all image quality issues; however, I discovered that proper tensioning, alignment, and calibration held the real key. This lightbulb moment taught me that attention to detail can override even the most advanced equipment when it comes to cinematic clarity.
3 Common Myths About projection screens,cinema projectors,film lighting,camera supports,cine lenses That Held Me Back
Firstly, I used to think that larger, more expensive projection screens automatically meant better visuals. Turns out, material quality and situational lighting matter far more. Secondly, I believed that high lumen output was the ultimate solution for ambient-lit environments; understanding gain and room reflectivity proved otherwise. Lastly, I assumed that premium lenses always provided superior image quality, but support, proper mounting, and understanding optical distortions made the significant difference. Debunking these myths opened new avenues for cost-effective improvements in my setup, and I encourage you to do the same by questioning assumptions.
What Industry Secrets Nobody Tells You About high-quality film lighting, projection, and support gear
Many seasoned professionals keep tight-lipped about how fine-tuning each component—from achieving perfect tension on a projection screen to selecting the right support system—can drastically enhance output. For instance, subtle adjustments in projector placement and calibration can prevent focus falloff and keystone distortions, saving time and frustration. Recognizing that light quality, support stability, and calibration are just as crucial as your core equipment has been a game-changer in my projects. For deep dives into these topics, check out mastering film lighting techniques or choosing the right lenses.
Your Turn to Elevate the Every Detail
Every cinematic setup benefits immensely from paying attention to the nuances that often go unnoticed. Whether it’s calibrating your projector with professional tools, selecting the optimal screen material, or securing your camera supports correctly—these small steps compound into remarkable improvements. The journey toward professional quality is continuous, but every step taken with focus and care accelerates progress. Remember, the difference isn’t always in acquiring new gear but mastering the art of fine-tuning what you already have. Ready to put these insights into action and see your visuals transform? Let me know in the comments—what’s the one detail you plan to perfect next?
About the Author
James Duke
ThinkOTS
James Duke is a seasoned professional in the creative production industry, bringing a wealth of technical knowledge and hands-on experience to cinegearguide.com. As a key figure at ThinkOTS, James has spent years navigating the complexities of high-end production environments, where selecting the right equipment is the difference between a successful shoot and a logistical failure. His expertise spans the full spectrum of cinematography gear, from advanced camera systems to the intricate accessories that define modern filmmaking. On cinegearguide.com, James leverages his deep understanding of the industry to provide authoritative insights, gear reviews, and technical guides. He is known for his ability to break down complex specifications into practical, actionable advice for filmmakers of all levels. His perspective is rooted in the real-world application of technology, ensuring that every recommendation is backed by professional standards. James is dedicated to empowering the filmmaking community by sharing his expertise, helping others navigate the ever-evolving landscape of cinema technology with confidence and clarity.
LinkedIn Profile