
I vividly remember a shoot where my camera rig suddenly lost power right in the middle of a critical shot. The battery indicator flashed ominously, and I was caught off guard. That moment was a real eye-opener. Like many filmmakers and videographers, I used to rely on small, removable batteries that seemed convenient at first, but soon proved limiting during long shoots or when powering multiple accessories. I realized I needed a solution that could keep my entire rig running smoothly, without constant battery swaps or worrying about power drops.
Why I Switched to V-Mount Batteries for My Camera Rig
The lightbulb moment came when I discovered the remarkable capability of V-Mount batteries. These power sources aren’t just for pro cinema cameras; they can energize your entire setup—camera, monitors, wireless transmitters, LED lights—everything. The promise of transforming my workflow from juggling multiple small batteries to a single, reliable power source was too tempting to ignore. Once I made the switch, my shoots became more efficient, less stressful, and I could focus entirely on capturing great footage, not managing power supplies.
Skeptical about the Power of V-Mount Batteries? Think Again
In my early days, I made a huge mistake—assuming all batteries were created equal—only to find out that cheap, unverified V-Mounts could fry my gear or cut my shoot short. That was a wake-up call. Now, I know that choosing the right V-Mount battery is essential. Not all are built with the same quality or safety standards. A high-quality V-Mount battery can provide clean, stable power, preventing drops and surges that could damage your gear. For more on optimizing your power setup, check out these film lighting techniques.
So, if you’ve ever faced the frustration of a dead battery in the middle of a shoot or are simply tired of the endless juggling of power sources, you’re not alone. In the following sections, I’ll walk you through everything you need to know about selecting, using, and maintaining V-Mount batteries, so you can keep your camera rig powered up and focused on what truly matters—making your vision come to life.
Select the Right V-Mount Battery
Start by assessing your power needs. For a typical DSLR with a monitor and small lights, a 98Wh battery may suffice. However, for longer shoots with multiple accessories, opt for higher capacity options like 150Wh or 190Wh. Remember, quality matters—invest in reputable brands that meet safety standards to prevent gear damage and ensure consistent power output. I learned this the hard way when a cheap, unverified V-Mount fried my monitor, causing delays. After switching to a trusted brand, my equipment remained stable, and my workflow improved.
Match Your Power Demands to Battery Capacity
Calculate the total power draw of your gear to select an appropriate battery. Use the formula: total wattage of accessories multiplied by estimated usage hours. For example, if your setup consumes 50W, and you plan to shoot for 4 hours, a 200Wh battery provides a comfortable margin. I once underestimated this during a location shoot, and halfway through, my battery depleted unexpectedly. Upgrading to a higher-capacity battery eliminated such surprises and extended my shooting time seamlessly.
Configure Your Power System for Efficiency
Utilize smart D-taps or Power Distribution Units (PDUs) to manage multiple devices safely. Distribute load evenly across connectors to prevent overloading one port, which can cause voltage drops or damage. When I set up my rig, I used a PDU with individual circuit protection—this avoided accidental overloads and protected my investments. Implementing a proper wiring hierarchy simplifies troubleshooting and ensures each component receives stable power.
Establish Proper Mounting and Cable Management
Secure your V-Mount batteries firmly using compatible plates and ensure cables are neatly routed. Use cable ties or velcro straps to prevent movement that could disconnect or damage connections. I once left my setup unattended, and a loose cable caused a power interruption during a crucial shot. After that, I adopted a cable management routine, which kept my power stable and minimized accidental disconnections.
Maintain and Monitor Your Batteries Regularly
Keep your batteries at optimal charge levels—avoid letting them fully discharge frequently, as this shortens lifespan. Store batteries in a cool, dry place when not in use. Use a battery monitor or charger with capacity indicators to track charge cycles and health status. When I noticed my battery’s runtime decreasing, I performed a capacity check; it was nearing the end of its life cycle. Regular maintenance saved me from unexpected power failures during critical moments, ensuring smooth production flow.
Practice Safe Handling and Storage
Never expose batteries to extreme temperatures or moisture. Use protective cases during transport to prevent physical shocks. Remember, safety first—improper handling could lead to fires or explosions. I keep my batteries in a dedicated protective case, which minimizes risks and prolongs their life. Investing time in proper storage routines directly impacts the reliability and safety of your power system.
Many filmmakers believe that selecting equipment like supports, lighting, or lenses is straightforward—pick a popular brand, set it up, and shoot. However, beneath these surface choices lie nuanced details that can significantly impact your results. Contrary to popular belief, not all camera supports are created equal, and misconceptions about film lighting and projection screens often lead to costly mistakes.
One common myth is that heavier, more robust support rigs automatically produce smoother shots. While stability is critical, overburdening your gear without considering ergonomics can cause fatigue and instability. For example, a high-quality support system designed with proper weight distribution can make a tangible difference, especially during long takes.
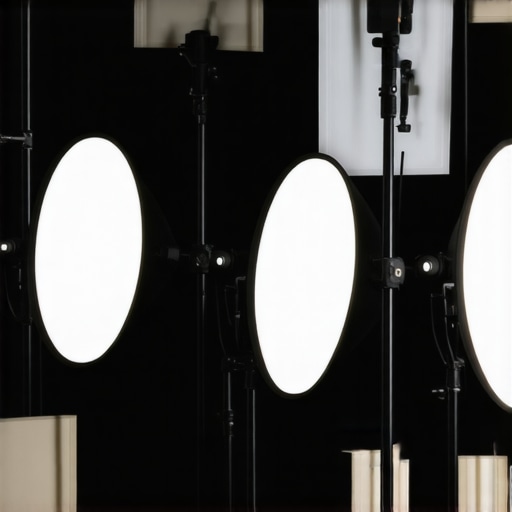
In the realm of film lighting, many assume that high wattage equals better illumination—nothing could be further from the truth. Overlighting not only blurs the scene but also introduces unwanted shadows and color shifts. A more sophisticated approach involves understanding how diffusion and modifiers shape light to craft mood and drama, rather than simply increasing brightness. Skilled use of flags, barn doors, and filters can elevate your lighting game without unnecessary power drain.
Projection screens can be equally misunderstood. Common belief suggests that a brighter screen with a high gain rating always yields a better picture, but in practice, this can cause glare and reduce contrast. Lower gain screens often produce more accurate colors and deeper blacks, especially in well-lit rooms. For optimal results, selecting the right material based on your space and content is critical; check out this guide for tailored advice.
When it comes to cinema projectors, many assume that higher lumens are the ultimate metric. However, in a controlled environment, contrast ratio and color accuracy trump raw brightness. Brightness alone can wash out images, especially if the projector isn’t correctly calibrated. Remember, a projector’s specs matter, but so does proper setup and room environment.
Expert Tip: The choice of cine lenses often gets reduced to focal length and aperture. But, lens quality—such as optical formula and glass elements—affects image clarity and chromatic aberration more than perceived. Even more subtle are the lesser-known differences like coating quality, which influences flare and contrast. Picking the right lens involves understanding these hidden details.
Are You Falling for the Same Assumptions?
Deep down, the real mistake is oversimplifying equipment choices based on assumptions or marketing hype. Ambiguity in specifications can trap you into gear that underperforms in real-world conditions. For instance, relying solely on high wattage or gain ratings without considering room setup, calibration, or technique can sabotage your project.
Let’s not forget a crucial fact: every piece of gear has a story behind its performance. Respecting these nuances ensures you avoid common pitfalls and achieve cinematic quality. Want to sharpen your understanding further? Dive into these lighting techniques, or explore support optimization tips.
Have you ever fallen into this trap? Let me know in the comments, and share your lesson learned—your experience could save another filmmaker time and money.
} }
}
Invest in Quality Tools and Maintain Them Regularly
My go-to approach for ensuring my camera supports, cine lenses, and lighting equipment stay reliable over time revolves around using high-quality tools from reputable brands like Manfrotto, Angenieux, and BFA. These brands offer not just durability but nuanced features that enable fine control during shoots. For maintenance, I perform routine inspections before every shoot—checking for loose screws, worn-out mounts, or compromised cables—and I keep a detailed log of wear and tear to anticipate replacements. Regularly cleaning lens elements with nitrogen-blown wipes and inspecting support gear for stress points prevents unexpected failures. Implementing a proactive maintenance routine ensures my rig performs flawlessly, even during the most demanding projects.
Use Proper Storage and Handling Habits
Proper storage extends equipment lifespan significantly. I store my cine lenses in dedicated, padded cases with silica gel packs to prevent fungus growth and moisture damage. When it comes to supports and projectors, I avoid stacking or leaving them in humid environments; instead, I utilize climate-controlled storage units. Handling practices also matter—when assembling support rigs, I ensure all quick-release plates and locking mechanisms are securely engaged, referencing this guide for specific tips. Consistent handling routines reduce the risk of mechanical failure and keep gear operational for years.
Adopt Modern Tools and Software
To streamline maintenance and long-term use, I rely on software like GearTrack, which helps me keep an inventory of all my equipment, monitor usage cycles, and set maintenance reminders. For example, my cinema lenses are insured and logged with metadata about each usage, enabling me to track fogging or optical anomalies early on. When selecting projector calibration tools, I prefer professional-grade software such as LightSpace, which offers precise color and gamma adjustments—crucial for high-end screening setups (see more). These tools help me identify potential issues before they escalate, saving time and money in the long run.
How do I keep my cinematic gear performing at its peak over time?
The secret lies in a combination of proactive maintenance, proper storage, and leveraging the right software tools. Schedule regular inspections and calibration sessions, especially after long shoots or transport, and always handle equipment with care. Keeping detailed records not only helps with warranty claims but also informs future upgrades. As the industry evolves, I predict that remote diagnostic tools and AI-powered predictive maintenance will become standard—allowing technicians to spot issues before they cause film delays. For now, I recommend trying high-end support accessories like advanced support systems combined with diligent maintenance practices to ensure longevity and reliability.
The Hardest Lessons I Learned About Camera Supports, Film Lighting, Projection Screens, Cinema Projectors, Cine Lenses
One of my most impactful experiences was realizing that premium support systems and precise lighting techniques can make or break a shot. I once attempted to save costs on support gear, only to have my rig wobble during a crucial take, ruining the shot and forcing a reshoot that ate into my schedule. That taught me the importance of investing in sturdy, reliable equipment and understanding its nuances. I also learned that even the finest cine lenses require careful handling and maintenance to preserve optical quality, which is often overlooked. These moments underscored that expertise isn’t just about gear but about respecting its role in storytelling and technical excellence.
Curated Resources That Elevated My Filmmaking Skills
My go-to resources include these film lighting techniques, which taught me how to craft mood and depth without overpowering scenes. For understanding camera supports, this support guide broke down the essentials for stabilizing shots efficiently. When it comes to cinema projectors, this comprehensive guide opened my eyes to calibration and setup practices that yield stunning picture quality. These resources are trusted because they combine practical insight with industry-tested techniques, saving me from costly mistakes.
Your Next Step in Cinematic Excellence Awaits
Learning the ins and outs of camera supports, lighting, and projection technology is a journey, but every step brings you closer to creating compelling visuals. Embrace the nuances, invest wisely in quality gear, and dedicate time to mastering maintenance routines—your future projects will thank you. Remember, the difference between a good shot and a memorable one often comes down to these behind-the-scenes details. Keep pushing your boundaries, and never stop refining your craft.
How have your experiences with camera supports or lighting setups transformed your filmmaking? Share your story below—your insights could inspire others to elevate their cinematic projects.
About the Author
James Duke
ThinkOTS
James Duke is a seasoned professional in the creative production industry, bringing a wealth of technical knowledge and hands-on experience to cinegearguide.com. As a key figure at ThinkOTS, James has spent years navigating the complexities of high-end production environments, where selecting the right equipment is the difference between a successful shoot and a logistical failure. His expertise spans the full spectrum of cinematography gear, from advanced camera systems to the intricate accessories that define modern filmmaking. On cinegearguide.com, James leverages his deep understanding of the industry to provide authoritative insights, gear reviews, and technical guides. He is known for his ability to break down complex specifications into practical, actionable advice for filmmakers of all levels. His perspective is rooted in the real-world application of technology, ensuring that every recommendation is backed by professional standards. James is dedicated to empowering the filmmaking community by sharing his expertise, helping others navigate the ever-evolving landscape of cinema technology with confidence and clarity.
LinkedIn Profile