
I remember the moment I realized my flat projection screen was holding back my cinematic immersion. After hours of fine-tuning my setup, I sat back, only to feel that familiar sense of disconnect—the image didn’t quite wrap around me the way I’d envisioned. It was like trying to watch a sunset through a fogged-up window; everything felt flat, disconnected, and just a little off.
Connecting the Dots: Better Projection Means Better Experience
That eye-opening frustration led me down a rabbit hole of research. I learned that the shape and curvature of your projection screen can dramatically influence the perceived depth and immersion, especially when working with ultrawide formats like 2.35:1. The specific challenge? Standard flat screens often don’t align with the natural field of view or the way our eyes process wide-angle images—creating distortions and uncomfortable viewing angles.
Is Curvature Just a Fancy Trend or Worth It?
Early on, I made the mistake of dismissing curvature as a mere aesthetic gimmick. But let me tell you—when I finally replaced my flat screen with a gently curved one, the difference was night and day. The edges become more consistent in brightness, and the image wraps around your field of vision, reducing eye strain and maximizing engagement. According to industry experts, curved screens improve the sense of depth and make viewing more natural—enhancing both clarity and comfort.
Now, I want to share this insight with you, especially if you’ve been battling with flat screens that limit your cinematic immersion. The good news? There are practical steps and tips that can help you transform your space and elevate your ultrawide projection game.
But before we jump into the technical details, I want to address a question many skeptics ask:
Why Opt for Curved Screens in a World of Flat Panels?
First, let me admit a common mistake I made early in my journey: I underestimated how much screen shape influences viewing comfort and image quality. Don’t fall into that trap. Understanding the subtle yet powerful effects of curvature can drastically improve your setup and viewing pleasure. Curious about how to make this work for your space? Keep reading—because the next sections are packed with insights to help you decide if a curved projection screen is right for you.
Choosing the Right Screen Material
Start by selecting a high-quality projection screen designed for ultrawide formats like 2.35:1. Matte white or grey surfaces are popular, but for enhanced contrast and ambient light rejection, consider specialized materials like ambient light rejecting screens. This initial choice affects image clarity and brightness, especially in your dedicated home theater.
Measuring and Planning Your Setup
Accurate measurement is crucial. Measure your room’s width, height, and distance from the seating area to the screen. Use this data to determine the optimal screen size and curvature radius. A practical analogy is to think of your room as a camera lens; the curvature should complement the viewing angle, much like a lens adjusts focus for clarity. I recall one time I drew a scale diagram on paper, then taped it in the room to visualize how the curved screen would fill the space without distortion, which saved me headaches later.
Building or Purchasing a Curved Frame
If opting for a DIY approach, construct a frame that matches your desired radius. Use lightweight but sturdy materials like aluminum or PVC piping. Wrap the screen fabric tightly over the frame, ensuring no slack or wrinkles. Alternatively, purchase a pre-made curved screen—many brands now offer customizable options. The key is consistency: uneven tension leads to image warping, akin to tensioning a drumhead for a perfect sound, but visually.
Aligning and Mounting the Projector
Position your projector so that it aligns with the center of the curved screen. Use a laser pointer or a plumb bob to mark the exact position on the ceiling or support. Adjust the projector’s lens shift and keystone correction to match the curvature, but avoid over-relying on digital correction—this can soften image quality. I once tested multiple projector positions, moving the unit incrementally and noting the focus and keystone changes, which helped me find a sweet spot for crispness.
Fine-Tuning for Immersive Impact
Once mounted, calibrate brightness, contrast, and color temperature using a test pattern or calibration tools. Test with ultrawide content to observe any distortions or uneven brightness. Adjust the projector’s zoom and lens shift rather than digital keystone correction, preserving image sharpness. For best results, consider consulting experts for precise calibration, or visit our support page for assistance. Remember, patience and meticulous tuning are vital—small tweaks make a significant difference in creating that wraparound cinematic feel.
Incorporating Acoustic Enhancements
Finally, pair your visual upgrade with proper sound treatment. Use acoustic panels and carefully position speakers behind or around the screen to complement the curvature. For detailed acoustic tuning, explore sound and lighting techniques that match your setup’s new geometry. The synergy between visuals and audio elevates your immersive experience beyond just the visual aspect.
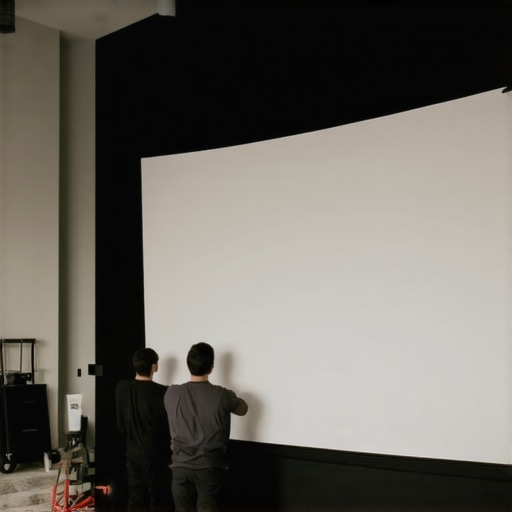 While many assume that choosing the latest projector with the highest resolution automatically guarantees perfect image quality, the truth is far more nuanced. A prevalent mistake among enthusiasts and professionals alike is focusing solely on specs like lumen output or pixel count, neglecting the critical role of proper calibration and understanding of the gear’s limitations. For example, even 4K projectors can deliver subpar images if not correctly calibrated for color accuracy and contrast settings. Moreover, some believe that a larger screen naturally results in better immersion, but without appropriate throw distance and lens selection, size can actually cause image distortions or loss of detail. An often-overlooked aspect is the alignment and support of cine lenses and camera rigs. Inaccurate support can introduce micro-shakes or optical aberrations that undermine shot stability and sharpness. Advanced practitioners know that mastering specific nuances, like lens flare management or proper filter stacking, significantly enhances the cinematic quality.
How do subtle misalignments in camera supports affect footage quality in professional settings?
Studies show that micro-movements and misalignments, invisible to the naked eye during setup, can lead to flickering or inconsistent exposure, especially in multi-camera shoots. Proper support systems with high-precision stabilizers and quick-release mounts are essential to avoid these issues. Be cautious of the myth that all support gear is interchangeable or one-size-fits-all; investing in tailored solutions and understanding their limitations is a key step toward professional-grade production. Additionally, many overlook the importance of proper lighting and diffusion techniques—assuming that modern LED panels alone suffice. Yet, subtle lighting control, such as using scrims or flags, can dramatically influence the mood and texture, making your footage more cinematic. Remember, achieving that professional look often hinges on mastering these nuanced details. For further insights into optimizing your setup, explore [our comprehensive guide on cinema projectors](https://cinegearguide.com/unlock-the-secrets-of-cinema-projectors-a-complete-guide-for-2025) and learn how precision calibration elevates your image quality. Don’t fall for the trap of relying solely on high-end gear; fine-tuning and understanding the subtleties make all the difference.
Why are many filmmakers still undervaluing the importance of accurate lens support and calibration?
Experts emphasize that even minor misalignments can lead to color fringing, focus inconsistency, and vignetting, which compromise the aesthetic and professional standards. Proper camera support and meticulous calibration are the backbone of high-quality cinematography, ensuring every frame meets the intended artistic vision. Have you ever fallen into this trap? Let me know in the comments.
Regular Calibration Keeps Everything Crisp
One of the most overlooked aspects of maintaining cinema gear is consistent calibration. I use the X-Rite i1Profiler for monitors and a SpyderX colorimeter for projectors. These tools provide precise color measurement, ensuring your images stay true to life. I calibrate my projection system monthly, especially when ambient lighting conditions change, which helps maintain consistency and reduces color shifts over time.
Invest in Reliable Maintenance Tools
For cine lenses, I always carry a Giottos Rocket Blaster and Zeiss lens cleaning wipes. Keeping lenses free of dust and smudges prevents micro-aberrations that can degrade image quality. Also, a high-quality blower prevents scratching during cleaning. Regularly inspecting and cleaning your lenses and support gear minimizes wear and tear, extending their lifespan.
Opt for Protective Cases and Storage
Storing your projection screens and lenses in dedicated cases with silica gel packets prevents moisture buildup, which can cause fungus or corrosion. I recommend a sealed environment for long-term storage, especially in humid climates. Proper storage practices safeguard your investment and ensure your equipment remains in optimal condition for years.
Use Advanced Support and Mounting Hardware
Camera supports should be robust and adaptable. I favor Manfrotto tripods with fluid heads because they allow smooth pan and tilt adjustments, essential for professional shots. For projectors, I use ceiling mounts with lockable brackets to secure stability. Upgrading to high-quality supports not only improves shot precision but also reduces maintenance caused by vibrations or misalignments. Learn more about specialized supports at our support guide.
Automate Your System Checks
In the future, automation will play a larger role in maintenance routines. I’ve integrated software like LightSpace CMS for calibration profiling and DR. This system automatically detects deviations and suggests adjustments, saving time and improving accuracy. As technology advances, expect smart sensors embedded into your gear to monitor performance parameters in real-time, alerting you before issues escalate. For professional-grade calibration software, check out our comprehensive guide.
How do I keep my equipment functional over time?
Consistent cleaning, calibration, proper storage, and investing in quality supports are key. Scheduling routine checks and using professional tools ensure your cinema gear operates at peak performance. Remember, neglecting maintenance can lead to costly repairs or replacements down the line—so treat your equipment like the investment it is. I challenge you to implement a monthly calibration routine with your projector—they’re surprisingly easy yet profoundly impactful. Proper maintenance not only prolongs your gear’s lifespan but also keeps your cinematic experience sharp and immersive.
The Hardest Lesson I Learned About cinema projectors,projection screens,cine lenses,film lighting,camera supports
One of the most transformative realizations in my journey was understanding that optimal gear isn’t just about high-resolution specs or the latest features. It’s about the harmony between equipment, setup, and calibration. I once invested heavily in a 4K projector, only to be disappointed by uneven color and contrast—proof that precision calibration and quality supporting tools are just as vital as the hardware itself.
3 Myths About cinema projectors,projection screens,cine lenses,film lighting,camera supports That Held Me Back
Many believe that bigger is always better when it comes to screens or that digital corrections can fix poor source quality. My mistake was trusting myth over mastery. The truth? Proper support and understanding of nuances like lens support stability or projector throw ratios significantly influence your cinematic experience. Don’t let misconceptions cloud your judgment—dive deeper, ask questions, and always prioritize quality calibration over flashy specs.
What Experts Won’t Tell You About cinema projectors,projection screens,cine lenses,film lighting,camera supports
Technicians and seasoned filmmakers agree that meticulous setup—correct lens support, precise alignment, and regular calibration—is what truly unlocks professional-grade visuals. Despite the abundance of tutorials, few emphasize the importance of tailored equipment support or routine maintenance. Embrace these behind-the-scenes details, and you’ll find your cinematic world transforming into an immersive sanctuary, far beyond what raw specs can offer.
My Top Picks to Elevate Your Cinema Experience
- LightSpace CMS: An advanced calibration tool that ensures your projector and monitor outputs match perfectly, maintaining color fidelity over time.
- Cine lenses explained on CineGearGuide: Offering insights into choosing reliable, high-performance lenses tailored for your setup.
- Camera support equipment guides: Essential for ensuring stability and precision during complex shots or static installations.
- Projection screens tailored for every room: Your environment dictates the optimal screen material and curvature for maximum immersion.
Your Turn to Take the Lead
Achieving cinematic immersion is a blend of science, craftsmanship, and a keen eye for detail. Remember, it’s not just about having the latest gear—it’s about knowing how to support, calibrate, and maintain it to unlock its full potential. Take this knowledge, experiment with your setup, and watch your home theater transform into a true cinematic haven. Are you ready to fine-tune your environment and elevate your viewing experience? Share your thoughts and experiences below—I’d love to hear your journey toward cinematic greatness!
About the Author
James Duke
ThinkOTS
James Duke is a seasoned professional in the creative production industry, bringing a wealth of technical knowledge and hands-on experience to cinegearguide.com. As a key figure at ThinkOTS, James has spent years navigating the complexities of high-end production environments, where selecting the right equipment is the difference between a successful shoot and a logistical failure. His expertise spans the full spectrum of cinematography gear, from advanced camera systems to the intricate accessories that define modern filmmaking. On cinegearguide.com, James leverages his deep understanding of the industry to provide authoritative insights, gear reviews, and technical guides. He is known for his ability to break down complex specifications into practical, actionable advice for filmmakers of all levels. His perspective is rooted in the real-world application of technology, ensuring that every recommendation is backed by professional standards. James is dedicated to empowering the filmmaking community by sharing his expertise, helping others navigate the ever-evolving landscape of cinema technology with confidence and clarity.
LinkedIn Profile