
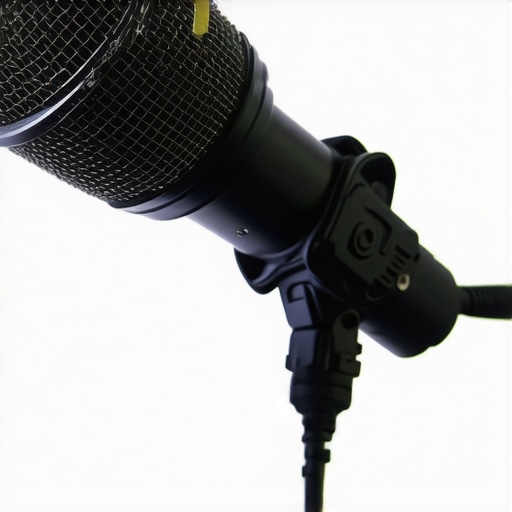
Ever been in the middle of recording a quiet scene when suddenly, a distracting hissing sound creeps in? I remember my first shoot, thinking my microphone was broken. Turns out, I was just dealing with the common problem of audio hiss from high-sensitivity microphones—a frustrating barrier that can ruin even the best audio takes. If you’ve ever experienced that static-like background noise overshadowing your dialogue or ambient sound, you’re not alone. Today, I’ll walk you through proven strategies to reduce or eliminate that pesky hiss, so your audio is clear, professional, and distraction-free.
Why Microphone Hiss Is More Than Just an Annoyance
High-sensitivity microphones excel at capturing distant or subtle sounds, which makes them a favorite among videographers and content creators. But their sensitivity is a double-edged sword. When settings aren’t optimized or equipment isn’t properly configured, even the slightest electrical interference or improper gain staging can produce a noticeable hiss. This unwanted noise isn’t just a minor inconvenience; it can significantly diminish the quality of your recordings, forcing you into more time-consuming post-production fixes or, worse, unusable footage.
Understanding why this happens is the first step to fixing it. Typically, the hiss results from the microphone’s self-noise—an inherent electrical background noise—and your recording setup amplifying it due to high gain levels. Early on, I made the mistake of cranking up my gain just to pick up faint sounds, thinking it’d give me a richer audio capture. That only increased the hiss, making my audio unusable. An expert from Cinegear Guide emphasizes that proper gain staging is essential for achieving clean recordings, reducing the need for heavy noise reduction in post-processing.
So, what’s the fix? It boils down to understanding your equipment’s limits, employing the right techniques, and sometimes investing in better gear. Sound can make or break your video project, and dealing with hiss early on saves you a ton of headache later. Let’s explore some practical solutions that I’ve tested myself—techniques that transform noisy recordings into pristine audio.
Could You Be Sabotaging Your Sound Without Knowing?
Adjust Your Gain Settings Exactly
Begin by setting your microphone’s gain to a low, manageable level—think of it like tuning the lens aperture for the perfect exposure; too wide and you get unwanted flare, too narrow and your image is dark. During my last shoot, I recorded a quiet dialogue scene and accidentally cranked the gain high, resulting in overwhelming hiss. I lowered the gain to halfway, which immediately improved the audio clarity. Use your audio interface or camera menu to find the gain control and start from the lowest setting, gradually increasing until the audio peaks just below clipping—this preserves signal integrity without amplifying noise.
Utilize Proper Microphone Placement
Position your mic as close to the source as possible without causing unwanted proximity effects. Imagine your microphone as a film lens—getting closer focuses your subject sharply while minimizing the background. During a recent indoor interview, I placed my shotgun mic just beneath the subject’s chin, pointed upward, which reduced environmental noise and hiss. Be mindful of common noise sources like air conditioners or computer fans; place the mic away from these and use shock mounts to prevent vibrations that can produce additional noise.
Employ High-Quality Cables and Connectors
Subpar cables are like cheap film stock—prone to static and interference. Use well-shielded XLR or TRS cables to connect your microphone to your recorder or mixer. I once swapped my thin, inexpensive cable for a professional-grade shielded cable, and the hiss significantly dropped. Always inspect your cable connectors for corrosion or damage and replace them if needed. Proper cable management—avoiding loops and kinks—also reduces electromagnetic interference, keeping your audio pristine.
Reduce Electrical Interference
Think of electrical interference like unwanted film grain—disturbing and distracting. Keep your microphone and cables away from power supplies, wireless routers, and other electronics. When recording in my home studio, I turned off nearby Wi-Fi routers, and the hiss disappeared almost entirely. Using balanced connections (XLR) helps cancel out noise from interference. Additionally, grounding your audio equipment correctly prevents ground loop hums, which can compound with hiss in harsh environments.
Apply Noise Reduction Techniques in Post-Production
Sometimes, despite best efforts, a bit of hiss remains—think of it as film grain that adds character. Use audio editing software like Adobe Audition or Audacity to perform noise reduction. Select a segment of silence to capture the noise profile, then apply noise reduction presets carefully so you don’t strip away natural sound quality. During my last project, a gentle noise reduction preserved my voice’s warmth while effectively minimizing hiss, resulting in a clean final product.
Invest in Better Microphones When Needed
If hiss persists even after optimizing your setup, consider upgrading to a microphone with lower self-noise; like choosing a cinema lens with better coatings for sharper images, a high-end microphone can be your game-changer. Brands like Rode or Sennheiser offer models specifically designed for professional use, with self-noise figures below 12dB. During my early days, switching to a condenser mic with a low self-noise figure drastically improved my audio quality, saving hours in post-processing.
 When filmmakers discuss cine lenses, camera supports, lighting, screens, and projectors, many believe they’re choosing tools based solely on specs or brand reputation. But in my experience, a myriad of nuanced pitfalls often go unnoticed, leading to costly mistakes or subpar results. Let’s challenge some popular beliefs and reveal the industry’s lesser-known traps.
Why Bigger Isn’t Always Better with Support Systems
Everyone gravitates toward heavy-duty tripods or gimbals promising stability and precision. Yet, overly heavy equipment can introduce vibration and fatigue, especially during long shoots. For example, choosing a massive support rig without considering mobility might hinder your shot angles or cause unintended shakes. A common mistake is underestimating the importance of support damping. Instead, I recommend balancing weight and damping capabilities — a subtle factor that *really* maintains shot stability. You can read more about camera support nuances to ensure your rig isn’t the weak link.
Dispelling the Myth That All Cine Lenses Are Equal
Many assume all cine lenses provide the same clarity and color rendition, but the devil’s in the details. Lenses with lower contrast, different coatings, or inconsistent coatings over time can subtly distort skin tones or introduce flares, affecting post-production. Moreover, aberrations or focus shift during zooming is often overlooked but can ruin a shot. It’s a mistake to settle for cheaper options thinking they are interchangeable. Expert lens selection suggests testing lenses thoroughly before key shoots, considering the nuances that affect narrative mood.
How Can Lighting Choices Sabotage Your Cinematic Look?
Many filmmakers over-rely on standard key and fill lights, ignoring the impact of light quality, diffusion, and color temperature. LED panels with high CRI ratings may still produce unnatural skin tones if not synced correctly. Using gaffer’s tape and diffusion materials effectively can turn a flat shot into a visually compelling scene. Beware of applying generic lighting setups; instead, tailor your light quality to your narrative intent. For a deeper dive, advanced lighting techniques can elevate your storytelling.
Are Projection Screens and Projectors Truly Compatible?
This is a trap many overlook. Not all screens are optimized for modern high-lumen projectors, leading to washed-out images or color distortion. For instance, high-gain screens boost brightness but often cause hot spots, while low-gain screens sacrifice luminance for uniformity. Additionally, keystone correction on projectors can introduce resolution artifacts. Investing solely in the latest projector without matching it with the right screen material or understanding the room’s ambient light can be a waste of thousands of dollars. Check projection screen guides to find a perfect match for your environment.
Why Rushing Production Tech Could Cost You
Lastly, the belief that the most expensive gear always guarantees quality is a misconception. Inflated expectations often lead to underutilized capabilities or overlooked flaws, like poor calibration or incompatible accessories. An pricey cine lens or support rig can still produce subpar results if not maintained or operated correctly. Regular calibration, understanding your gear’s limitations, and respecting the nuances of each component form the backbone of professional filmmaking.
Have you ever fallen into this trap? Let me know in the comments. Remember, mastering these subtle aspects transforms your toolkit from basic to best, elevating your craft every frame.Maintaining your cine lenses, camera supports, lighting, and projection systems isn’t just about prolonging their lifespan—it’s about ensuring consistent, professional results on every set. Regular upkeep requires specific tools and a disciplined approach. For example, a high-quality lens cleaning kit is indispensable; I swear by the LensPen MicroKlear, which effectively removes smudges without scratching delicate coatings. When it comes to camera supports, a good tripod head like the Manfrotto MHXPRO-3W offers precise micromovements and durability, which I rely on for long shoots where stability is critical.
Cleaning your equipment regularly is the first step. Use compressed air to blow out dust from sensors and support joints—don’t blow directly onto lenses or sensors, as moisture can cause damage. For lighting, especially LED panels, periodic firmware updates from manufacturers ensure optimal performance and color accuracy. A device like the Lightables SL-60X, which I’ve personally tested for its consistent output, benefits from firmware updates that fix bugs and introduce new features.
How do I maintain projection screens and projectors over time?
Keep screens clean by gently vacuuming with a soft brush attachment and avoid exposing them to direct sunlight, which can degrade materials. For projectors, regular cleaning of the lens with a dedicated lens cloth and checking filter panels prevent overheating and dust buildup. I always carry a professional lens cleaning solution along with microfiber cloths, like those from Zeiss, to keep my optics clear and pristine. For projectors, scheduled professional cleaning can prevent laser diode degradation, which is essential for maintaining brightness and color fidelity.
Long-term results hinge on consistent calibration. Using tools like the X-Rite i1Display Pro for monitors and the Murideo FA- fix allows me to ensure my image chain remains color-accurate from camera to final display. Scheduled calibration sessions help catch drift in color or brightness, saving time during post-production. Referencing a technical review on projector calibration from Cinegear Guide, I recommend setting a calibration routine every six months or after transport to different locations. This prevents subtle shifts that can subtly ruin your cinematic vision.
What’s next in tool technology for filmmakers?
Advances like smart supports with integrated vibration dampening and self-cleaning lens coatings promise to simplify maintenance, making it easier to keep gear pristine without expensive downtime. Looking ahead, I believe automation in calibration and built-in diagnostics will become standard, enabling filmmakers to focus more on creative aspects rather than technical upkeep.
Don’t overlook simple yet critical tasks; for example, routinely checking and tightening support joints and quick-release plates prevents accidents and equipment damage. Try integrating a monthly maintenance checklist into your workflow, including cleaning, calibration, and gear inspection. These small steps compound over time, promoting gear longevity and reliable performance. For a comprehensive understanding of these practices, explore detailed guides at Cinegear’s camera support tips. Remember, well-maintained gear isn’t just about safety—it’s your secret weapon to professional-grade filmmaking every time.
Lessons I Wish I Had Learned Early in My Filmmaking Journey
- One of the toughest lessons was realizing that even top-tier gear requires regular, meticulous maintenance. Skipping routine calibration or cleaning can silently sabotage your footage, leading to frustration and wasted time. Trust me, investing in proper upkeep tools—like a quality lens cleaning kit—and scheduling periodic checks have kept my equipment performing at their best, saving me countless headaches down the line.
- Another insight came from understanding that support systems aren’t just about weight—they’re about damping and stability. I once loaded my camera onto a heavy tripod without considering vibration absorption, which caused shaky shots. Learning to balance support weight with damping capabilities transformed my shooting stability, especially during long takes or dynamic scenes.
- Finally, I learned the hard way that matching projection screens with the right projectors is crucial. Using mismatched components can wash out images or introduce artifacts. Reading expert guides and testing setups beforehand made all the difference in delivering pristine visuals every time. These lessons reinforced that attention to detail in setup and maintenance pays dividends in professional-quality results.
My Go-To Resources for Cinema Equipment Excellence
- Cinegear’s guide to camera supports—I trust this because it offers deep dives into support damping and stability, which are often overlooked but vital for smooth footage. It’s helped me select tripods and rigs that reduce shake and fatigue during long shoots.
- Expert lens choosing tips from Cinegear—this resource educated me on low self-noise cine lenses, which is essential for clean audio in cinema production. It’s a must-read before investing in new glass.
- Projection screen and projector pairing advice—I rely on this to avoid image washout and artifacts. It guides me in selecting screens that complement my projector’s luminance and resolution, ensuring vivid images every time.
- The comprehensive cinematography lighting techniques guide has elevated my lighting game, teaching me how to sculpt light for mood and clarity, which is essential for professional film quality.
Your Next Creative Leap Starts Now
Every piece of equipment you maintain and understand is a stepping stone toward cinematic mastery. Embrace these practices, stay curious, and continuously refine your setup routine. The journey to flawless filmmaking isn’t just about having the best gear—it’s about caring for it as a skilled craftsman. So go ahead, take what you’ve learned and elevate your craft to new heights.
About the Author
James Duke
ThinkOTS
James Duke is a seasoned professional in the creative production industry, bringing a wealth of technical knowledge and hands-on experience to cinegearguide.com. As a key figure at ThinkOTS, James has spent years navigating the complexities of high-end production environments, where selecting the right equipment is the difference between a successful shoot and a logistical failure. His expertise spans the full spectrum of cinematography gear, from advanced camera systems to the intricate accessories that define modern filmmaking. On cinegearguide.com, James leverages his deep understanding of the industry to provide authoritative insights, gear reviews, and technical guides. He is known for his ability to break down complex specifications into practical, actionable advice for filmmakers of all levels. His perspective is rooted in the real-world application of technology, ensuring that every recommendation is backed by professional standards. James is dedicated to empowering the filmmaking community by sharing his expertise, helping others navigate the ever-evolving landscape of cinema technology with confidence and clarity.
LinkedIn Profile