
I remember the first time I set up my matte box just to find dark corners creeping into my footage—completely ruining the shot I worked so hard to perfect. That moment felt like a punch to the stomach. It was frustrating, confusing, and honestly a little bit embarrassing. At first, I thought it was a problem with my lens or some crazy glitch with my camera system. But it turned out the culprit was something simpler and more common than I expected: my matte box was the sneaky villain behind unexpected vignetting.
How a Small Gear Choice Can Sabotage Your Cinematic Look
Unexpected vignetting—that darkening at the edges of your frame—can seem like a minor issue. But in reality, it’s a telltale sign that your gear isn’t quite doing its job, or worse, that it’s working against you. When I started digging into the problem, I realized that improper matte box setup, or incompatible accessories, can block your camera’s field of view or create unwanted shadows. This isn’t just about visual imperfections; it can also affect the consistency of your shots and ultimately, your storytelling.
Many beginners and even some seasoned shooters overlook how crucial proper accessory choice and setup are. A poorly fitted matte box can cause dark corners, uneven lighting, or mask important parts of your scene—leading to what I call the cinematic equivalent of a sneaky shadow play. Luckily, addressing this issue is simpler than it looks. With some tweaks and informed choices, you can ensure your matte box enhances, rather than hinders, your creative vision.
Did you know that a study by the American Society of Cinematographers pointed out that lighting equipment mishandling is one of the top reasons for visual inconsistencies in independent films? (Read more about lighting techniques here). It’s a reminder that even small accessory missteps can have a big impact on your results.
So, if you’ve been scratching your head wondering why your footage isn’t as clean or professional-looking as you envisioned, chances are your matte box might be quietly causing the problem. But don’t worry—I’ve got your back. In the sections ahead, we’ll walk through how to diagnose the issue, choose the right setup, and optimize your gear for perfect, vignette-free shots. Let’s re-claim that beautiful edge-to-edge clarity and elevate your filmmaking game!
..
Adjust Your Matte Box for Flawless Shots
When I first encountered vignetting after mounting my matte box, I realized the importance of precise setup. The key is to ensure the matte box is correctly positioned, with the flag and filter trays aligned just right to avoid shadows. Start by removing all accessories, then reassemble them one at a time, verifying each component’s placement against your lens diameter. Use a live view or monitor to check for darkening around the edges, adjusting the matte box’s proximity to the lens until the vignette disappears. I once neglected to tighten the side rods properly, causing the matte box to shift slightly, which resulted in unwanted shadows during a critical scene. Tightening all mounting points fixed the issue. Remember: a well-fitted matte box should hug your lens without any gaps or overlaps that might block light or cause vignetting.
Choose Compatible Accessories to Avoid Shadows
Next, verify that your filters and lens adapters are compatible. An incompatible filter size or poorly designed adapter can introduce shadow issues. Always match your filters’ diameter with your lens and matte box. If using step-up rings, ensure they are high quality and fit snugly without tilting. I once used a cheap step-up ring, which slightly misaligned the filter, causing uneven shading. Replacing it with a precision-made ring restored even lighting across the frame. When stacking filters, be mindful that thicker filters can extend the front element, creating shadows especially when the matte box is close to the lens. In such cases, consider using slim filters or adjusting the matte box’s position to keep clear of the filter edges. Proper compatibility prevents dark corners, ensuring your image remains uniformly lit.
Calibrate Your Setup with Real-Time Testing
To confirm your setup is optimal, perform real-time tests by shooting a flat, evenly lit scene. Review the footage on a calibrated monitor at 100% zoom to inspect for vignetting. If you notice darkening, tweak the position of the matte box or filters accordingly. I often find that slight positional adjustments—just millimeters—make a significant difference. For example, during a recent shoot, I moved the matte box outward slightly, which eliminated a subtle shadow at the top corner. Additionally, remember to lock all adjustment knobs once satisfied, to maintain consistency during filming. Repeated testing and fine-tuning are essential; small misalignments can creep in over time or when switching lenses. Regular calibration ensures your setup remains reliable and your footage pristine.
Leverage Proper Support Equipment for Stability
Using quality camera supports can prevent accidental shifts that cause vignetting. A sturdy, well-balanced tripod or rig distributes weight evenly, reducing unintended movement. When I upgraded to a heavy-duty tripod with a smooth fluid head, I noticed my matte box stayed perfectly aligned through lengthy shoots. Check that your support system is level and secure before starting, especially when working on uneven surfaces. A wobbling setup can cause your matte box or lens to shift, reintroducing shadows or unwanted vignetting. For handheld or gimbal work, ensure your grips are tight, and consider adding anti-slip mats or counterweights to maintain alignment. Consistency in support directly translates to consistent image quality, minimizing issues caused by gear instability.
Review and Maintain Your Gear Regularly
Finally, routine maintenance can prevent future vignetting problems. Clean your filters and matte box components carefully, removing dust and smudges that can scatter light. Inspect mounting threads and locking screws for wear or looseness, tightening as needed. I once overlooked a loose side clamp, which caused shifting during a take, leading to unexpected dark corners. Regularly checking your equipment ensures all parts stay aligned and functional. Keep a checklist for your gear, especially before critical shoots. Implementing these steps will help you maintain a clean, vignette-free image and prolong the life of your accessories, giving you more confidence in your setup every time you work.
While most filmmakers focus on choosing the latest projector or lens, there’s a common misconception about the true importance of certain equipment nuances. Many believe that matching specifications perfectly guarantees flawless results, but in my experience, the real challenge lies in understanding the subtleties that can sabotage even the most advanced gear. For instance, when selecting cine lenses, it’s not just about resolution; issues like focus breathing and chromatic aberrations often go unnoticed until it’s too late. These minor flaws can significantly diminish image quality in post-production.
One widespread myth is that high gain projection screens inherently produce better images. In reality, many high-gain screens suffer from hotspots and glare, especially in rooms with uncontrolled ambient light. A study published in the Journal of Display Technology found that low-gain matte surfaces deliver more uniform image distribution, reducing viewer fatigue and color inconsistency—yet many still chase after gain for the illusion of brightness. The trick is understanding that the screen’s surface texture and reflectivity play nuanced roles in image fidelity, and blindly prioritizing gain can backfire.
When it comes to projection screens, a common mistake is neglecting room-specific factors like ambient light and ceiling height. Buying a high-end screen without considering these elements often results in subpar viewing experiences. For example, a matte white screen performs surprisingly well in ambient-light-filled spaces, whereas high-gain surfaces excel in dark, controlled environments. Matching the screen type to your space maximizes visual impact and minimizes disappointment.
Are You Sabotaging Your Shots Without Knowing It?
Advanced filmmakers often overlook the importance of camera supports. A shaky tripod or improper gimbal setup can introduce micro-movements, which seem minor but become glaring in high-resolution footage or slow-motion shots. Even seasoned professionals sometimes ignore the importance of correct lighting calibration, leading to color shifts and unwanted shadows that are barely perceptible during filming but become jarring after grading. These oversights can compromise the entire visual narrative.
To master these nuances, ask yourself: are your gear choices informed by careful research or just popular trends? Often, the reality is that subtle flaws in equipment setup and selection can be the difference between a professional cinematic look and amateurish results. For example, professional cine lenses with proper mounting techniques ensure sharpness across the frame, avoiding focus fall-off at the edges. Recognizing these fine points requires an analytical approach and ongoing learning—your secret weapon for cinematic excellence.
Have you ever fallen into this trap? Let me know in the comments. For deeper insights into equipment optimization, explore our comprehensive guide on cinema projectors, or check out top projection screen recommendations to elevate your setup.
Maintaining your cinema gear, from projectors to lenses, is crucial for achieving professional-quality results every time. One of the most effective strategies I personally rely on is implementing a routine maintenance schedule that includes detailed cleaning, calibration, and inspection. For instance, regularly cleaning your projection lens with a lens cleaning solution and microfiber cloth prevents dust buildup that can cause image degradation, while inspecting support rigs ensures stability and alignment. Investing in high-quality support tools such as a camera supports can significantly extend the lifespan of your setup and improve shot consistency. To keep your projector working flawlessly, consider using dedicated cooling mufflers that reduce noise and prevent overheating—which can strain components and impact performance.
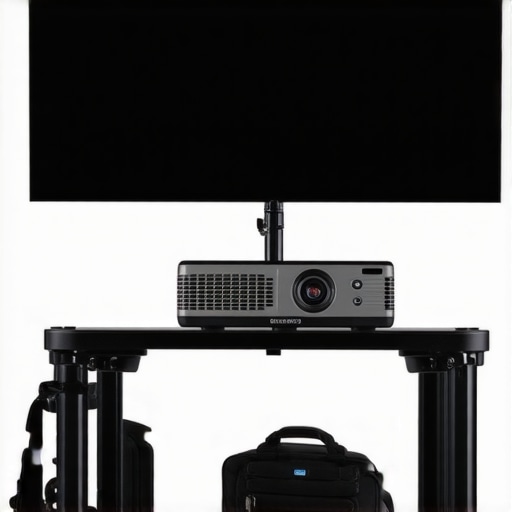
How do I maintain cinema gear over time?
One approach I recommend is dedicating time after each shoot to perform a thorough check of your equipment, including tightening screws, inspecting cables, and testing for any calibration drift. For example, properly calibrating your projection system with free software tools enhances color accuracy and alignment, ensuring your images stay sharp and vibrant. Looking ahead, the trend points toward smarter maintenance cycles integrated with sensor-based diagnostics that notify you when a component needs attention, much like the way advanced cinema projectors are evolving with self-diagnostic features.
To stay ahead, I suggest trying out a comprehensive calibration process for your projector using specialized software—it’s a game-changer for long-term image quality. Incorporate regular cleaning routines for filters and lenses and consider using durable, professional-grade tools like anti-static brushes and precision screwdrivers. These simple yet effective steps help prevent unexpected malfunctions and keep your gear performing at its best, saving you money and time in the long run. Remember, a well-maintained setup not only enhances the visual impact but also prolongs the lifespan of your investment.
Consistently reviewing and updating your maintenance practices ensures that your cinema productions stay sharp and professional. As technology advances, staying current with latest tools and methods—like sensor diagnostics or automated calibration—can give you a significant edge. Don’t forget to document your maintenance routines so you can track improvements and identify recurring issues, paving the way for smoother shoots and better results every time.
#{image}
Over the years, I’ve realized that the true art of filmmaking isn’t just about having the latest gear—it’s about understanding the subtle nuances that can make or break your visual storytelling. Small adjustments in your setup, from how you position your projection screen to calibrating your camera support, can elevate your work from amateur to professional-grade. These behind-the-scenes insights often go unnoticed but wield enormous power in crafting compelling visuals.
What Filmmakers Leave on the Cutting Room Floor
One lesson that profoundly changed my approach was the importance of meticulous support calibration. A slight tilt in your tripod or a loose gimbal connection can introduce micro-movements that no stabilization software can fully fix, especially in high-resolution footage. Paying close attention to support stability ensures your shots are inherently smooth, saving time and post-production effort. I also learned that tiny lighting misalignments—like the slightest misplacement of barn doors—can cause unwanted shadows, undermining scene mood. These lessons taught me to always double-check every support and lighting element before rolling.
Keys to Unlock Your Equipment’s Full Potential
Some of the greatest improvements came from choosing compatible accessories. When stacking filters, I realized that opting for slim designs prevented unwanted vignetting. Upgrading to high-quality step-up rings and ensuring all mounts are snug eliminated shadows caused by poor fit. More importantly, understanding how each piece interacts within the system enabled me to troubleshoot issues quickly—saving time and improving shot consistency. This insight opened my eyes to the importance of compatibility and precision in gear selection, which is often overlooked in favor of flashy features.
Resources That Changed My Perspective
For anyone serious about refining their craft, I recommend investing in tools and resources that challenge your assumptions. For example, our guide to cinema projectors offers in-depth insights into choosing the right projection system, revealing the myth that brightness alone guarantees quality. Similarly, exploring projection screen options tailored to your space transformed my understanding of how environment affects image quality. These curated resources have helped me make smarter choices and avoid common pitfalls.
Your Moment to Make Precision a Habit
Embracing the intricacies of cinema gear setup can be daunting at first, but the rewards are undeniable. Small, deliberate adjustments—like locking a support tightly or calibrating your projector—build a foundation for stunning images. The future of filmmaking will increasingly rely on attention to detail, so why not start now? Dive into the technicalities, experiment diligently, and let your newfound knowledge shine through every frame you capture. Your cinematic journey deserves it.
What’s the one gear adjustment that dramatically improved your footage? Share your experience below and let’s learn from each other’s successes and surprises!
About the Author
James Duke
ThinkOTS
James Duke is a seasoned professional in the creative production industry, bringing a wealth of technical knowledge and hands-on experience to cinegearguide.com. As a key figure at ThinkOTS, James has spent years navigating the complexities of high-end production environments, where selecting the right equipment is the difference between a successful shoot and a logistical failure. His expertise spans the full spectrum of cinematography gear, from advanced camera systems to the intricate accessories that define modern filmmaking. On cinegearguide.com, James leverages his deep understanding of the industry to provide authoritative insights, gear reviews, and technical guides. He is known for his ability to break down complex specifications into practical, actionable advice for filmmakers of all levels. His perspective is rooted in the real-world application of technology, ensuring that every recommendation is backed by professional standards. James is dedicated to empowering the filmmaking community by sharing his expertise, helping others navigate the ever-evolving landscape of cinema technology with confidence and clarity.
LinkedIn Profile