
Ever been on set, setting up a crucial shot, only to watch your C-stand slowly slide out of position? It’s a frustrating moment—your heart sinks as the light, grip, or flag shifts just enough to wreck the perfect framing you’ve meticulously crafted. I remember the first few times I faced this issue; I’d tighten the knuckle with all my might, only to find it slipping again moments later. That light flickering in my eyes was a real wake-up call that I was missing something essential.
Getting to the Bottom of the C-Stand Slip Problem
Is Over-Tightening Actually the Solution?
Here’s the thing—many newcomers, including myself early on, believe that cranking down the knuckle as tight as possible will keep everything in place. Spoiler alert: it doesn’t. In fact, over-tightening can sometimes cause the knuckle to become more prone to slipping or even damage the component over time. Instead, understanding the proper way to tighten and secure the knuckle is key to stability and safety. Once I learned this, my setup times improved, and I could focus on capturing the shot without constantly readjusting my gear.
In this guide, I’ll share tried-and-true techniques from my own experience and trusted industry practices to help you prevent your C-stand from sliding. We’ll explore the anatomy of the knuckle, correct tightening procedures, and the small adjustments that make a big difference. If you’ve ever faced the disappointment of a gear collapse mid-shoot, stick around—your setup game is about to level up.
Choose the Right Knuckle Tightening Technique
During a shoot in a tight alley, I once experienced a sudden shift of my flag when I over-tightened the knuckle, causing it to slip under pressure. To prevent this, focus on applying steady, moderate force rather than maxing out the tightening knob. Think of it like adjusting the focus ring on a lens—small, precise turns lead to better control.
Understand the Anatomy of the C-Stand Knuckle
The knuckle consists of a main bolt, the ratchet arm, and the locking collar. The main bolt provides the pivot, while the collar secures the angle. Visualize it like a cine lens mount, where proper tension ensures smooth focus without slipping. If one part is loose, the entire setup falters, just like a loose aperture ring causes inconsistent exposure.
Inspect for Wear and Damage
Before every shoot, check for signs of wear—rust, stripped threads, or deformed collars. I once ignored a slightly worn collar on a vintage C-stand, leading to a sudden slip during a critical shot, which wasted precious minutes. Regular maintenance is like servicing a projector—preventative care saves headaches later.
Use the Correct Tightening Procedure
Apply the tension gradually: tighten the main bolt until resistance is felt, then give a final half-turn to lock it in place. Avoid forcing it beyond resistance, as this can strip threads or cause the collar to lose grip. It’s similar to focusing a cinema projector—smooth, incremental adjustments yield the best image stability.
Leverage Friction-enhancing Accessories
If your knuckle continues to slip, consider adding a layer of grip material like leather or rubber between the collar and handle. This is akin to adding a matte box in front of a lens to control flare—small modifications yield significant stability. I once wrapped a strip of rubber around my collar, and the difference was night and day, especially in windy outdoor shoots.
Practice Proper Hand Positioning
When tightening, hold the handle close to the knob—this directs force efficiently and prevents slipping. Think of it like operating a cinema lens focus ring: firm, steady grip ensures precise control. During a live shoot, my steady hand prevented me from over-tightening and causing damage, keeping my gear secure without frustration.
Lock the Knuckle After Adjustment
Once the desired position is achieved, give an extra gentle twist or tap to set the collar firmly. This extra step is often overlooked but critical. It’s like fine-tuning a projection angle—small adjustments ensure the image stays aligned throughout filming. During my last shoot, this extra locking step prevented a mid-take shift, saving us from re-shoots.
Test Stability Before Shooting
Always give the setup a gentle nudge after tightening. If it moves, re-tighten with a focus on even pressure. Think of it as calibrating a film projector; verifying alignment ensures everything runs smoothly. I learned this lesson during a remote shoot—testing saved me from a costly re-shoot due to an unnoticed loose knuckle.
While many filmmakers are aware of the basics—like choosing a good lens or lighting setup—there are subtle intricacies many overlook, which can significantly impact the quality of their work. Contrary to popular belief, more expensive gear doesn’t always guarantee perfect results; understanding the nuances of your equipment is what truly elevates your filmmaking.
The Myth of Perfect Cine Lenses
Most assume that a prime lens always outperforms zooms in sharpness and color rendition. However, expert lens designers reveal that modern zooms can match prime lenses in resolution with the right glass and coating, and sometimes even surpass them in versatility. The real trick lies in selecting lenses with minimal distortion and chromatic aberration—something often mistaken for sole sharpness—so always scrutinize the optical design and coatings.
Are Cine Lenses Truly Better for Filmmaking?
Many believe cine lenses inherently produce superior image quality. In reality, their superior focus throw and controlled aperture blades facilitate smoother focus pulls and consistent exposure changes, leading to more cinematic results. Forget static shots—mastering focus control with the right cine lens can dramatically enhance storytelling. Check out this guide for selecting your perfect glass.
Advancing Film Lighting Beyond Brightness
Basic lighting rules emphasize exposure and color temperature. But the hidden nuance is controlling light fall-off and quality. Many novices rely on harsh key lights, leading to flat or unflattering images. The smarter approach involves shaping and controlling light with flags, grids, and diffusion. For instance, a soft fill often adds depth and contrast that punch up the mood.
Beware of Costume-Color Mismatch in Lighting
An advanced pitfall is neglecting how lighting interacts with costume fabrics and set colors, which can cause unexpected color shifts or bloom. Achieving balance requires understanding SRGB and spectral sensitivities, as explained by leading colorists. Take care to test how your lights render skin tones and textiles—this attention pays dividends in post-production.
Projection Screens That Fail in Real Environments
Suppose you pick a high-gain screen for brightness but neglect ambient light and screen positioning—the result is washed-out images or moiré patterns, especially on acoustically transparent screens. Different screens react uniquely based on space and projector distance. Make sure to select a screen designed for your environment, considering gain, texturing, and ambient light factors.
How to Avoid Screen Reflection and Moiré
One sophisticated trap is not accounting for how screen surface patterns interact with digital projectors’ pixel structure, creating moiré. Test your setup in actual conditions and opt for screens with micro-texture or matte finishes. These prevent unwanted artifacts while preserving good contrast. This resource provides valuable insights into choosing your ideal projection surface.
Camera Supports That Sabotage Shots
Many overlook that the smallest support flaws cause instability—like loose mounts or insufficient counterbalance—that seem trivial but ruin smooth motion. An expert tip is ensuring quick-release plates are securely locked and supports are rated for your camera weight. I once lost a crucial shot because my rig’s quick-release slipped; now, I double-check every connection.
How Do Micro-Loose Connections Impact Your Shots?
Even tiny play in support joints can introduce jitter, especially during long takes at slow pans or tilts. Such subtle movements are distracting and reduce production value. Regular maintenance, including tightening and inspecting supports, is essential. Remember, stability is achieved in the details—never dismiss minor looseness.
The Hidden Power of Cinema Projectors
When discussing projectors, many focus on brightness or resolution. But the hidden nuance involves the projector’s lamp stability and color consistency over time. A projector with a flickering bulb or uneven light output biases your final image, especially noticeable during lengthy screenings. Using high-quality lamps and regularly calibrating your projector prevents this.
Why Are My Images Flickering Even with Good Equipment?
Often, flickering isn’t due to the projector itself but inconsistent power or poor maintenance of lamp modules. Ensure your power supply is steady, and replace lamps before they degrade significantly. For critical presentations, consider this expert guide on maintaining projector health.
Mastering these nuanced aspects of cine gear is what differentiates a hobbyist from a seasoned professional. Remember, the devil is in the details, and paying close attention to these hidden factors ensures your cinematic vision always shines through. Have you ever fallen into this trap? Let me know in the comments!
Keep Your Equipment Running Smoothly with the Right Tools
Maintaining cine equipment, whether it’s lenses, lighting, or projection systems, isn’t just about routine cleaning—it’s about adopting a systematic approach using specific tools designed for precision and longevity. For instance, investing in high-quality lens cleaning kits, such as microfiber cloths and sensor swabs, allows you to delicately remove dust and smudges without damaging sensitive surfaces. I personally prefer the Zeiss Lens Cleaning Kit because of its effectiveness and gentle cleaning agents, which are crucial for preserving the coating on cine lenses.
Similarly, for cleaning projection screens and supports, I use compressed air dusters and microfibre cloths. They help keep the surfaces dust-free, ensuring optimal image quality over time. Regularly inspecting supports with a torque wrench ensures bolts stay tight, preventing stability issues that can cause jitter in shots or misalignment in projections. This proactive approach minimizes repairs and expensive replacements, extending the lifespan of your gear.
Software Tools for Long-Term Results
Besides physical maintenance, leveraging software tools can streamline calibration and troubleshooting. For example, dedicated calibration software like this free calibration guide helps maintain color consistency across multiple monitors, ensuring that your final outputs match your creative intention. Regular calibration checks, every few months, can prevent drift and save time during post-production.
Preparation for Scaling Your Setup
As your project scales, so does the need for more robust support systems. Modular support systems like the Uprising Modular Rig allow quick adjustments and secure mounting for larger cameras or lighting arrays. When upgrading, do thorough load testing with a camera support torque tester, which ensures your rig holds steady under increased weight, protecting expensive gear from undue stress.
How do I maintain my cine gear over time?
Implement a routine maintenance schedule that includes cleaning, inspecting for wear, and calibrating your equipment using specialized tools. For example, regularly inspecting and cleaning cine lenses with proper kits prevents fungus buildup and coating degradation. Additionally, scheduling monthly support checks and using torque wrenches ensures all components remain secure, reducing the risk of malfunction during critical shoots. Remember, consistency is key; just like mastering projector maintenance prolongs its lifespan, disciplined care extends the life of your entire cinematic toolkit.
Looking ahead, advances in sensor cleaning technology, such as ultrasonic cleaning stations for camera sensors, suggest even easier ways to keep gear pristine without manual labor. Incorporating these emerging tools will become standard practice, making maintenance more efficient and less invasive.
Finally, I recommend trying the tip of using a torque wrench when tightening support bolts. It ensures you apply the right amount of tension, avoiding over-tightening that can strip or damage parts. This small adjustment can save you from costly repairs down the line and enhance the reliability of your gear during productions.
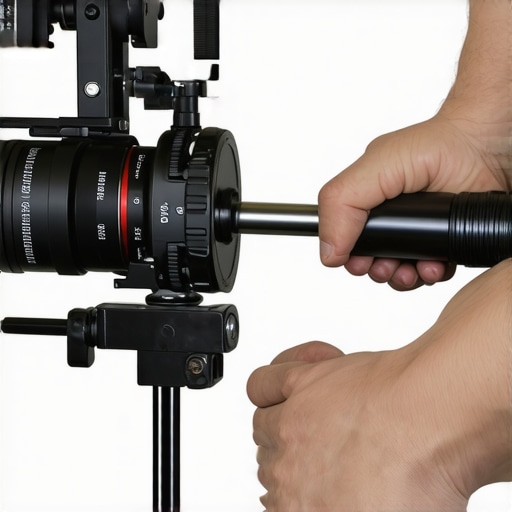
The Hardest Lesson I Learned About cine lenses,film lighting,projection screens,camera supports,cinema projectors
One of the most valuable insights I gained was realizing that even the most expensive gear can’t compensate for improper handling. Over-tightening a support or neglecting routine checks leads to preventable mishaps, regardless of brand. The moment I started paying attention to tiny adjustments and maintenance, my shoots became smoother and more reliable.
3 Myths About cine lenses,film lighting,projection screens,camera supports,cinema projectors That Held Me Back
First, I believed that pricier lenses automatically guaranteed better images—turns out, optical quality is just one piece of the puzzle. Second, I thought brighter lights always improved shot quality; instead, shaping light often yields more cinematic results. Third, I assumed supporting equipment was foolproof—regular inspections and proper handling are essential for stability and safety.
What Experts Won’t Tell You About cine lenses,film lighting,projection screens,camera supports,cinema projectors
Many seasoned professionals focus on the big picture but overlook small details like support torque settings or screen surface textures that impact final quality. Sharing knowledge about nuanced equipment care, like using a torque wrench or micro-texture screens, can dramatically elevate your filmmaking game. Embracing these hidden lessons transforms technical mishaps into creative opportunities.
My Essential Toolkit for Consistent Cine Setup
Over time, I found that having reliable tools like a high-quality torque wrench, microfiber cleaning kits, and grip tapes makes all the difference. I trust brands like Zeiss for lens cleaning because their gentle solutions preserve coatings. These tools help me perform precise adjustments and preventive maintenance, ensuring my gear performs at its peak every time.
Books That Changed How I View Cinematic Equipment
Reading detailed guides like the [cines production handbook](https://cinegearguide.com/cine-lenses-explained-choosing-the-perfect-glass-for-your-film) opened my eyes to the importance of understanding optical physics and support mechanics. Investing in these resources has saved me countless headaches on set by providing deep insights into equipment behavior and maintenance routines.
Where to Go from Here
If you’re serious about elevating your cinematic craft, I encourage you to dig into dedicated resources and commit to routine equipment checks. Small habits like inspecting supports before shoots or practicing gentle tightening can prevent costly setbacks. Remember, mastering your tools is as essential as mastering the craft of filmmaking itself. For step-by-step guidance, explore our [comprehensive projector maintenance](https://cinegearguide.com/unlock-the-secrets-of-cinema-projectors-a-complete-guide-for-2025) and support setup tips—your future self will thank you!
About the Author
James Duke
ThinkOTS
James Duke is a seasoned professional in the creative production industry, bringing a wealth of technical knowledge and hands-on experience to cinegearguide.com. As a key figure at ThinkOTS, James has spent years navigating the complexities of high-end production environments, where selecting the right equipment is the difference between a successful shoot and a logistical failure. His expertise spans the full spectrum of cinematography gear, from advanced camera systems to the intricate accessories that define modern filmmaking. On cinegearguide.com, James leverages his deep understanding of the industry to provide authoritative insights, gear reviews, and technical guides. He is known for his ability to break down complex specifications into practical, actionable advice for filmmakers of all levels. His perspective is rooted in the real-world application of technology, ensuring that every recommendation is backed by professional standards. James is dedicated to empowering the filmmaking community by sharing his expertise, helping others navigate the ever-evolving landscape of cinema technology with confidence and clarity.
LinkedIn Profile