
Picture this: you’re on set, adjusting your camera’s ISO, only to realize that shots captured with a mirrorless camera look completely different from those taken with your older DSLR, even when you’re aiming for the same exposure. It hits you—you’ve got a sensor mismatch, and it’s throwing off your entire workflow. I’ve been there, fumbling with settings, hoping magic would happen, but instead, I ended up with inconsistent footage that needed hours of post-production correction.
That was my lightbulb moment. I realized that matching exposures across different sensor sizes and types doesn’t have to be a headache reserved for big-budget productions. With some practical know-how and a few tools, you can get consistent, professional-looking results without draining your wallet.
Why Matching Exposure Matters on a Budget
In the world of filmmaking and videography, especially when working with limited resources, maintaining consistent exposure is crucial. It ensures your footage seamlessly blends, saving you hours in color grading and correction. But achieving this consistency becomes tricky when your camera gear involves varied sensor sizes—think full-frame versus Micro Four Thirds—or even different sensor sensitivities.
Many amateurs and hobbyists shy away from tackling this issue, thinking only high-end rigs or professional setups can handle it. The truth? With some understanding and a handful of affordable tools, you can level the playing field. Proper exposure matching elevates your storytelling, giving your work a polished, cohesive look that’s often assumed to be exclusive to big studios.
Early in my journey, I made a common mistake: trusting that simply adjusting ISO would be enough. Turns out, sensor size, gain, and lens characteristics all interplay, affecting how exposure manifests on screen. Ignoring these factors led to mismatched footage that looked jarring when edited together. Learning to account for sensor differences and using tools like exposure calculators or calibrated meters transformed my workflow.
Have you faced trouble matching shots from different cameras? If yes, stay tuned—I’ll walk you through practical steps to bridge that gap and get professional results without splurging on fancy gear. For more in-depth techniques, check out our guide on mastering film lighting techniques, which complements these exposure strategies perfectly.
Calibrate Your Equipment Before Shooting
Start by understanding your camera sensors. Use a light-meter or exposure calculator (see projection screens guide for insight on light behavior) to record base exposure values for each camera. For instance, set your DSLR to a specific ISO and measure the luminance with a handheld meter. Repeat this process with your mirrorless camera, noting how each sensor responds under the same lighting conditions.
Match Camera Settings Strategically
Adjust your aperture, shutter speed, and ISO based on the calibration. Picture this: you set your DSLR at f/5.6, 1/50s, ISO 100, and measure a specific exposure level. Then, tweak your mirrorless camera to match this luminance, which might mean adjusting ISO or aperture accordingly. Remember, ISO amplifies sensor sensitivity but also noise. When matching exposures, prioritize setting a comparable physical aperture and shutter angle when possible, as they influence motion portrayal and depth of field.
Use Matching of Color Profiles and Gamma
Even if exposure looks similar, differences in color profiles can create discrepancies. In your camera menus, switch to a neutral flat profile or log setting for both cameras. This allows you to match not only exposure but also tonal response during post-production. A helpful trick I learned was filming a gray card under the same lighting conditions, then using color grading tools to align each shot’s look, which simplifies matching across sensors.
Employ Real-World Test Shots and Adjust
Conduct test shots in your actual environment. Place a gray card or standardized chart in the scene, then record with both cameras. View the footage on a calibrated monitor. You might find, for example, that despite matching ISO and aperture, the mirrorless camera renders shadows slightly darker or highlights brighter. Use exposure compensation or slight tweaks in your settings to fine-tune this. It’s an iterative process—expect some messy adjustments before achieving perfect consistency.
Leverage Post-Production Tools for Fine-Tuning
Once on set, aim for close matches, but don’t stress over perfecting everything immediately. In your editing workflow, employ tools like scopes (waveform and vectorscope) to analyze exposure and color. Use secondary color correction to subtly adjust shadows or highlights, matching their luminance levels precisely. If you’re unsure, consulting resources like lighting techniques can help refine your approach, especially when dealing with distinct sensor responses.
Remember, the key is consistency. In one of my shoots, I intentionally overexposed a shot to match a brighter sensor and then pulled back in post, rather than trying to get perfect in-camera match. That flexibility allowed for cleaner color grading and a cohesive final look, saving hours of correction time.
Many filmmakers and videographers assume that equipment like camera supports, lighting setups, or projection screens are straightforward tools, but **there’s more to them than meets the eye**. A common mistake is trusting generic advice or popular myths without understanding the subtle nuances that impact the final image quality and operational efficiency. For example, while many believe that a sturdy tripod guarantees sharp shots, **the real secret lies in the head’s tension and balance**, which directly affects smoothness during pans and tilts. Misjudging this can result in shaky footage even with a premium support system.
Another pervasive myth concerns film lighting: many assume that more lights or higher wattage always produce a better look. But in reality, **controlling light quality and directionality** shapes mood and detail much more effectively than brute force. Using diffusion, flags, and gels intelligently offers *advanced users* a significant edge, enabling them to craft cinematic visuals that resonate emotionally.
**Beware the trap of over-generalization when choosing cine lenses**, especially for hybrid digital setups. Autofocus lenses, often labeled as ‘cine’, aren’t always optimized for precision focus pulls, leading to focus breathing issues. As explained by experts in cine lenses explained, understanding the optical characteristics—like spherical aberration and distortion—is key to making the right choice for your narrative style.
When it comes to projection screens, many overlook the importance of the materials’ gain and surface texture. Contrary to popular belief, a higher gain doesn’t necessarily mean a better picture, especially in rooms with ambient light. Low-gain screens with matte surfaces often provide more consistent images, avoiding hotspots and preserving color accuracy. For insights, see our comprehensive guide on projection screens for every space.
**Cinema projectors are another area riddled with misconceptions**. A common error is equating higher lumens with better image quality. However, *professional cinema machines* emphasize contrast ratios, color fidelity, and lens quality. Laser projectors, for instance, may have lower lumen specs but excel in color and black level performance, as discussed in our recent cinema projectors guide.
Now, for the question that advanced enthusiasts often ask: How do you account for optical limitations when selecting cine lenses in a digital environment? The key is understanding the interplay between lens design and sensor characteristics. For example, **sensor size and resolution influence diffraction and aberration effects**, making some lens choices better suited for specific workflows. Consulting optical charts and conducting real-world tests are invaluable strategies. As noted in expert lens guides, tailoring your lens selection to your project’s technical parameters can save time and elevate quality.
Have you ever fallen into this trap? Let me know in the comments! Mastery of these nuances can only be achieved through deliberate experimentation and continuous learning, so keep questioning and refining your setup.
Tools That Keep Your Gear Running Smoothly
To maintain your camera supports and lenses in top condition, I personally rely on high-quality microfiber cloths and sensor cleaning swabs from companies like Cine Gear Guide. These tools are essential for avoiding dust and smudges that can degrade image quality. Additionally, a set of precision screwdrivers and torque wrenches ensures your support rigs and cine lenses stay securely assembled, especially during long shoots.
For calibration and fine-tuning, I use a portable colorimeter such as the Sekonic C-700 series, which provides accurate light measurements in challenging environments. Regularly checking your equipment with dedicated tools prevents minor issues from escalating into costly repairs or scene delays.
Software That Extends Your Equipment’s Life
Applying firmware updates from manufacturers like Canon or Sony is crucial; they often fix bugs and improve performance, helping your camera and lens systems remain compatible with new accessories. I use dedicated calibration software like Panasonic’s T-Cam tool, which allows precise adjustments to look-up tables (LUTs), ensuring consistent color rendering across different devices. Routine calibration using such software extends the lifespan of your equipment by keeping it within optimal operating parameters.
Another software tip: employing project management tools like Frame.io or ShotGrid helps track maintenance schedules and repairs, so you never miss a service interval that could save your gear from premature failure.
The Future Looks Bright for Maintenance
Advancements in predictive maintenance, powered by AI, hint at a future where your camera gear could self-diagnose issues before they become critical. Imagine a support system that alerts you when a cine lens’s focus motor starts to degrade or a projector’s bulb nears end-of-life, guiding timely interventions. This proactive approach will revolutionize how we care for our investments, reducing downtime and ensuring a consistent workflow.
How do I keep my camera and film lighting gear in top shape over time?
Establish a routine maintenance schedule that includes cleaning lenses with proper solutions, inspecting support rigs for wear and tear, and updating firmware regularly. Incorporate calibration checks for your monitors and projectors, especially before critical shoots, to ensure consistent color fidelity. For cinematic lighting setups, regularly test your dimmers and ensure light modifiers are functioning correctly. Remember, investing a little time consistently saves big in the long run and prevents avoidable breakdowns.
For an in-depth look at maintaining your cinema projectors, check out our guide on cinema projectors, which offers expert tips on longevity and optimal operation. Try implementing a monthly cleaning routine with compressed air and lens-safe cleaner, and see how your equipment’s performance not only improves but also lasts much longer.
Ultimately, staying proactive and using the right tools will keep your gear reliable, allowing you to focus on creating compelling visuals without unexpected interruptions.
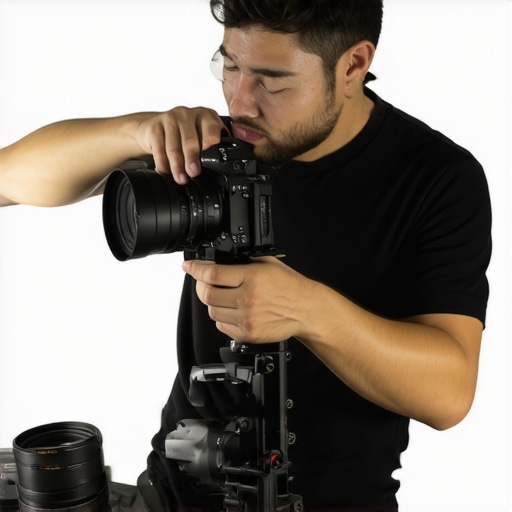
Over the course of my journey in filmmaking, I discovered that achieving truly professional footage isn’t just about having the right camera or lens—it’s about understanding the subtle interplay of exposure, sensor characteristics, and diligent gear care. These insights transformed my approach from guesswork to precision, allowing me to craft visuals that resonate with clarity and artistic intent.
The Hard Lessons That Shifted My Perspective
- Sensor differences are more than just pixel counts: Recognizing how sensor size and profile impact exposure and color was a game-changer. I learned to calibrate each camera explicitly, which eliminated mismatched shots and improved workflow efficiency.
- Post-production is a safety net, not a crutch: Fine-tuning exposure and color in editing software like scopes and LUTs became second nature, but only after perfecting in-camera settings. Doing so saved me countless hours and resulted in more natural-looking footage.
- Consistency starts with pre-shoot calibration: Investing time in measuring light and setting up each piece of gear beforehand created a smoother shooting experience and superior final results. It’s a habit I continually recommend to peers seeking professionalism without the high-end budget.
- Maintenance equals longevity: Regular cleaning, firmware updates, and calibration preserve gear performance. Simple routines with trusted tools, such as microfiber cloths and calibration software, extend your equipment’s lifespan and maintain image quality, making every dollar spent truly count.
- Myth-busting leads to smarter choices: Dispel misconceptions like overestimating the power of high-gain screens or assuming autofocus lenses are always best. Instead, select tools based on specific project needs and real-world tests, which ultimately elevates your craft.
Tools I Depend On for Professional Results
- High-quality microfiber cloths and sensor cleaning swabs—trustworthy for keeping lenses and sensors pristine.
- Optical charts and calibration software—essential for matching camera profiles and ensuring color fidelity across different models.
- Projector and monitor calibration tools—imperative for consistent viewing and grading, especially when working across various display types.
- Robust support rigs and fluid heads—crucial for smooth motion and stable framing, with periodic maintenance preventing unexpected failures.
Keep Your Creative Passion Burning Bright
Embracing these practical principles has empowered me to pursue my filmmaking ambitions with confidence, even on modest budgets. The beauty of mastering exposure matching and gear upkeep lies not just in technical excellence but in the artistic freedom they unlock. So, I encourage you: keep experimenting, stay curious, and invest in your craft diligently. Your visual storytelling will thank you, and your audience will feel the difference.
What’s the one gear or technique upgrade that has most impacted your filmmaking journey? Share your stories below—I’d love to hear how you elevate your craft!
About the Author
James Duke
ThinkOTS
James Duke is a seasoned professional in the creative production industry, bringing a wealth of technical knowledge and hands-on experience to cinegearguide.com. As a key figure at ThinkOTS, James has spent years navigating the complexities of high-end production environments, where selecting the right equipment is the difference between a successful shoot and a logistical failure. His expertise spans the full spectrum of cinematography gear, from advanced camera systems to the intricate accessories that define modern filmmaking. On cinegearguide.com, James leverages his deep understanding of the industry to provide authoritative insights, gear reviews, and technical guides. He is known for his ability to break down complex specifications into practical, actionable advice for filmmakers of all levels. His perspective is rooted in the real-world application of technology, ensuring that every recommendation is backed by professional standards. James is dedicated to empowering the filmmaking community by sharing his expertise, helping others navigate the ever-evolving landscape of cinema technology with confidence and clarity.
LinkedIn Profile