Ever spent hours setting up a shot, only to realize your camera support wobbles at the worst moment? Or struggled with a projection screen that just wouldn’t stay put, ruining your perfect scene? I’ve been there—fighting against shaky footage and unstable displays, feeling like my gear was holding me back instead of helping me create. That frustrating feeling of wasted time and blurry shots was a real eye-opener for me. It made me realize that the right support and screen choices are not just accessories—they’re essential tools that can make or break your filming experience.
Why the Right Camera Supports and Projection Screens Matter in 2024
In the fast-evolving world of filmmaking, the gear you choose can dramatically influence your final product. Whether you’re shooting a documentary, a short film, or a professional project, stability and clarity are everything. In 2024, advancements in technology mean there are more options than ever—lightweight rigs, innovative stabilization systems, ultra-portable screens, and high-resolution projection solutions. But with so many choices, how do you pick what’s right for your needs? That’s what I want to help you with today.
Choosing the proper support system and projection screen isn’t just about convenience. It’s about ensuring your shots are steady, your images are sharp, and your workflow is smooth. I’ve learned the hard way that skimping on quality or ignoring compatibility can lead to shaky footage, blurry displays, or worse—damaged equipment. Early on, I made the mistake of investing in cheap supports that couldn’t handle the weight of my gear, which resulted in shaky footage and constant readjustments. That was a costly lesson, and it’s why I now advocate for investing in well-made, reliable supports and screens that match your specific workflow.
So, if you’ve ever faced the frustration of unstable shots or poor image quality, you’re not alone. Today’s post will walk you through everything you need to know about selecting the best camera supports and projection screens in 2024. We’ll cover the latest innovations, practical tips, and common pitfalls to avoid. By the end, you’ll be equipped to make smarter choices that elevate your filmmaking quality and save you time on set.
Is All Camera Support Equipment Created Equal? The Truth About Stability and Durability
Before we dive into the best products, let’s address a common skepticism: “Are fancy supports really worth the extra cost?” Honestly, I used to think that cheap supports would do the job. Big mistake. I quickly learned that flimsy tripods and unstable rigs are not only frustrating—they can also be dangerous for your gear and compromise your shots. The right support should feel solid, lock tightly, and handle the weight of your camera confidently. For more insights on stabilizing your shots, check out my guide on stabilizing your shots like a pro. I promise, investing in quality pays off in the long run.
Have you faced these support struggles before? Drop me a line through my contact page. I’d love to hear your stories and help you find the perfect gear for your projects.
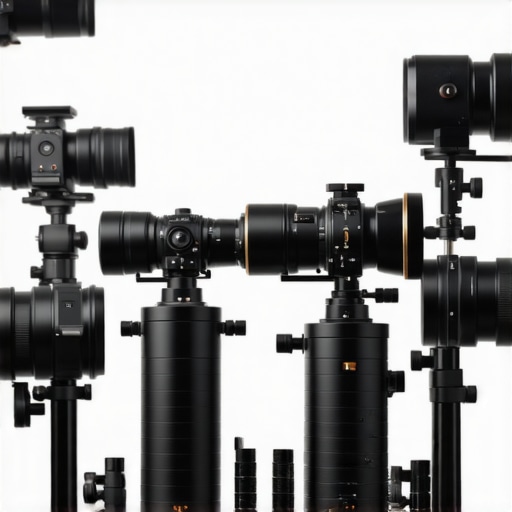
Secure Your Gear with the Right Tripod and Support Systems
Start by selecting a support that matches your camera’s weight and your shooting style. I vividly recall the first time I upgraded from a cheap tripod to a sturdy professional one; my shots instantly became sharper and more stable. Look for tripods with locking mechanisms that feel firm and locks that don’t slip under pressure. Test the support by placing your camera on it and gently applying pressure to ensure it doesn’t wobble. Consider a fluid head if you need smooth panning shots—these are game changers for dynamic scenes. When I shot a fast-paced interview, switching to a fluid head tripod reduced my setup time and improved shot stability significantly. For lightweight setups, portable monopods or even handheld rigs with stabilization features can work well. Always check reviews and specifications to confirm that supports can handle your gear’s weight and dimensions. For a deeper dive into choosing the best camera supports, visit this comprehensive guide.
Stabilize with Professional Camera Rigs and Accessories
For complex shots, consider adding stabilizers such as gimbals or shoulder rigs. Gimbals are like the steering wheel of your camera—they keep your footage smooth even when you move around. I once used a gimbal during a handheld shoot in a crowded street market; despite the chaos, my footage remained steady, making post-production much easier. Attach your gimbal securely following the manufacturer’s instructions, balance your camera carefully, and practice smooth movements before shooting. Shoulder rigs distribute weight evenly, reducing fatigue and allowing for longer takes. When I first tried a shoulder rig, it took a few sessions to get comfortable, but the stabilization it provided was worth the effort. Always match your support system with your camera’s specifications and your style of filming. Explore more options and detailed setups at this resource.
Choosing the Perfect Projection Screen for Your Space
Next, focus on your projection surface. The right screen can transform your viewing experience. I learned this firsthand when I switched from a cheap, wrinkled wall to a high-gain, tensioned projection screen. The difference was night and day—the image was brighter, more vivid, and perfectly aligned. Measure your space carefully, considering throw distance and ambient light. For small rooms, a retractable or portable screen might be ideal, while larger studios benefit from fixed, high-gain screens that maximize brightness. When I was setting up my home theater, I opted for a matte white screen with a 1.0 gain for balanced viewing, but experimenting with different gain levels can yield better results depending on your lighting conditions. For expert tips and top picks in projection screens, check this guide.
Align Your Screens and Supports for Seamless Filming
The final step is to ensure your supports and screens are perfectly aligned and secured. Use leveling tools to set your tripod or support system at the desired height and angle. When I shot a product demo outdoors, I used a bubble level attached to my support to avoid tilt or skew—this small step made my visuals look professional and polished. For screens, tensioning mechanisms keep the surface flat and free of wrinkles. Secure all supports to stable surfaces and double-check connections regularly during shoots. This attention to detail prevents accidental slips or vibrations that can ruin a shot. Remember, a stable setup not only enhances your footage quality but also boosts your confidence on set. For more technical advice, visit this detailed guide.
Many filmmakers and hobbyists assume that choosing the most expensive or popular gear automatically guarantees top-notch results. However, the reality is more nuanced. One of the biggest misconceptions is that all camera supports and projection screens are created equal. In fact, the subtle differences in quality, design, and compatibility can make or break your production. For instance, a support rig that feels sturdy in the store might wobble under the weight of your camera during a shoot, or a projection screen that looks fine in a catalog might reflect ambient light poorly, reducing contrast and clarity.
Let’s dig into some advanced details that often get overlooked. First, stability isn’t just about weight capacity. It’s about the support’s damping ability—how well it absorbs vibrations and prevents micro-movements that can blur your shots. Many assume that a support with a high weight rating will automatically be stable, but materials and construction quality matter significantly. For example, a tripod made from lightweight aluminum might wobble more than a heavier, well-engineered carbon fiber rig, especially on uneven terrain.
Another common myth is that larger or more expensive projection screens are always better. In reality, the optimal screen size and gain depend heavily on your space and lighting conditions. An oversized screen in a small room can cause image distortion and uneven brightness, while a screen with too high gain might produce hotspots and washed-out segments. It’s essential to match your screen’s specifications to your environment, which is something many overlook when shopping solely based on specifications or brand reputation.
Now, let’s address a trap that even experienced filmmakers fall into: neglecting proper calibration and setup. A support system or screen set up hastily or without proper leveling can introduce micro-shakes or skewed images that ruin your shot. For example, even a minor tilt in your support can distort your frame during a critical scene. Similarly, tensioning a projection screen improperly can cause wrinkles or uneven surfaces, diminishing image quality. These details require attention to detail and often a small investment in leveling tools or tensioning accessories.
What advanced techniques can help prevent stability issues in complex setups?
In high-end productions, professionals often use vibration isolation platforms and damping pads beneath support rigs to minimize micro-movements. Balancing your gear precisely on supports and regularly checking for flex or wobble can save hours of post-production correction. Additionally, understanding the material properties—like the damping coefficient of different support components—can inform better choices. For example, some support manufacturers incorporate vibration-dampening materials that significantly improve stability, especially during dynamic shots.
For more insights on how to fine-tune your gear and avoid these pitfalls, explore this guide. Remember, investing in quality gear and mastering setup nuances are crucial for elevating your filmmaking game. Have you ever fallen into this trap? Let me know in the comments.
Keeping your camera supports and projection screens in top condition is crucial for maintaining professional-quality results over time. Regular maintenance not only extends the lifespan of your gear but also ensures consistent performance, so you can focus on creating without worrying about technical hiccups. From cleaning routines to calibration techniques, here’s what I recommend based on my experience and industry best practices.
How do I maintain my filmmaking equipment for longevity
First, always clean your supports and screens after each shoot. Dust, dirt, and fingerprints can degrade materials and cause wear, especially on delicate parts like tripod joints or tensioned screen fabrics. Use a soft, lint-free cloth and appropriate cleaning solutions—avoid harsh chemicals that can damage finishes or fabrics. For support joints, a light application of lubricant like silicone spray helps keep moving parts smooth and prevents rust. I personally swear by using a silicone lubricant on my tripod’s leg locks and fluid heads; it keeps everything operating smoothly and reduces squeaks over time.
Second, check and tighten all screws and locks regularly. Over time, vibrations and repeated setup can loosen components, risking instability or damage. I schedule a quick inspection before every shoot, tightening loose parts and ensuring locks are secure. This simple habit saves me from unexpected wobbling during critical shots.
Third, calibrate your equipment periodically. For camera supports, this might mean rebalancing gimbals or verifying level accuracy. For screens, ensuring tensioning mechanisms are properly adjusted maintains flatness and image quality. Proper calibration prevents micro-movements and distortions that can ruin footage and is especially important when working in variable environments or outdoor locations.
Recommended tools for reliable support and screen maintenance
Invest in a high-quality multi-tool kit tailored for filmmaking gear. I use a compact set that includes screwdrivers, Allen wrenches, and pliers—these cover most support adjustments and repairs. A digital level or smartphone app helps me quickly check support angles and screen flatness, ensuring everything is aligned perfectly. For cleaning, a microfiber cloth and mild cleaning spray are indispensable. When tensioning screens, I rely on tensioning tools provided by premium support brands, which help evenly distribute stress and prevent wrinkles or tears.
Looking ahead, I believe the trend will move towards smart supports integrated with sensors that monitor stability and wear in real-time. Companies are already experimenting with vibration-dampening materials that adapt dynamically to movement, promising even more reliable support systems in the future. To stay ahead, try implementing regular inspection routines and investing in quality tools now—this proactive approach will keep your gear performing flawlessly for years to come.
Remember, consistent maintenance is the secret to long-term success. Take a few minutes after each shoot to clean and check your gear, and invest in the right tools for precision and ease. For detailed advice on calibrating your specific equipment, visit this guide. Start implementing these habits today and see how they transform your filmmaking experience!
The Hardest Lesson I Learned About Support Stability
One of my biggest lightbulb moments was realizing that even the most advanced camera gear can be rendered useless by shaky support. I once spent hours setting up a shot only to see it wobble in post-production, costing me time and frustration. The lesson? Never underestimate the importance of stability—your shots depend on it. Investing in high-quality, well-engineered support systems has transformed my workflow and results.
3 Myths About Projection Screens That Held Me Back
I used to believe bigger and more expensive screens automatically meant better visuals. Turns out, the environment and screen gain matter just as much. A poorly chosen screen can reflect ambient light and wash out your image, no matter the size. Now, I choose screens based on space and lighting, not just price or brand. This approach has saved me from costly mistakes and improved my viewing experience.
What Experts Won’t Tell You About Filmmaking Support
Vibration damping and material quality are often overlooked. Micro-movements can blur shots, especially during dynamic scenes. I learned that adding damping pads and choosing supports with damping properties drastically improves stability. These small tweaks elevate your footage from shaky to cinematic. Don’t skip this crucial step—your audience will notice the difference.
My Essential Toolkit for Support and Screen Maintenance
I rely on a compact multi-tool kit with screwdrivers, Allen wrenches, and a digital level. Regular cleaning with microfiber cloths, tightening screws, and calibrating supports keep everything in top shape. I also monitor tension on screens to prevent wrinkles. Investing in quality tools and routines has extended my gear’s lifespan and saved me headaches during shoots. For detailed maintenance tips, check my favorite resources here: support maintenance guide.
Push Your Filmmaking to New Heights
Now is the perfect time to upgrade your support and screen setup. Proper stability and image quality are the backbone of professional filmmaking. Don’t settle for less—your future projects deserve the best tools. Take action today, refine your setup, and watch your footage improve exponentially. What’s your biggest support challenge right now? Share below and let’s troubleshoot together!
Related Posts

Fix 16K Edge Smearing: 4 Aspheric Cine Lenses for 2026 Sensors
Have you ever been in the middle of shooting a…
![5 Prime Lenses That Actually Resolve 16K Detail [2026 Tested]](https://cinegearguide.com/wp-content/uploads/2026/02/5-Prime-Lenses-That-Actually-Resolve-16K-Detail-2026-Tested.jpeg)
5 Prime Lenses That Actually Resolve 16K Detail [2026 Tested]
I vividly remember the moment I realized my favorite film…
Cine Lenses & Cinema Projectors: Top Filmmaking Tools 2024
I'll never forget the moment I spent hours tweaking my…