
It was a bright Saturday afternoon when I finally faced the stark reality—my home cinema project was a mess. The images flickered inconsistently, and the 3D depth felt more like a cartoon than a movie. I realized I had been rushing through my setup, neglecting the critical step of balancing two projectors for passive 3D. That lightbulb moment led me down a rabbit hole of research and experimentation, and today, I want to share what I learned.
Why Setting Up Dual Projectors for Passive 3D Can Seem Daunting
Many enthusiasts dive into passive 3D cinema thinking they just need two projectors and a screen. But the mechanics behind ensuring seamless synchronization and image quality can be quite complex. Without proper calibration, your visuals can end up blurry, misaligned, or with unwanted ghosting effects. The stakes are high, especially if you’re invested in creating an immersive viewing environment, whether for personal enjoyment or professional demonstrations.
Starting out, I made a common mistake—assuming that simply placing two projectors side by side would suffice. I didn’t realize the importance of angle adjustments, synchronized shutters, and precise screen positioning. The result? Frustration, wasted time, and a shaky confidence in my rig.
However, once I understood the fundamentals—like how to align projectors to avoid keystone distortion and how to control crosstalk—I started to see real improvement. Through trial and error, coupled with solid advice from experts, I got closer to that perfect stereo image I craved.
Now, I aim to help you avoid the pitfalls I encountered. Whether you’re upgrading your current system or starting fresh, mastering the setup process is crucial.
Are you tired of dealing with ghost images or uneven 3D depth? Have you faced difficulties aligning two projectors for a picture-perfect passive 3D experience? If so, you’re not alone. Many enthusiasts wrestle with these challenges early on. According to industry insights, achieving a seamless dual-projector setup can elevate your viewing quality dramatically—something well worth the effort (source: https://cinegearguide.com/unlock-the-secrets-of-cinema-projectors-a-complete-guide-for-2025).
In the upcoming sections, I’ll walk you through the necessary tools, step-by-step procedures, and expert tips to get your system running flawlessly. Ready to turn your home cinema into a professional-grade 3D theater? Let’s dive in.
Position Your Projectors Precisely
Start by placing your projectors on a level surface with a stable support system, such as dedicated cinema mounts or adjustable supports. Use a spirit level to ensure they are perfectly horizontal. Think of your projectors as the lenses of a pair of binoculars—alignment is crucial for a seamless 3D image. I once set up mine hurriedly on uneven tables, causing skewed images and viewer discomfort. Once I corrected the projector heights and secured them properly, the image crisped up significantly.
Align the Projector Lenses for Perfect Convergence
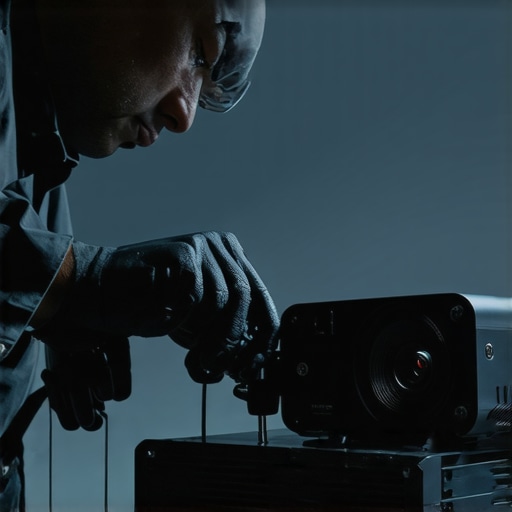
Adjust the lens convergence to ensure both projectors’ images overlap precisely on the screen. Utilize the projector’s keystone and lens shift features—if available—to fine-tune the alignment. Imagine tuning two musical instruments to the same pitch; minor discrepancies can cause discord. During my initial attempt, I used masking tape and a level to mark the ideal projector positions, then fine-tuned the lens shift until the edges of the images matched seamlessly. This step mitigates ghosting and double images.
Calibrate the Shooting Angles
Set your projectors at equal distances from the screen, ideally double the screen width apart for optimal passive 3D. The angles should be symmetrical—similar to how headlights are adjusted on a car to avoid blinding other drivers. I used laser measuring tools and adjustable mounts to achieve this symmetry. Small misalignments here can cause keystone distortion or asymmetrical images, so take your time during this phase.
Synchronize Brightness and Color
Ensure both projectors produce consistent brightness and color levels. Use a colorimeter or calibration discs to match luminance and hue. Think of this process as matching voice tones in a duet; mismatched levels break the harmony of 3D depth. When I first calibrated, I noticed one projector was significantly brighter, causing eye strain. After adjusting the brightness, gamma, and color settings via the projector menus, the images blended naturally, enhancing passive 3D immersion.
Set Up Proper Screen and Viewing Position
The screen must be flat, tensioned, and free of wrinkles, similar to a stage backdrop that needs to be taut to prevent distortions. Position your seating at the optimal distance—roughly 1.5 to 2 times the screen width—to maximize depth and comfort. During my first trial, I neglected to measure my seating layout; as a result, some viewers experienced discomfort or lost the 3D effect. After relocating the seats and verifying viewing angles, the experience vastly improved.
Test and Refine the System
Run test patterns to check for alignment, ghosting, or focus issues. Use test images with sharp edges and color gradients—these highlight misalignments or crosstalk. I recommend adjusting one parameter at a time and documenting your settings to return to if needed. Iterative testing can take a few hours but pays off in a professional-quality passive 3D experience. During my setup, this step revealed subtle misalignments that were otherwise invisible, allowing me to achieve a flawless stereo image.
When diving into the world of cinema equipment, many filmmakers and enthusiasts fall prey to misconceptions that subtly undermine their projects. Let’s debunk some of the most prevalent myths and shed light on nuances that seasoned professionals know but rarely discuss openly.
Why Picking the Latest Gear Doesn’t Guarantee Better Results
Everyone insists on the newest, most expensive lenses or the trendiest lighting kits, but in reality, understanding how to optimize what you already have often makes a more significant difference. Overreliance on high-end gear can lead to neglecting fundamental principles like proper camera support or precise lighting setups. A common mistake is substituting equipment quality for technique; for instance, selecting a premium cine lens without understanding its optimal focal lengths or distortion characteristics can result in images that feel unnatural. For in-depth details on selecting the right cine lenses, check out this guide.
The Hidden Danger of Underestimating Camera Supports
Many assume that just placing a camera on a sturdy tripod is enough, but the nuances of support mechanisms can profoundly influence shot stability and ease of operation. Cheap, poorly rated supports can introduce micro-vibrations, leading to jittery footage, especially in long takes or slow pans. Moreover, overextending supports without proper counterweights or professional-grade heads can cause tipping or drift during complex movements. Take the time to select the right support system; it can elevate production quality drastically.
Lighting Myths That Could Overwhelm Your Budget
It’s tempting to believe that bright, high-powered lights are always better, but this mindset can backfire. Overlighting scenes without considering diffusion, color temperature, or shadows creates a flat, unnatural look and wastes energy—both literal and figurative. Professionals emphasize the importance of lighting technique over raw power. For instance, manipulating softboxes, reflectors, and gels can produce more cinematic results than simply cranking up wattage. Remember, good lighting is more about control and intent than sheer brightness.
Are We Misjudging Projectors and Projection Screens? A Deeper Look
Many believe all projectors and screens are created equal—an easy misconception that can haunt your flat-screen setup or home theater ambitions. High lumen ratings don’t guarantee exceptional image quality, especially if the screen’s surface is incompatible with high-gain projection or if ambient light isn’t managed. The choice of projection screens plays a pivotal role in image uniformity and contrast. Choosing the wrong combination can lead to washed-out images or hotspots. Always consider the specific requirements of your space and equipment to avoid costly mistakes.
Having accurate knowledge of these nuances helps you avoid common pitfalls that compromise your film’s technical quality. Remember, mastering the subtleties—be it support stability, lighting finesse, or screen calibration—distinguishes the amateurs from the professionals. If you’re eager to refine your setup further, feel free to reach out via our contact page.
Enjoy experimenting with these insights, and don’t settle for mediocrity—aim for cinematic excellence. Have you ever fallen into this trap? Let me know in the comments!.
Keep Your Equipment Running Smoothly with the Right Tools
Maintaining a professional cinema setup requires precision and reliable tools. I personally swear by a high-quality lens cleaner for cine lenses. Regularly cleaning your glass with a proper brush and cleaning solution prevents dust and smudges that can degrade image quality over time.
For calibration, I use a Colorimeter, such as the X-Rite i1Display Pro, which allows me to consistently match brightness, contrast, and color across multiple projectors and screens. This ensures uniformity, especially when fine-tuning projector color profiles or matching different lighting setups. Having a proper calibration device reduces trial-and-error, saving time and money in the long run.
Software for Continuous Monitoring and Calibration
Tools like CalMAN Studio or LightSpace are integral for ongoing calibration, particularly in high-end cinema rooms. These programs analyze real-time image data and help fine-tune output parameters. I recommend setting a routine monthly calibration schedule; this keeps your system consistent, especially if environmental factors like ambient light or bulb brightness change with usage.
What are the best practices to maintain your projection screen and supports?
Keeping your projection screen clean and tensioned prevents distortions and hotspots. Use a microfiber cloth and avoid harsh chemicals that can damage specialized fabrics. Regularly inspecting support hardware, like mounts and supports, for rust or looseness, is equally vital—think of supports as the backbone of your entire setup. A quick check-up every few months can prevent costly accidents or misalignments that could compromise your viewing experience.
Long-Term Results and Scaling Your System
Investing in durable, easy-to-maintain equipment pays dividends. High-grade cine supports with quick-release mechanisms, for example, facilitate rapid adjustments and reduce setup time. Over time, upgrading to motorized lens focus or remote calibration controls can make large systems more manageable, especially if you’re scaling to larger venues or multiple screens. Prediction-wise, as 8K projectors become more affordable, ensuring your support systems and lighting are adaptable becomes increasingly important for future-proofing your setup.
How do I maintain my cinema lighting and projectors over time?
Regular cleaning and inspection are key. Use compressed air to clear dust from projector filters and ensure cooling fans operate unobstructed. Schedule bulb replacements based on manufacturer lifespan estimates—don’t wait until they fail during a screening. For lighting, checking connections, diffusers, and dimming controls periodically preserve consistent performance. A proactive maintenance routine extends equipment life and keeps your cinema performing at its best. Want more detailed advice? Reach out through our contact page to get tailored recommendations.
The Unexpected Lessons That Changed My Approach to Passive 3D Setup
One of the most profound realizations I had was that precision trumps equipment. Achieving a seamless passive 3D experience isn’t about having the latest projectors but understanding the subtleties of projection angles, synchronization, and screen calibration. I once underestimated how even minor misalignments could cause ghosting, which detracted from the immersive quality I sought. These lightbulb moments taught me to focus on meticulous setup rather than just gear upgrades.
Another key insight was the importance of patience during calibration. Rushing through adjustments, I often skipped detailed testings, only to realize later how small tweaks could dramatically improve clarity and depth. Investing time in iterative testing—using test patterns and documenting changes—was invaluable. It’s a reminder that mastery in cinema setup comes from deliberate practice and attention to detail.
Lastly, I learned that environmental factors matter as much as equipment. Ambient light, seating positioning, and screen quality all influence the final experience. Simply put, creating a professional-grade passive 3D setup is an art as much as it is a technical task, and patience combined with keen observation are your best tools.
My Toolbox for Continuous Cinema Calibration and Support
For maintaining optimal image quality, I rely on tools like the X-Rite i1Display Pro colorimeter. It ensures my projectors and screens stay calibrated, matching brightness and color consistency over time. Regular calibration helps prevent drifts caused by environmental changes or bulb aging, ensuring every viewing remains pristine.
Additionally, software solutions like CalMAN Studio play an essential role in fine-tuning color profiles and synchronization. Routine checks using such tools make it easier to maintain a professional-level experience without guesswork or repeated trial-and-error. If you’re serious about top-tier passive 3D, investing in these calibration essentials can elevate your setup dramatically.
Supporting equipment also matters; sturdy mounts and precise lens adjustments can make or break your alignment. I recommend exploring camera supports designed for cinema to achieve stable, repeatable setups. Keeping your gear in top condition ensures consistency and safety, especially when upgrading or scaling your system over time.
Your Next Step Toward Cinematic Mastery
Now that you’re equipped with deeper insights and practical tools, it’s time to take action. Whether you’re refining your passive 3D system or aspiring to professional standards, remember that each calibrated setup inches you closer to immersive perfection. Embrace the process, be patient, and celebrate your progress along the way. The world of cinema is vast, and your journey into mastering it is just beginning—so go ahead, turn your space into a true cinematic sanctuary.
What was the most surprising challenge you faced when setting up your passive 3D system? Share your experience below and let’s learn together!
About the Author
James Duke
ThinkOTS
James Duke is a seasoned professional in the creative production industry, bringing a wealth of technical knowledge and hands-on experience to cinegearguide.com. As a key figure at ThinkOTS, James has spent years navigating the complexities of high-end production environments, where selecting the right equipment is the difference between a successful shoot and a logistical failure. His expertise spans the full spectrum of cinematography gear, from advanced camera systems to the intricate accessories that define modern filmmaking. On cinegearguide.com, James leverages his deep understanding of the industry to provide authoritative insights, gear reviews, and technical guides. He is known for his ability to break down complex specifications into practical, actionable advice for filmmakers of all levels. His perspective is rooted in the real-world application of technology, ensuring that every recommendation is backed by professional standards. James is dedicated to empowering the filmmaking community by sharing his expertise, helping others navigate the ever-evolving landscape of cinema technology with confidence and clarity.
LinkedIn Profile