
I’ll never forget the moment I lined up my home cinema setup, eager for a perfect picture, only to be greeted with blurry edges and inconsistent brightness—like someone had smeared Vaseline over the lens. Frustration set in. I knew that calibration was the key, but the thought of spending hundreds on fancy tools or professional services was daunting. Sound familiar? That’s when I realized that you don’t need to break the bank to achieve professional-quality results.
Why Calibrating Your Projector Matters More Than You Think
Projector calibration isn’t just about making things look pretty; it directly impacts your viewing experience, your eye strain, and the overall immersion. An improperly calibrated projector can distort colors, cause uneven focus, and even lead to unnecessary eye fatigue after a movie marathon. If you’ve ever watched a film with unnatural skin tones or suffered from washed-out whites, chances are your projector needs some TLC.
Most setup guides emphasize expensive hardware like color meters, but trust me, you can do a thorough calibration using only free tools. Over the years, I’ve tried multiple DIY methods, and today I’ll share a step-by-step approach that’s accessible, effective, and—most importantly—budget-friendly. With just a few free software programs on your laptop and some patience, you’ll see a remarkable difference in image quality.
Is It Really Worth the Hype? Calibrating on a Budget
At first, I was skeptical—after all, can software really replace professional calibration tools? Early mistakes taught me a hard lesson. My first attempt involved guesswork—adjusting blindly while hoping for improvement—and I only made things worse. It wasn’t until I started using free software like CalMAN’s free trial or HCFR Colorimeter that I understood just how critical proper calibration is. These tools helped me measure and fine-tune the projector’s output with precision I hadn’t thought possible without expensive gear.
Calibration isn’t just about making colors pop; it’s about accuracy. Think of it like tuning a musical instrument—subtle adjustments lead to harmony. If you’ve faced issues like overly warm whites or dull blacks, a proper setup can transform your viewing experience. And the best part? All of this can be achieved without spending a dime.
If you’re tired of subpar image quality or are curious about squeezing the most out of your existing projector, you’re in the right place. Next, I’ll walk you through a simple, step-by-step process to calibrate your projector using free tools—so stay tuned!
→[Have you faced this exact problem? Share your experience on our contact page and let’s troubleshoot together.]
Set Up Your Workspace and Gather Tools
Begin by choosing a dark, neutral room free of ambient light to accurately assess calibrations. Place your projector on a stable surface and ensure it’s powered and warmed up for at least 30 minutes. Download free calibration software like HCFR or avail yourself of CalMAN’s trial—install and familiarize yourself with the user interface before proceeding. Having a calibration disc or test patterns ready can also aid in manual adjustments. Remember, just like tuning a cine lens requires precise focus, calibrating a projector demands attention to detail and patience.
Align the Projector Properly
Position your projector so that the lens is perpendicular to the screen surface, avoiding keystone distortions. Use a level tool or a straight edge to verify alignment. Slight misalignments can cause focus issues or trapezoidal distortion, which complicate calibration. Imagine adjusting a cine camera’s support—small tweaks in placement lead to sharper images and easier calibration, no matter if shooting film or digital. I once struggled with skewed images, but after re-aligning, the test patterns became perfectly rectangular, simplifying the process.
Initial Brightness and Contrast Tweaks
Start with the projector’s factory settings. Reduce the brightness and contrast to a moderate level before beginning calibration. Use grayscale test images or slides to observe the tonal range. Adjust the lamp mode or eco settings if your projector has them—these can influence color accuracy. Think of this step like balancing a lighting rig before fine-tuning your cine lights; it sets a baseline for more nuanced adjustments.
Color Calibration: Achieve Accurate Tones
This is the core of calibration. Load the test patterns from your software, focusing first on grayscale accuracy. Use the software’s sliders to adjust color temperature or white balance—aim for a neutral gray without color tint. Move on to primary colors—red, green, blue—and tweak their gains or offsets until the test patterns look true to life. For example, I once used a color patch test image and fine-tuned my projector’s blue gain. The whites shifted from a bluish hue to a natural tone, vastly improving picture quality. If you notice skin tones looking off, consider referencing [cine lenses explained](https://cinegearguide.com/cine-lenses-explained-choosing-the-perfect-glass-for-your-film) to understand how lens choices affect color rendition.
Adjust Sharpness and Focus
Use a high-contrast test pattern or Sharpness test image. Dial in the sharpness control—either digital or physical—to get crisp edges without introducing halos or artifacts. Focus the projector physically as well, adjusting the lens until the test pattern shows fine detail clearly. Remember, like focusing a cinema camera’s cine lens, achieving perfect focus requires iterative small adjustments—overshoot and review, then repeat. I once spent 15 minutes progressively sharpening my image, which resulted in a razor-sharp picture akin to professional cinema quality.
Refine with Advanced Settings
If available, tweak additional settings like gamma curves, color management system (CMS), or gamma presets. Use your software’s gamma test patterns to select the setting that reproduces the desired luminance curve—often 2.2 or native for home viewing. Altering these can make a significant difference in how dark or bright scenes appear. Think of this step as adjusting the film stock in a vintage cine camera—subtle changes can breathe new life into your image.
Final Verification and Adjustment
Once satisfied, review your calibration with different content—movies, photos, and test scenes. Check for consistency across different colors and grayscale. Make minor tweaks if necessary. This process is akin to calibrating a cine lens for multiple scenes—what looks perfect in test images might need slight realignment when viewing real content. I vividly remember adjusting my projector late at night, and after a few passes, the picture looked like it was shot in a professional studio.
By methodically following these steps, you’ll unlock a level of image quality comparable to professional calibration—all without spending a dime. Remember, patience and precision are your best tools, just like in mastering a cine lens or stabilizing your camera supports. Every adjustment brings your projector closer to that cinematic magic.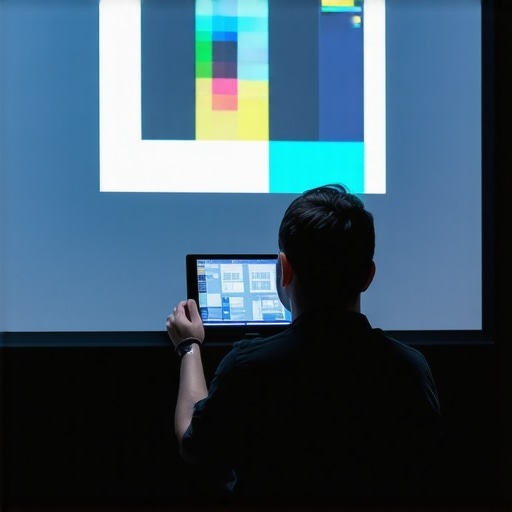
When it comes to professional filmmaking equipment, many enthusiasts and even seasoned shooters fall prey to certain misconceptions that can hinder their craft. One common myth is that modern cine lenses are universally superior to vintage glass. While newer lenses often boast advanced coatings and coatings, vintage cine lenses—especially those with well-preserved elements—can offer character and optical qualities that modern designs struggle to replicate. This contradicts the widespread belief that newer always means better, but understanding the nuances of lens design reveals why vintage glass often beats the precision of modern lenses in certain scenarios. Learn more about why vintage cine lenses outperform modern ones.
Are You Falling for the Support Support Trap?
Many filmmakers underestimate the importance of high-quality camera supports. The prevalent advice is that a sturdy tripod is enough, but the truth is that cheap supports often introduce micro-movements or jitters that ruin otherwise smooth footage. This is a classic trap: sacrificing support quality for cost-saving. It may seem insignificant—after all, isn’t the camera really the star?—but in reality, poor support gear hampers stabilization and affects focus accuracy. For example, lightweight gimbals are appealing but can amplify vibrations if not paired with stabilizers designed for their load. This mistake is easy to make and hard to detect until post-production corrections reveal the instability. Discover how to choose and upgrade camera supports.
The Subtle Differences in Cinema Projectors and Screens
It’s tempting to think that any projector and screen combo will suffice, but the reality is more complex. Many overlook the impact of subtle optical and environmental factors—like screen gain, ambient light, and color management—that drastically influence image quality. A common mistake is believing all projection screens are created equal; in fact, the choice of screen fabric can make or break color accuracy and contrast. For instance, high-gain screens might seem advantageous for brightness but often introduce hotspots and uneven viewing angles. Likewise, poorly calibrated projectors can produce color casts that are mistaken for hardware defects, when the true culprit is improper setup. For an in-depth understanding, explore our guide to projection screens and calibration.
Have you ever fallen into this trap? Let me know in the comments.
The world of cinema gear involves more than just picking the latest release. Mastery lies in understanding the nuanced interplay between optical qualities, stabilization support, and environmental factors. Whether it’s a vintage cine lens or an advanced support rig, the devil is often in the details that most overlook. Staying informed and questioning assumptions enables you to elevate your production quality to professional standards. Remember, the difference between amateur and seasoned filmmakers often hinges on appreciating these hidden details.
Tools That Keep Your Equipment Running Smoothly
Investing in quality tools is essential for keeping your cine lenses, supports, and projection systems in top shape. Personally, I swear by a high-grade lens cleaning kit that includes anti-static brushes, microfiber cloths, and specialized cleaning solutions—these prevent dust buildup and scratches on delicate optical elements. For calibration, a digital light meter like the Sekonic C-800-U provides precise readings necessary to maintain consistent exposure and color temperature over time, crucial for both camera and projector setups.
Additionally, a sturdy support system is vital. I recommend using a fluid head like the Manfrotto 529 Series, which offers smooth pans and tilts essential for cinematic shots. Regularly checking support connections and tightening fixtures prevents sudden movements or collapses that could damage valuable gear.
Don’t forget software tools. Programs such as DaVinci Resolve’s color grading suite allow ongoing adjustments to post-production calibration, ensuring your footage stays true to your vision after long hours of shooting. Keeping your software updated ensures compatibility with new hardware and fixes bugs that could hinder your workflow.
Developing a Routine for Long-Term Reliability
Establishing maintenance routines saves money and time. I perform a detailed cleaning of my lenses and supports after every shoot, focusing on removing dust and fingerprints that can deteriorate optics faster. For cine lenses, I apply a drop of Leica-approved lubricant on the focus and zoom rings periodically—this prevents gritty, stiff movements. Remember, like maintaining camera supports, regular inspection and tightening of support fixtures prevent wear and tear.
Calibration should be revisited at least every six months, especially if your setup is moved or exposed to temperature and humidity fluctuations. Use a color calibration target alongside your light meter to verify accurate exposure. For projector maintenance, replacing filters and checking lamp hours helps maintain image quality; a dusty or overused lamp can cause color shifts or brightness drops, which compromise your entire projection.
Many professionals swear by creating a maintenance log—tracking cleaning dates, calibration adjustments, and parts replacements. This record not only helps spot recurring issues but also simplifies warranty claims or support requests. Reliable maintenance ensures your cinema equipment stays operational and delivers consistent quality for years to come.
Scaling and Future-Proofing Your Cinema System
As your setup grows, so does the need for scalable maintenance strategies. Modular supports like advanced gimbal systems or multi-camera rigs benefit from quick-release mechanisms—saving time during setup and teardown. Investing in durable, easy-to-clean support components helps in adapting your system for different shoots or viewing environments without major overhauls.
Expect technology to evolve rapidly; for instance, the trend towards laser projectors promises lower maintenance and longer lifespan, but they demand careful calibration and cooling solutions. Keeping firmware updated and consulting manufacturer documentation, such as best practices for projector support, prepare you for seamless upgrades. Planning your infrastructure with flexibility in mind ensures you won’t be left behind as tech advances.
How Do I Maintain Cine Lenses and Support Systems Over Time?
The key is consistent, gentle care combined with proactive checks. Regularly clean your lenses with microfiber cloths and appropriate cleaning solutions, and replace worn support pads or quick-release plates to prevent slippage. Schedule periodic calibration of your projection and camera systems, especially after transportation or environmental shifts. Additionally, keep a detailed maintenance log to track issues and repairs, simplifying future upkeep. To get professional advice tailored to your setup, don’t hesitate to reach out through our contact page. Starting with advanced support like a precision lens heater or vibration-isolating mounts can dramatically extend equipment lifespan, so consider implementing these upgrades gradually—your future self will thank you.
The Unexpected Lessons from My Cinematic Journey
One of the most profound realizations I had was that perfection doesn’t come from expensive gear alone but from meticulous attention to detail and understanding the nuances of each component. I once believed that a high-end projector or the latest lens could solve all visual issues, but I learned that even vintage cine lenses, when properly calibrated and supported, can outperform modern gear in character and depth. The hardest lesson was recognizing that consistent maintenance and calibration, no matter how small the detail, have a compounding effect on image quality and reliability. This insight transformed my approach from reactive fixes to proactive care, ensuring every shot and projection meets professional standards without breaking the bank.
My Toolkit for Cinematic Excellence
Over the years, I’ve curated a set of tools that keep my cinematic environment sharp and reliable. A premium microfiber cleaning cloth coupled with a gentle lens cleaner is essential—dust and fingerprints are the silent enemies of optical clarity. My trusted digital light meter, the Sekonic C-800-U, helps me achieve consistent exposure across different projects, drawing from my experience that precise lighting makes or breaks the shot. For camera support, the Manfrotto 529 Series fluid head offers unparalleled smoothness, ensuring steady pans that mimic cinematic fluidity. These tools, combined with ongoing education through trusted resources like our comprehensive guide to cine lenses, have been invaluable in reaching professional levels without a high-end budget.
Harnessing Passion to Fuel Your Progress
Stepping into the world of cinema is both exhilarating and humbling. The key is to embrace ongoing learning and view setbacks as opportunities to grow. Whether you’re calibrating your projector for the first time or experimenting with vintage lenses, patience is your best ally. Remember that the pursuit of excellence is a marathon, not a sprint. I encourage you to take that first step—revisit your support supports, fine-tune your lighting, or experiment with different lenses—each small improvement compounds into extraordinary results. Ultimately, your passion and persistence will create a viewing experience that rivals professional theaters, proving that with the right mindset, quality cinema is within everyone’s reach.
About the Author
James Duke
ThinkOTS
James Duke is a seasoned professional in the creative production industry, bringing a wealth of technical knowledge and hands-on experience to cinegearguide.com. As a key figure at ThinkOTS, James has spent years navigating the complexities of high-end production environments, where selecting the right equipment is the difference between a successful shoot and a logistical failure. His expertise spans the full spectrum of cinematography gear, from advanced camera systems to the intricate accessories that define modern filmmaking. On cinegearguide.com, James leverages his deep understanding of the industry to provide authoritative insights, gear reviews, and technical guides. He is known for his ability to break down complex specifications into practical, actionable advice for filmmakers of all levels. His perspective is rooted in the real-world application of technology, ensuring that every recommendation is backed by professional standards. James is dedicated to empowering the filmmaking community by sharing his expertise, helping others navigate the ever-evolving landscape of cinema technology with confidence and clarity.
LinkedIn Profile