
Ever had that sinking feeling when you review your footage and realize the crisp dialogue you captured is overshadowed by distracting handling noise from your boom pole? I’ve been there—setting up for what should be a perfect shot, only to be haunted by every jitter, squeak, or bump every time I move the microphone into position. That moment of frustration is familiar, and it’s a sure sign that something needs to change.
Handling Noise: The Silent Enemy of Clean Sound
If you’ve ever experienced lingering audio issues despite excellent mic placement and sound equipment, handling noise might be the culprit. It sneaks in through the entire take, making even the best performances sound amateurish. When I first started in the field, I ignored the importance of proper boom pole handling—thinking a lightweight pole would be enough. Spoiler: it wasn’t. I quickly learned that even the slightest shake or bump could ruin otherwise flawless audio, and I paid the price—wasting time and reshoots.
Handling noise isn’t just a minor inconvenience; it can undermine your entire production. The key is understanding how to minimize or eliminate it entirely. Today, I want to share the insights I’ve gained along the way to help you capture pristine audio, even when your camera support setup is less than perfect. We’ll explore practical techniques, gear upgrades, and habits that can save your sound from that sneaky noise ruining your great takes.
Is Proper Boom Handling Really Worth All the Fuss?
Honestly, I used to dismiss the fuss about handling noise as overkill. One early mistake I made was relying solely on a lightweight pole without considering grip techniques or appropriate accessories. That mistake cost me audio clarity, and I learned the hard way—investing in better support equipment and developing good handling habits made all the difference. Want to avoid similar pitfalls? Dive into the upcoming sections, where we’ll cover tried-and-true methods to keep your audio crisp and professional. If you’re interested in improving your support system, check out this guide on stabilizing camera supports.
Secure Your Grip with Proper Technique
Start by adopting a relaxed but firm grip on your boom pole, framing your hand around the support, not just the microphone, to distribute the weight evenly. I recall a shoot where I used a death grip, causing tremors; switching to a loose grip with controlled wrist movements eliminated handling noise dramatically. Practicing this grip before set ensures muscle memory and steadiness during takes.
Leverage Equipment for Stability
Invest in accessories like shock mounts and boom pole jackets that absorb vibrations. I once attached foam padding around my pole, which dampened minor shakes. Additionally, using a weight bag at the base of your support can stabilize your setup. Remember, a stable base minimizes the transfer of vibrations to your mic, thus sharply reducing handling noise.
Use Proper Stance and Body Mechanics
Stand with your feet shoulder-width apart, bend your knees slightly, and keep your arms close to your body. When I shot in a cramped space, this stance kept me grounded, preventing movement. Move smoothly, pivot your hips, and avoid shifting weight during recording. This disciplined posture directly correlates with reduced shake in the audio signal.
Control Your Environment and Movements
Avoid abrupt movements; plan your shots to minimize motion. If unavoidable, anticipate your movements and drift gracefully, akin to a photographer panning smoothly. I once had to chase a moving subject; by pre-planning my approach and moving slowly, I avoided jarring noise. Also, position yourself so that external disturbances—like footsteps—are outside your audio capture zone.
Practice and Routine Calibration
Regularly rehearse handling techniques, recording yourself to identify tremors. During one practice session, I noticed slight jitters when my grip tired; I then adjusted my stance and took micro-breaks. Additionally, keep your gear well-maintained; loose screws or worn grips can introduce noise. Routine checks maintain your support system’s integrity, ensuring consistent quality.
Implement Live Monitoring and Quick Adjustments
Always use headphones to monitor in real time. This practice offers immediate feedback, allowing you to correct subtle shakes. I remember catching an avoidable bump during a take — with quick adjustment and a reassuring nod to my crew, I kept subsequent takes clean. Use visual cues from your monitor to synchronize your movements and prevent handling noise before it becomes audible.
By combining proper grip techniques, suitable gear, body mechanics, environmental control, constant practice, and live monitoring, you can drastically cut down unwanted handling noise. These actionable steps, when integrated into your routine, elevate your sound quality and make your audio truly professional.
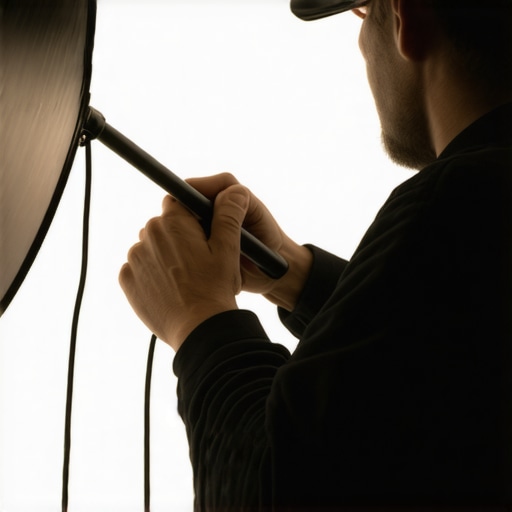 When it comes to crafting cinematic visuals, enthusiasts and professionals alike often focus on the obvious choices: selecting a high-end projector, the perfect lens, or the ideal lighting setup. However, true mastery lies in understanding the subtle details and misconceptions that can derail even the most well-planned shoots. Contrary to popular belief, investing solely in premium gear doesn’t guarantee stellar results; it’s equally about understanding the nuances and avoiding common pitfalls. For example, many assume that brighter projectors automatically produce better images, but in reality, overestimating lumen output without considering ambient light control can lead to washed-out visuals, diminishing contrast and color richness. This misconception often pushes productions to overspend on equipment that doesn’t address core challenges. To make informed decisions, filmmakers should delve into detailed specifications and expert insights, such as those found in comprehensive guides on projectors or projection screens, ensuring their choices align with their unique environment and goals.
A frequent trap relates to cine lenses. Beginners and even some professionals tend to prioritize aperture size or brand prestige, overlooking critical factors like optical QA and coating technologies. Vintage cine glass, for instance, is often dismissed as outdated, yet many seasoned cinematographers swear by their unique character and unparalleled image quality, especially in storytelling that benefits from organic imperfections. Visiting this resource can reveal how proper lens selection hinges on understanding the subtle differences that impact depth, flare, and character.
Another often overlooked aspect is camera support stability. The myth that lightweight supports are always preferable for handheld flexibility can be misleading. In actual practice, underestimating the importance of robust support systems and proper rigging can lead to micro-vibrations and unintended shake, no matter how steady your hands are. Investing in durable support, such as high-quality tripods and stabilizers, combined with correct handling techniques, dramatically enhances shot stability. For insights on how to achieve professional support setups, check out this guide.
Cinematic lighting is another nuanced domain. Many assume that powerful lights with high CRI guarantees accurate skin tones, but the real secret lies in proper placement and color temperature control. Relying solely on high-lumen fixtures without considering their spectrum can result in unnatural skin tones or color shifts. Advanced cinematographers understand the importance of fine-tuning lighting setups to match the scene’s mood and camera’s color profile, often utilizing techniques like lighting instead of filters.
Finally, projection screens are more complex than they seem. The default assumption that all screens with high gain produce sharp images is false. High-gain screens can introduce hotspotting and reduce viewing angles, leading to uneven brightness and color inconsistencies across the image. Choosing the right screen for your space involves balancing gain with viewing comfort; detailed testing and professional advice are essential. For a deep dive, consider exploring this comprehensive guide.
Remember, what separates amateurish results from professional cinema is often the meticulous attention to these hidden details. By challenging common myths—like brightness for projectors or support weight for rigs—and understanding the sophisticated balance of equipment choices, you elevate your craft. Have you ever fallen into this trap? Let me know in the comments.
Tools That Keep Your Cinema Gear in Top Shape
Investing in high-quality tools is essential for maintaining your cinema setup over the years. I swear by a few specific items that have saved me countless hours and dollars. First, a precision lens cleaning kit, including swabs, microfiber cloths, and specialized cleaning solution, ensures your cine lenses stay free from dust and smudges—preserving image quality. For projector maintenance, I rely on a high-end air compressor with a filter to remove dust from vents and internal components without risking damage. When it comes to camera supports, a digital tripod level helps maintain perfect framing and stability, especially on uneven terrain, reducing wear on support joints. Incorporating these tools into your routine helps avoid costly repairs and keeps your gear performing at its best.
Software Aids for Longevity and Calibration
Beyond physical tools, software plays a crucial role. I regularly use calibration software like Datacolor’s SpyderX for monitors, ensuring color accuracy from editing to projection. This prevents color shifts over time, particularly vital when matching scene lighting with projected images. For projectors, firmware updates are critical; manufacturers often release patches addressing bugs and optimizing performance. Set calendar reminders to check for updates quarterly. Additionally, random audits using test patterns help detect drift in image quality early—addressing issues before they become noticeable problems. Staying proactive with these digital tools extends your equipment’s lifespan and maintains visual fidelity.
Developing a Maintenance Routine to Avoid Breakdown
Consistency is key. I schedule weekly checks for support equipment, including tightening bolts, lubricating moving parts, and inspecting cords for wear. For long-term storage, I clean every component thoroughly and store cine lenses in airtight containers with desiccants—this minimizes fungus and corrosion. When moving equipment between locations, use dedicated cases with foam inserts to prevent knocks and vibrations. Implementing a routine check list—covering cleanliness, calibration, and physical integrity—ensures your gear remains reliable. Adopting this discipline not only preserves the investment but also boosts confidence during critical shoots.
Scaling Your System as Projects Grow
As your projects expand, so should your maintenance approach. For larger setups, consider investing in a centralized ventilation system to control temperature and humidity—crucial for sensitive equipment. Upgrading to modular support rigs allows easy reconfiguration without compromising stability, and regular professional servicing ensures all components operate harmoniously. Additionally, integrating cloud-based documentation of maintenance logs helps track recurring issues and plan upgrades. Remember, proper scaling isn’t just about adding gear—it’s about smart upkeep that ensures each component performs optimally over time. Think about how you can streamline your maintenance process; perhaps a dedicated digital log could be your next step.
How do I maintain professional-grade cinema equipment over time?
Maintaining your setup involves a combination of the right tools, routine checks, and strategic upgrades. Using specific gear like a high-quality lens cleaning kit, firmware updates, and calibration software helps keep everything in check. A disciplined maintenance schedule minimizes downtime and avoids costly repairs, especially when scaling up for larger productions. Employing these practices today will save you headaches tomorrow. For detailed tips on lens care, check out this guide on cine lenses. Try implementing a weekly cleaning routine for your lenses and see how much sharper your images remain long-term.
How I Learned to Spot the Hidden Flaws in Cinema Gear
- Early on, I thought that high-end gear could mask my lack of technique, but I quickly discovered that understanding the nuances of each component—like lens coatings or screen reflectivity—made all the difference. Real mastery comes from knowing not just what to buy, but how each piece interacts within your system.
- Matching equipment to environment saved me countless headaches. A powerful projector isn’t enough if your room’s lighting conditions aren’t considered. It took trial and error to realize that specs like lumen output need contextual understanding—sometimes, less is more.
- Routine maintenance isn’t glamorous, but neglecting it can turn your prized setup into a costly paperweight. Regular calibration, cleaning, and upgrades ensure your gear performs at peak with minimal surprises during critical moments.
- Supporting gear, like sturdy mounts and balanced support systems, are often underestimated. A tiny vibration in your support rig can result in shaky footage or fuzzy projections. Investing in quality and proper handling techniques pays off in image stability and professional polish.
- In my journey, the most profound lesson was that continuous learning—asking questions and seeking out specialized resources—accelerates growth. Sometimes, the smallest adjustments have the largest impact on quality and peace of mind.
My Go-To Resources That Keep Me Sharp
- Exclusive guides like Cine Lens Selection give me a detailed understanding of optical qualities, helping me choose lenses that suit the narrative mood.
- Understanding projection technology through comprehensive projector guides ensures I avoid common pitfalls like mismatch between lumen spec and ambient lighting conditions.
- Support system tips from rigging and stabilization resources help me keep my shots smooth and professional, even in challenging environments.
- Adding consistency through regular calibration and maintenance routines, inspired by film lighting mastery, ensures the visual output remains true over time.
Push Your Limits and Elevate Your Cinematic Craft
Remember, perfecting your cinema setup isn’t about quick fixes; it’s a continuous journey of learning, adjusting, and refining. Embrace curiosity, prioritize proper maintenance, and don’t shy away from seeking expert advice. Your dedication today will set the stage for spectacular visuals tomorrow. Which part of your cinema setup do you want to improve next? Let’s discuss below!
,
About the Author
James Duke
ThinkOTS
James Duke is a seasoned professional in the creative production industry, bringing a wealth of technical knowledge and hands-on experience to cinegearguide.com. As a key figure at ThinkOTS, James has spent years navigating the complexities of high-end production environments, where selecting the right equipment is the difference between a successful shoot and a logistical failure. His expertise spans the full spectrum of cinematography gear, from advanced camera systems to the intricate accessories that define modern filmmaking. On cinegearguide.com, James leverages his deep understanding of the industry to provide authoritative insights, gear reviews, and technical guides. He is known for his ability to break down complex specifications into practical, actionable advice for filmmakers of all levels. His perspective is rooted in the real-world application of technology, ensuring that every recommendation is backed by professional standards. James is dedicated to empowering the filmmaking community by sharing his expertise, helping others navigate the ever-evolving landscape of cinema technology with confidence and clarity.
LinkedIn Profile