I remember the first time I set up a projection screen in my small studio and watched the image struggle to come alive. The colors were dull, the contrast was off, and I felt that sinking feeling—like I’d wasted hours on equipment that just didn’t work together. It was a lightbulb moment for me: I had overlooked how crucial the right projection screen and lighting setup are to making your film look professional. That frustration sparked my quest to master these elements, and let me tell you, it’s been a game-changer.
Why Choosing the Right Projection Screen and Film Lighting Can Make or Break Your Film
This isn’t just about having fancy gear. It’s about understanding the nuances that turn a good shot into a stunning one. Whether you’re shooting a small indie project or a high-end commercial, your equipment choices directly impact your final look. A poor-quality projection screen can wash out your image, while bad lighting can flatten your scene or create unwanted shadows. Over the years, I’ve learned that even small adjustments here can elevate your entire production.
If you’ve ever faced the dilemma of whether to go big with expensive gear or settle for cheap alternatives, you’re not alone. I’ve been there, too. But the key is knowing what to prioritize and how to optimize what you have. That’s exactly what I’ll help you do today. Together, we’ll sift through the common pitfalls and focus on practical, proven solutions to get your visuals shining.
Is a Fancy Projection Screen Actually Worth the Hype
Early on, I bought what looked like the best screen on the market without doing proper research. Spoiler: it wasn’t. I learned the hard way that not all screens are created equal. Some are designed for home theater, others for professional settings, and each has different requirements. The mistake I made was assuming that a high price tag meant better quality. Trust me, that’s not always true. To avoid wasting money and time, check out my comprehensive guide on selecting the perfect projection screen for your space.
Same goes for lighting. I once used generic LED panels without considering color temperature or lumen output, which resulted in flat, unflattering scenes. The takeaway? Do your homework. Proper film lighting isn’t just about brightness; it’s about shaping your scene, controlling shadows, and setting the mood. Want to avoid my rookie mistakes? Keep reading, and I’ll walk you through the essentials that make a real difference.
Choose the Right Projection Screen for Your Space
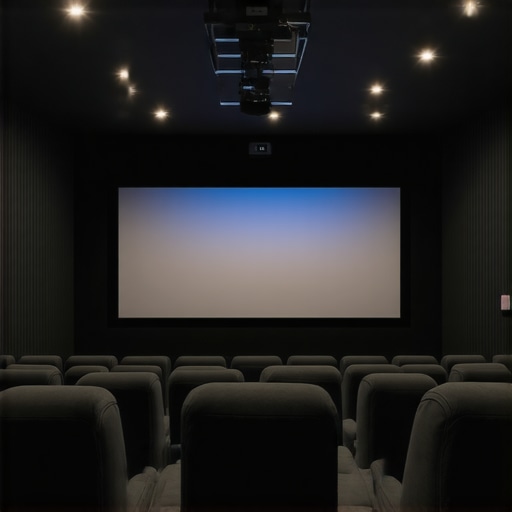
Start by analyzing your environment. Measure your room dimensions and note the ambient light levels. For small studios, a matte white screen with a gain of 1.0 often suffices, but larger spaces might benefit from high-gain screens that direct more light towards the audience. I once set up a 120-inch screen in my garage, initially opting for a cheap, foldable option. The result was washed-out images. Switching to a dedicated, high-quality screen from this guide transformed my visuals—colors became vibrant, and contrast improved dramatically.
Match Your Screen to Your Projector’s Capabilities
Check your projector’s lumen output. If it’s under 2000 lumens, avoid screens with high gain, which can cause hotspots. Conversely, projectors over 3000 lumens can handle brighter, high-gain screens. Think of it like choosing sunglasses: too dark, and you lose details; too light, and everything looks washed out. I once used a 2,500-lumen projector with a 2.0 gain screen, resulting in uneven brightness. Upgrading to a screen tailored for my projector’s specs made the image evenly sharp and colorful.
Optimize Your Lighting Setup for Cinematic Impact
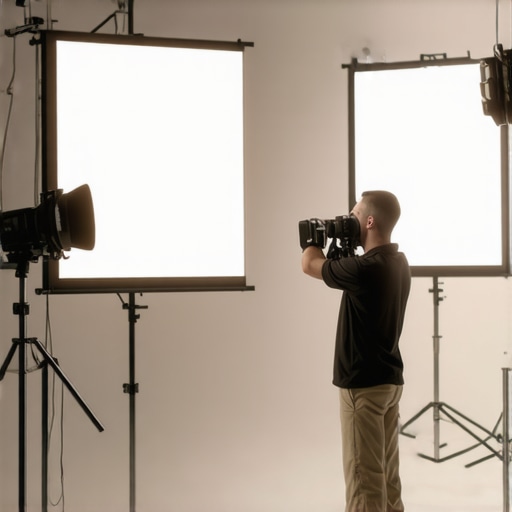
Lighting is your tool for shaping mood and emphasizing details. Start by controlling ambient light. Use blackout curtains or flags to block unwanted light sources, akin to closing blinds before a movie. In my first shoot, I failed to do this and ended up with a glare that washed out my scene. After blackout, I added key lights with adjustable color temperature, inspired by these techniques. My scenes gained depth and warmth, making them look professional.
Use the Right Light Sources and Positioning
Choose lights with adjustable color temperature and dimming features. LED panels with a CRI of 95+ are ideal for vibrant, true-to-life colors. Position your key light at a 45-degree angle to your subject, with a fill light on the opposite side to soften shadows—think of it as sculpting your scene with light and shadow. Once, I used a single harsh light that created unflattering shadows on my subject’s face. Adding a fill light and diffusing my key light made a world of difference, giving my scene a natural, cinematic glow.
Shape and Control Light with Modifiers
Utilize softboxes, reflectors, and flags to control light spill and create the desired mood. Softboxes diffuse light evenly, like a gentle cloud, perfect for portraits. Reflectors bounce light into shadows, increasing detail without harshness. Flags block unwanted spill, providing precise control. I once shot in a cramped space and used black flags to block light from spilling onto my background, which made my subject pop and kept the background unobtrusive.
Test and Adjust for the Best Result
Always review your setup in the shooting environment. Take test shots or clips and evaluate the image. Adjust screen angle, lighting intensity, and color temperature as needed. Remember, small tweaks can have a big impact. I once spent hours tweaking my lights and screen until I achieved a balanced look that matched my artistic vision—proof that meticulous setup pays off.
Many filmmakers and hobbyists often fall prey to misconceptions that can sabotage their visual quality. One of the most pervasive myths is that more expensive equipment automatically guarantees professional results. In reality, understanding the nuances of your gear—like the specific properties of projection screens and lighting—is far more important than price tags. For example, a high-gain projection screen might seem appealing for its brightness, but if misused, it can create hotspots and uneven images that ruin the viewing experience. The same applies to lighting: opting for the most powerful or expensive lights without considering color temperature, CRI, or proper placement can lead to flat, unnatural scenes. To truly elevate your production, focus on matching your equipment to your specific environment and artistic goals. For detailed insights, I recommend checking out these tips on selecting the perfect projection screen and advanced lighting techniques.
Keeping your filmmaking gear in top shape is crucial for consistent, high-quality results. Over time, even the most robust equipment can suffer from wear and tear, dust, and misalignment. That’s why implementing a routine maintenance schedule and investing in reliable tools is essential. For example, regularly cleaning your lenses with a microfiber cloth and proper lens cleaner prevents dust buildup that can compromise image clarity. I personally use the LensPen because it’s gentle yet effective at removing smudges without scratching. Additionally, keeping your camera supports, such as tripods and stabilizers, well-lubricated and checked for loose parts can save you from unexpected breakdowns during critical shoots.
To ensure your equipment continues to perform optimally, consider investing in a dehumidifier or protective cases for sensitive gear, especially if you work in humid or dusty environments. Regularly inspecting cables and connectors for signs of wear can prevent frustrating connection issues. For lighting, check and replace bulbs or LEDs as needed, and store your lights in padded cases to avoid damage when not in use. These small but impactful steps extend the lifespan of your equipment and reduce downtime.
How do I maintain my projection screens and lighting setups over time?
Projection screens should be kept clean and free of dust, which can degrade image quality. Use a soft, dry cloth or a gentle vacuum with a brush attachment to remove dirt. Avoid harsh chemicals that might damage the material. For lighting, regularly check the integrity of your fixtures, replace bulbs or LEDs before they fail, and calibrate your color temperature periodically to maintain consistent scenes. When storing lights, make sure they are cool and protected from moisture. These practices help preserve your setup’s quality and ensure your visuals stay sharp for every project.
Looking ahead, the trend toward smart, networked lighting and automated calibration tools promises to make maintenance easier and more precise. For now, investing in high-quality tools like professional cleaning kits and regular inspections can keep your gear reliable for years to come. Don’t forget to schedule quarterly checkups and keep detailed logs of maintenance activities—this habit makes troubleshooting much faster and more effective. Ready to take your setup to the next level? Try implementing a monthly equipment audit and see how much smoother your productions run.
Looking back, one of the most pivotal moments in my filmmaking journey was realizing that equipment alone doesn’t define your visual quality. It’s the meticulous selection and maintenance of your projection screens and lighting techniques that truly elevate your film’s appearance. These lessons, learned through trial, error, and a lot of experimentation, have become the cornerstone of my approach to professional-looking productions.
Lessons from the Front Lines of Film Setup That Changed Everything
- Not all screens are created equal: I once bought a high-end-looking projection screen without researching its compatibility with my projector or room. The result was disappointing. Now, I know that matching your screen’s gain and material to your environment makes a huge difference. I wish I had understood this earlier, as it would have saved me time and money.
- Lighting is more than brightness: Initially, I thought powerful lights were all I needed. But I underestimated the importance of color temperature and placement. Properly calibrated, adjustable lights can add depth and mood, transforming flat scenes into cinematic visuals. This revelation pushed me to invest in better lighting gear and learn advanced techniques.
- Regular maintenance saves headaches: Dusty lenses and worn-out bulbs can sabotage your work. I learned to clean my equipment regularly and replace worn parts proactively. It’s a small effort that guarantees consistent quality, especially during critical shoots when every second counts.
- Test, tweak, and perfect: Never underestimate the power of a test shot. Small adjustments in your setup can have a profound impact. Spending time to evaluate and refine your visuals before the actual shoot ensures your final product is polished and professional.
Curated Tools That Make a Difference
- Projection screen selection guides: Check out the comprehensive guide to find the perfect screen for your space. It’s helped me choose the right model for every project.
- Lighting calibration kits: I trust professional color meters and CRI-rated LED panels, which ensure accurate color reproduction. These tools have been invaluable in achieving the cinematic look I want.
- Maintenance equipment: Keep microfiber cloths, lens cleaners, and spare bulbs handy. Regular upkeep with quality supplies prolongs your gear’s lifespan and performance.
- Educational resources: Deepen your knowledge with this expert guide on lighting techniques. It’s a game-changer for elevating your cinematography skills.
Harness Your Passion and Push Your Limits
Every filmmaker starts somewhere, and the journey to mastering projection screens and lighting is filled with learning moments. Embrace the process, experiment boldly, and don’t be afraid to refine your setup until it’s perfect. Your visuals will thank you, and your audience will notice the difference. Remember, the key isn’t just equipment—it’s your knowledge, attention to detail, and willingness to improve. Keep pushing forward, and your films will shine brighter than ever. Ready to upgrade your visual game? Share your biggest challenge below and let’s conquer it together!
2 Replies to “Ultimate Guide to Projection Screens & Film Lighting for Filmmakers”
Leave a Reply
Related Posts
Best Projection Screens & Film Lighting Equipment for Filmmaking
Ever spent hours filming your masterpiece, only to find the…
Best Projection Screens & Film Lighting Equipment for Modern Cinematography 2024
Ever spent hours setting up your cinematic space only to…
Top Projection Screens & Cinema Projectors for Modern Filmmaking
My First Encounter with a Home Cinema Projector I'll never…
Reading this article really resonated with my own experience in setting up a home studio. I initially invested in a high-end projector and a fancy screen, but I wasn’t satisfied with the image quality—until I took the time to calibrate my lighting and choose a screen that suited my space. It made such a difference! I think many beginners overlook the importance of understanding their environment and matching their gear accordingly. One mistake I see often is neglecting ambient light control; even the best equipment can be rendered useless if glare or reflections interfere.
I’m curious—how do others approach balancing budget constraints with the desire for professional-level results? Do you have any tips for those working with limited space or resources but still aiming for cinematic quality? Overall, this post highlights essentials that can truly transform a project, and I appreciate how it emphasizes practical decisions over just expensive gear. Looking forward to hearing everyone’s insights on optimizing setups for different environments.
This post really hits home for me, especially regarding the importance of matching your projection screen and lighting to your space. I’ve learned from personal experience that investing in a good-quality screen made a huge difference, but equally vital is understanding the environment. I remember initially thinking bright lights would solve everything until I realized controlling ambient light was crucial for image clarity. In a small room, I found that even modest lighting adjustments—like adding flags or blackout curtains—can dramatically improve image contrast and color vibrancy. One thing I’ve been curious about is how others navigate the challenge of balancing budget constraints with the need for quality gear. For those working with limited resources, what are some effective ways to optimize existing equipment or choose versatile tools without breaking the bank? I believe that with some strategic planning and understanding the nuances discussed here, anyone can achieve great results without necessarily spending a fortune. Thanks for sharing these practical insights—they’ve definitely inspired me to revisit my setup and fine-tune my environment for better cinematic results.