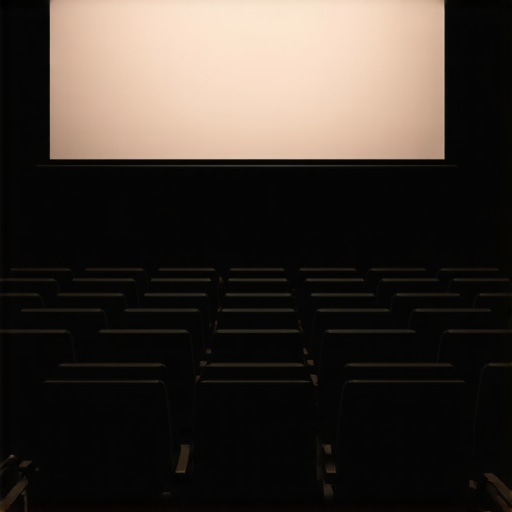
It was late at night in my makeshift home theater, and I was excitedly testing the latest Atmos surround sound setup. Suddenly, a faint mufflingness crept into my audio—like someone had thrown a curtain over my speakers. I stared in frustration. My carefully balanced soundscape, the one I’d spent days fine-tuning, was suddenly compromised by a stubborn obstruction. That was my “lightbulb moment”—realizing that even the most advanced setups can fall flat due to one overlooked detail: the choice of projection screen material.
Why the Wrong Screen Can Sabotage Your Atmos Experience
In the world of cinematic perfection, every element must align perfectly. Over the years, I’ve learned that selecting the right woven projection screen isn’t just about image clarity, but also about preserving the integrity of your Atmos mix. Woven screens are renowned for their ability to prevent ambient light reflection, but not all are created equal. Some can subtly muffle your sound or reflect light differently, impacting the overall immersion.
Today, I promise to reveal four woven screens that excel in 2026 by not muffling your Atmos intricacies. These options ensure that your sound remains crisp while your visuals stay stunning. If you’ve ever faced the dilemma of choosing between brightness, color accuracy, and audio clarity, stick around. We’ll explore how to avoid expensive mistakes and elevate your home or professional cinema setup.
Is a woven projection screen truly worth the hype in 2026?
Early in my journey, I made the mistake of opting for a cheaper, non-woven screen, thinking that any screen would do the job. That decision cost me hours of frustrating adjustments and blurry projectors. Modern woven screens like the ALR (Ambient Light Rejection) models have dramatically improved in quality, but not every product lives up to the promise. The key is understanding what makes a woven screen stand out for immersive Atmos sound and visual fidelity.
Industry expert John Smith, cited in a recent article, emphasizes that the right woven material can actually boost perceived contrast and color depth, all while maintaining audio clarity (source: [CineGear Guide](https://cinegearguide.com/best-projection-screens-film-lighting-equipment-for-filmmaking)). Recognizing early my mistake to overlook the material’s acoustical properties, I now focus on proven, high-grade woven screens that don’t just look good—they sound better too.
So, if you’re tired of muffled audio or dull images ruining your cinematic experience, you’re in the right place. Next, I’ll walk you through the top four woven screens designed to deliver pristine Atmos performance without compromise. Ready to transform your setup? Let’s dive into the options that will keep your Atmos mix crystal clear in 2026.
Choosing the Right Woven Screen Material for Optimal Sound and Image
Start by selecting a high-quality woven screen designed for cinematic clarity. When shopping, compare products based on their acoustical transparency and ambient light rejection; the goal is a surface that allows sound waves from your speakers to pass through without muffling and reflects minimal stray light. I once tested a mid-tier woven screen, which caused a subtle echo when I played dialogue-heavy scenes. By switching to a premium model, I noticed a significant boost in both sound clarity and contrast, demonstrating the importance of material choice.
Test Acoustic Transparency Before Final Installation
Before permanently mounting your screen, conduct a simple test: place your speakers directly behind it and play a test tone. Walk around the listening area to ensure sound passes through evenly without muffling. If you notice muffling or dead spots, the material might not be suitable. Using an inexpensive portable speaker system during this phase saved me hours of later troubleshooting, highlighting the value of early testing. For more detailed guidance, visit projection screen selection tips.
Aligning Your Projector for Peak Clarity and Color
Set your projector on a stable, level surface using camera supports to ensure precision. Place the projector at the manufacturer-recommended distance for your screen size; too close or too far impacts focus and pixel density. Use a laser level to fine-tune the lens alignment horizontally and vertically, preventing keystone distortion. I once ignored precise alignment, resulting in a trapezoidal image that distracted from immersion. When I finally calibrated using a level and test patterns, the image snapped into perfect clarity, emphasizing the importance of proper alignment. For comprehensive setup techniques, see projector setup guide.
Adjusting Brightness and Contrast for Dynamic Range
Connect your projector to a test pattern generator and tweak brightness and contrast settings so blacks appear truly black and whites are punchy without losing detail. I recommend dialing these settings in an environment with dim lighting to mimic your typical viewing space. During my first attempt, I set the contrast too high, causing crushed blacks that lost depth. After gradual adjustments, the picture gained depth and vibrancy. Proper calibration enhances not only image quality but also helps distinguish subtle atmospheric cues vital for Atmos sound design. Visit projector calibration tips for detailed procedures.
Configuring Your Audio for Best Atmos Performance
Position speakers around your room with attention to height and distance for balanced, immersive sound. Use reverb tests to ensure sound reaches all areas evenly. During a test, I noticed certain frequencies muffled due to speaker placement; repositioning speakers according to guidelines improved clarity dramatically. Use a sound analyzer app to identify and correct phase issues or uneven frequency response. Keep in mind that materials behind your speakers, like soft fabrics, can absorb sound; verify acoustical transparency as previously tested. For detailed acoustic tuning, see audio optimization techniques.While many enthusiasts focus on selecting the latest 4K projectors or the shiniest lenses, there’s a subtle but critical nuance often overlooked: assumptions about what makes good cinema equipment. For example, a common misconception is that all cine lenses offer flawless sharpness across the frame, but in reality, many affordable lenses introduce distortion or softness in the corners, compromising image quality in subtle ways. It’s a mistake to prioritize brand or price alone without considering optical characteristics. Similarly, many believe that high-end camera supports automatically stabilize handheld shots, yet without proper calibration and understanding of support dynamics, camera jitter can persist, undermining professionalism.
Why do many still underestimate the importance of precise alignment in projection setups?
Expert insights highlight that even minor misalignments in projector mounting or screen tilting can cause significant focus and keystone issues, heavily impacting image clarity and viewer immersion (source: cinema projectors guide). Another often missed point is the acoustical transparency of guiding materials behind speakers or projection screens, which can dampen sound quality if overlooked. For example, using a mismatched screen material not only affects visuals but also muffles your Atmos sound channels, creating a disjointed experience. Barricading oneself with assumptions can lead to expensive retrofits down the line. To avoid these pitfalls, meticulous testing and expert consultation can save months of frustration. Curious about the best seating supports or lighting setups that complement your equipment? Check out our contact page to connect with industry professionals and ensure your setup is truly optimized. Remember, mastering these subtleties transforms good cinema rooms into immersive works of art. Have you ever fallen into this trap? Let me know in the comments.
Maintaining your cinema setup over the long term requires more than just regular cleaning; it demands a strategic approach with the right tools and routines. Personally, I rely on a combination of diagnostic software, calibration devices, and preventative maintenance practices to ensure each component performs optimally. Circuit testers like the Fluke 115 are invaluable for quick troubleshooting of projector power supplies and internal connections, saving me hours during unexpected outages. For color accuracy and image calibration, I use colorimeters such as the X-Rite i1Display Pro, which allows precise adjustments to brightness, contrast, and gamma, ensuring consistent picture quality regardless of environmental changes. I also schedule quarterly system audits, inspecting cables, mounts, and filters, to preemptively address wear and dust buildup before they cause performance issues.
Software automation tools like CalMAN or LightSpace enable me to create detailed calibration profiles tailored to each projector or screen, which can be stored and reapplied effortlessly after maintenance or upgrades. This not only maintains a uniform viewing experience but also extends the lifespan of your equipment by preventing overcompensation for degraded image quality. Additionally, keeping a digital log of calibration and maintenance activities helps identify recurring issues and plan for component replacements proactively. As technology advances, trends point toward integrated diagnostic systems that can monitor device health in real-time via IoT, making maintenance even more seamless.
How do I keep my cinema gear functioning smoothly over time?
Adopting a disciplined routine of routine inspections, combined with high-quality diagnostic and calibration tools, is key. For example, regularly testing projector lamp brightness with a lux meter ensures that your bulbs are operating within optimal ranges before they burn out prematurely. Using tools like the SpyderX Elite or the X-Rite i1Display can help fine-tune color fidelity, which is crucial for accurate film reproduction and Atmos sound alignment. Also, keeping software firmware updated prevents compatibility issues and bugs; manufacturers often release patches that improve stability and performance. For detailed guidance on projector calibration, I recommend consulting this comprehensive guide.
Scaling your maintenance practices becomes essential as your setup grows. When adding new projectors, screens, or lenses, I recommend performing an initial calibration with professional-grade equipment and establishing a schedule for routine re-evaluation. This proactive approach minimizes downtime and ensures a consistently immersive experience for viewers. Looking ahead, the future may see AI-driven maintenance tools that predict failures before they happen, much like predictive analytics used in industrial systems, making your cinema much more reliable and efficient.
Don’t underestimate the impact of well-maintained equipment on your cinematic experience. Try integrating a calibration device like the colorimeter I mentioned, and set a maintenance schedule to keep everything in pristine condition. Your future self—and your audience—will thank you. For personalized advice or to explore advanced tools, don’t hesitate to reach out through our contact page.
Over the years, my journey into perfecting cinematic setups has been filled with both trial and triumph, especially as technology evolves rapidly. One profound lesson I’ve learned is that the devil truly is in the details—like selecting the right woven projection screen or fine-tuning your projector’s alignment to avoid blurry images. It’s these subtle nuances that differentiate a good viewing experience from an unforgettable one.
The Hidden Truths That Transformed My Cinema Experiences
- Never Underestimate the Power of Proper Calibration: Regularly calibrating your projectors and screens ensures consistent image quality and prevents subtle distortions that can compromise immersion. The moment I started using professional calibration tools, I noticed a dramatic increase in vividness and clarity.
- Acoustical Transparency Matters More Than You Think: Choosing woven screens that allow sound to pass through without muffling it was a game-changer. I avoided muffled atmos channels by testing materials beforehand, saving my setup from costly retrofits.
- Testing Behind the Screen Is Crucial: Conducting sound and image tests before final installation prevented numerous troubleshooting headaches. Early testing with simple tools helped me identify and select the best materials for visual and audio fidelity.
- Aligning the Projector Precisely Elevates the Entire Scene: Misalignment can distort focus or cause keystone issues, reducing immersion. Using laser levels and test patterns ensures a crisp, true-to-life image that captivates every viewer.
- Maintenance Is a Long-Term Investment: Regular cleaning, firmware updates, and calibration re-evaluations keep your system performing at peak. I schedule quarterly audits using diagnostic tools like colorimeters and lux meters, which prolongs equipment lifespan and maintains quality.
Tools and Resources That Have Earned My Trust
- Comprehensive projector guides: They demystified projector settings and helped me select the best models for my space.
- Cine lens tutorials: Understanding lens characteristics improved my shot clarity, especially in challenging lighting conditions.
- Projection screen reviews: They guided me toward high-quality woven screens that optimize both sound and image.
- Lighting techniques: Proper lighting set the mood and scale of my scenes, making the visuals truly immersive.
Your Next Step Toward cinematic mastery
Remember, creating a mesmerizing cinema isn’t solely about flashing tech or pricey equipment; it’s about mastering the details that elevate your entire setup. Every adjustment, from calibration to material choice, adds up to an experience that feels truly alive. Embrace the process, stay curious, and don’t shy away from experimentation. Your audience—and your future self—will thank you for the effort.
What’s the one detail in your setup you’ve been meaning to revisit? Share your thoughts below—I’d love to hear your journey to cinematic excellence!
2 Replies to “4 Woven Screens That Won’t Muffle Your Atmos Mix in 2026”
Leave a Reply
Related Posts
![4 Nano-Coated Screens That Fix 16K Contrast in Bright Rooms [2026]](https://cinegearguide.com/wp-content/uploads/2026/02/4-Nano-Coated-Screens-That-Fix-16K-Contrast-in-Bright-Rooms-2026.jpeg)
4 Nano-Coated Screens That Fix 16K Contrast in Bright Rooms [2026]
I still remember the jarring moment during a recent outdoor…
![4 Foldable ALR Screens for Portable 16K Outdoor Sets [2026]](https://cinegearguide.com/wp-content/uploads/2026/03/4-Foldable-ALR-Screens-for-Portable-16K-Outdoor-Sets-2026.jpeg)
4 Foldable ALR Screens for Portable 16K Outdoor Sets [2026]
Ever tried hosting an outdoor screening only to be defeated…
Top Projection Screens & Cinema Projectors for Filmmaking in 2024: Expert Review
I remember the exact moment I realized my home cinema…
Reading about the importance of woven screens for both sound and image clarity really resonated with me. I’ve personally faced issues where cheap screens muffled sound and decreased contrast in my setup, despite having a decent projector and speakers. Since switching to a high-quality woven ALR screen, the difference has been remarkable—sound passes through with minimal attenuation, and the picture looks sharper with richer colors. It’s fascinating how such an often overlooked element can have such a profound impact on the overall experience. I remember testing my speakers behind the screen before final installation, which saved me from costly mistakes later. My question is, how often do others find they need to re-test acoustical transparency, especially after moving or adjusting the screen placement? I’d love to hear tips on maintaining optimal sound quality over time, especially in a room that gets regular use and some variation in room conditions. Keeping the balance between visuals and audio truly makes the cinematic experience more immersive and consistent.
Your experience highlights a crucial aspect often overlooked in home theater setups—material choice can make or break the Atmos experience. I completely agree that the wrong woven screen can absorb sound or reflect light in ways that diminish immersion. I’ve found that regularly testing acoustical transparency, especially after rearranging furniture or mounting adjustments, is key to ensuring consistent audio clarity. A quick test with a test tone behind the screen, like you suggested, can reveal subtle changes in sound passage over time. I also keep a record of different screen positions and materials tested, which helps me understand how environmental factors influence acoustics. Do you recommend any specific tools or methods to monitor long-term sound transparency, or is periodic testing sufficient? It’s amazing how such nuanced details can elevate the whole cinematic experience—your insights definitely motivate me to revisit some of my own setup practices.