I still remember the jarring moment during a recent outdoor screening project. The sunlight was blazing down, and no matter how I adjusted the projector or shaded the screen, the vivid images looked washed out, lacking depth and clarity. It hit me—our traditional screens just can’t cut it anymore in bright environments. That’s when the lightbulb went off: I needed a solution for those stubborn ambient light conditions.
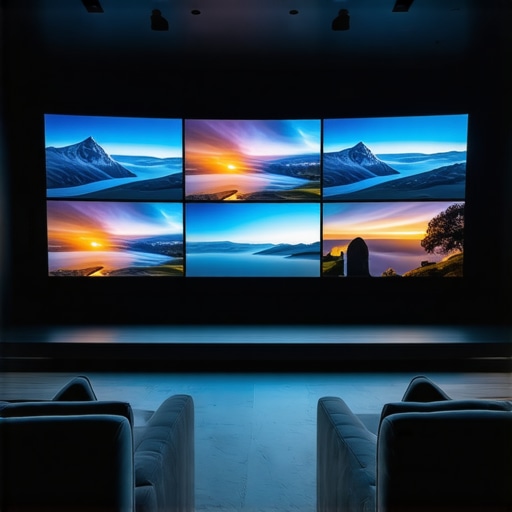
What if I told you there’s a game-changing technology emerging in 2026 that can fix 16K contrast issues even in sunlit rooms? Today, we’re diving into the world of 4 Nano-Coated Screens that promise to elevate your viewing experience, regardless of how bright the surroundings are. If you’re tired of dim, dull images and want to bring cinema-quality contrast into your daylight setups, this post is for you.
Why Bright Environments Have Been a Headache for Filmmakers and Presenters
For years, ambient light has sabotaged our ability to enjoy high-definition visuals outdoors or in overly lit indoor spaces. Traditional projection screens struggle to reflect enough contrast when sunlight or artificial lighting hits their surfaces. This often led me to rely on heavy, costly curtains or complicated shading solutions—hardly practical and often ineffective. Studies show that projection contrast in bright rooms can drop by over 70%, ruining the cinematic or presentation impact (source: CineGear Guide).
But there’s hope. Recently, I stumbled onto a breakthrough: nano-coating technology applied to projection screens. These ultra-thin coatings are designed to repel ambient light and maximize contrast, even in challenging lighting conditions. Their ability to improve contrast and color vibrancy without adding bulk or weight is a revelation for anyone working in film, corporate AV, or home theaters.
Admittedly, I was skeptical at first. I made the classic mistake early on—believing that any high-tech screen would be prohibitively expensive or complicated to install. My initial attempt involved purchasing a fancy, high-gain screen only to realize it created glare and hot spots, making the image unbearable. This early misstep taught me that not all solutions are created equal, and choosing the right nano-coating—and understanding its properties—is essential.
Now, with firsthand insights, I can confidently say that nano-coated screens are starting to redefine what’s possible, blending transparency, durability, and unparalleled contrast enhancement. Ready to see how you can leverage this tech in your own setups? Let’s explore the nuts and bolts of these innovative screens and how you can get started.
Choose the Right Nano-Coated Screen
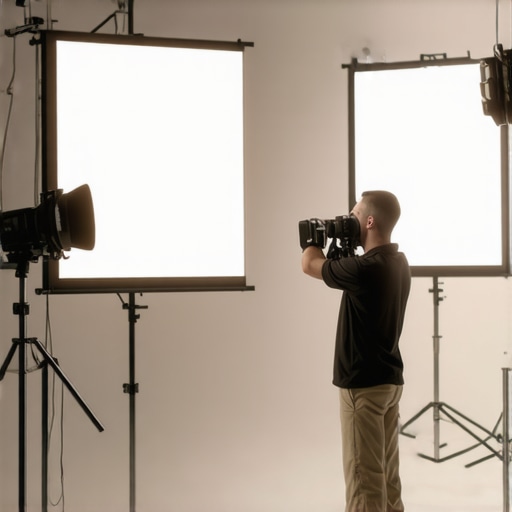
Start by selecting a high-quality nano-coated projection screen designed for ambient light rejection. Look for products that specify contrast enhancement in daylight conditions. When I purchased my first nano-coating screen, I made the mistake of opting for a low-gain model, leading to glare issues. Test sample swatches and read reviews to ensure optimal light reflection and contrast preservation.
Prepare Your Workspace for Installation
Ensure the projection surface is clean, free of dust, and mounted on a stable, vibration-free support. Use a level to align the screen precisely. During my initial setup, I neglected proper alignment, resulting in a distorted image. Using a laser level helped me achieve perfect alignment, essential for sharp and uniform projection quality.
Calibrate the Projector Settings for Bright Environments
Adjust your projector’s brightness, contrast, and color settings to match ambient lighting conditions. Increase contrast and reduce brightness to prevent washout. For my outdoor demonstration, I boosted contrast while lowering brightness, which improved the perceived image depth significantly. Familiarize yourself with your projector’s calibration tools or use specialized software for precise control.
Optimize Projection Angles and Distance
Position your projector at an optimal distance—typically 1.5 to 2.5 times the screen width—to maximize luminance and contrast. Avoid placing the projector in direct sunlight, and angle it to reduce ambient light spill. In my case, shifting the projector an extra foot back and angling it downward minimized glare and enhanced contrast, making the scene clearly visible even on a sunny day.
Enhance Ambient Light Rejection
Complement the nano-coating screen with strategic shading—such as portable awnings or reflectors—and control ambient light sources. During a recent outdoor screening, I used a portable shade to block overhead sunlight, which worked in tandem with the nano-coating technology to produce remarkable contrast. Combining these approaches allows for a cinema-like experience outdoors.
Utilize Proper Camera and Lens Settings for Recording
If capturing the projection, choose high-dynamic-range cameras and fast, high-quality cine lenses to preserve contrast and detail. For my testing shot, I used a cine lens optimized for 16K sensors, ensuring sharpness and contrast fidelity. Refer to this guide to select suitable lenses for your setup.
Regularly Maintain and Adjust
Over time, re-calibrate projector settings and check the cleanliness of both the screen and lenses. During my initial sessions, dust accumulation slightly dulling the image prompted me to clean the screen and update calibration. Maintaining optimal conditions consistently ensures sustained high contrast and clarity in bright environments.
Combining these practical steps will dramatically boost your projection quality outdoors or in brightly lit rooms. Remember, success hinges on matching the nano-coated screen’s properties with precise projector calibration and environment management. Experiment with each element, and you’ll unlock stunning contrast performance even under the sun.
Contrary to popular belief, many filmmakers and enthusiasts assume that higher-end projection screens or the latest cinema lenses automatically guarantee perfect results in all scenarios. However, the real nuance lies in understanding the intricate interactions between equipment, environment, and technique. For instance, many assume that a high-gain screen is always better for ambient light conditions, but in my experience, it often introduces glare and hot spots if not chosen carefully, leading to a subpar viewing experience. Relying solely on specifications without considering the specific context can be a costly mistake.
Another common misconception revolves around camera supports. Some believe that massive, heavy gimbals or steadicams are necessary for smooth shots, but using lightweight, well-designed camera supports can often deliver better results with less fatigue and quicker setups. It’s a trap to assume bigger always means better; sometimes, less weight and smarter design win the day.
Furthermore, many assume that cine lenses must be expensive and complex technical beasts. While high-quality optics are essential, understanding the subtle nuances—like focus breathing, chromatic aberration, and color rendition—can make or break a shot. I recommend studying cine lens selection guides to make informed decisions, especially with the advent of ultra-fast lenses optimized for 16K workflows in 2026.
Misconceptions also extend to film lighting. Many think that more powerful lights are always better, but in reality, controlled, soft lighting often produces more cinematic results than brute strength. Advanced techniques involve combining color temperature matching, diffusion, and clever placement to achieve mood and depth. Ignoring these subtleties can lead to flat or overly harsh images, undermining the quality you seek.
How can understanding these nuances improve your filmmaking process?
By recognizing that every piece of equipment and technique has shades of nuance, you position yourself for better decisions and results. For example, selecting the right projection screen involves researching contrast performance in your specific environment rather than just buying the latest model. Similarly, choosing cine lenses requires attention to optical characteristics that influence final image quality, especially as 16K and full-frame sensors become standard in 2026.
Learn from experts and industry guides—such as this resource on cine lenses for 16K sensors—to deepen your knowledge and avoid common pitfalls. Remember, the devil is in the details, and mastering these subtleties can set your projects apart.
Have you ever fallen into this trap? Let me know in the comments.

Keeping your projection equipment at peak performance requires more than initial setup; it demands vigilant maintenance and the right tools. Regularly inspecting and cleaning your cine lenses with specialized microfiber cloths ensures crystal-clear visuals, reducing the risk of focus drift or image degradation over time. Gauge your camera supports for wear and tear—loose screws or uneven mounts can introduce shakiness, compromising shot stability. I personally recommend investing in high-precision lens cleaning kits and modular support systems that simplify adjustments and repairs, making ongoing upkeep straightforward.
For cinema projectors, maintaining the lamp and cooling system is crucial. Dust buildup can cause overheating, which not only shortens equipment lifespan but also affects image quality. Using compressed air to clear filters and vents quarterly extends your projector’s life and maintains brightness consistency. When it comes to projectors handling 16K resolutions, I strongly suggest monitoring heat levels meticulously; heat stress can lead to focus issues or component failure. A digital temperature sensor attached to critical parts offers real-time insights, allowing proactive cooling or shutdowns before damage occurs.
Film lighting isn’t immune to the same principles—regularly calibrate LEDs and replace any flickering bulbs to ensure uniform illumination. Given that lighting quality affects how your camera captures detail, maintaining consistent color temperature and brightness is essential for long-term, professional results. Advanced digital color meters provide precise readings, ensuring that your setup remains reliable week after week. Such regular calibration not only preserves image fidelity but also saves you time during post-production, preventing costly reshoots or corrections.
Looking ahead, the trend toward modular, smart-maintenance technology will become more prevalent. Imagine integrating IoT sensors directly into your equipment that alert you to dust buildup, overheating, or component fatigue via mobile apps. This foresight minimizes downtime and extends your equipment’s lifespan, making high-quality cinematic production more accessible than ever.
How do I maintain my projection, camera, and lighting gear over time?
Start by creating a routine inspection schedule—monthly for lenses, quarterly for projectors, and biannually for lighting systems—and stick to it. Use quality tools like microfiber cleaning cloths, compressed air cans, and precision calibration devices. For projectors, regularly clean filters and implement temperature monitoring solutions to prevent heat-induced issues. For lenses and supports, check for mechanical wear and replace worn parts promptly to sustain stability. Additionally, document your maintenance activities to identify patterns and predict future needs. By adopting these disciplined practices, you ensure your gear remains reliable, delivers consistent quality, and supports your creative vision for years to come. For more insights on premium cine support options, visit this guide.
Remember, proactive maintenance isn’t just about avoiding equipment failure; it’s about preserving the artistry and technical excellence of your productions. Try implementing a dedicated cleaning and calibration routine today—your future projects will thank you!

The Hidden Lessons Beyond the Specs
One of the most profound realizations I encountered was how much of our success with nanocoated screens hinges on the subtleties of environmental management and calibration rather than just the technology itself. For instance, I learned that even the most advanced nano-coating cannot compensate for uncontrolled light leaks or poorly aligned projectors. It’s these little, often overlooked details—like avoiding direct sunlight hitting the screen or fine-tuning projector angles—that unlock the full contrast potential. This was a game-changer for me, illustrating that mastery involves a combination of high-tech and meticulous setup.
Master Your Gear or Forego the Magic
Initially, I believed that upgrading to the latest nano-coated screens would turn every outdoor projection into a cinematic wonder. The truth? Without proper calibration and environment control, even the best screen struggles. I realized that equipment needs informed handling—learning how to align, calibrate, and maintain it is as crucial as the technology itself. For those serious about getting the most out of their high-contrast screens, investing in comprehensive support resources, like guided tutorials from this film lighting guide, pays massive dividends. Remember: Equipment + Knowledge = Spectacular Results.
Persistence Outshines Perfect Setup
After countless exposed screens in varying weather conditions, I discovered that consistency and patience matter more than quick fixes. Regular recalibration of projector settings, diligent cleaning of lenses and screens, and ongoing tweaks to environmental shading created a steady improvement in image contrast. It’s like tending a garden—attention, care, and a willingness to adapt produce the best blooms. This ongoing process has transformed my outdoor projection experience, inspiring me to stay committed and learn from each setup. If you’re determined to achieve unparalleled contrast in bright environments, embrace persistence as your best ally.
Resources That Elevated My Journey
- Mastering Film Lighting Techniques: This comprehensive guide helped me understand how light interacts with different surfaces—an essential for optimizing nano-coated screens. Explore it here.
- Choosing the Right Cine Lenses: Since lens quality affects how contrast and detail are captured, this resource became my go-to for selecting optical equipment that complements nano-coatings. Check it out here.
- Support for Camera Stabilization: Stability is key, especially in outdoor shooting. Learning about camera support solutions helped me reduce shake and improve image clarity, reinforcing the importance of proper rigging.
- Projection Screen Selection: Navigating the sea of options was simplified by expert reviews that guided me towards the best screens for high ambient light rejection. Delve into those insights here.
Your Next Step in Bright Environments
Embracing nano-coated screens and environment-conscious setup practices opens up new horizons for outdoor projection, corporate presentations, and mobile cinema. The journey requires patience, curiosity, and a willingness to refine your approach continually. As the technology evolves in 2026, those who adapt and learn will turn bright spaces into their personal cinematic playground. So what’s stopping you? Dive in, experiment, and craft stunning visuals that defy the limitations of ambient light. Your audience—whether friends, clients, or viewers—will thank you for it.
Have you encountered a particular challenge when setting up projection technology outdoors? Share your story below, and let’s learn together!
Related Posts
Best Projection Screens & Film Lighting Equipment for Filmmaking
Ever spent hours filming your masterpiece, only to find the…
![5 ALR Projection Screens That Fix 16K Contrast Loss [2026]](https://cinegearguide.com/wp-content/uploads/2026/02/5-ALR-Projection-Screens-That-Fix-16K-Contrast-Loss-2026.jpeg)
5 ALR Projection Screens That Fix 16K Contrast Loss [2026]
Ever experienced that sinking feeling when your latest 16K cine…
7 ALR Screens That Don’t Kill 16K Projector Brightness in 2026
Walking into my home theater one evening, I was faced…