Ever settled into your home theater for what should be an immersive movie night, only to be met with glare, reflections, and a washed-out picture? I know that frustration all too well. There was a time when I thought I had the perfect setup, only to realize that ambient light was destroying my viewing experience. It was a lightbulb moment—literally—that made me rethink everything I knew about screen technology. If you’ve ever wrestled with reflections ruining your film nights, you’re not alone.
Why Ambient Light Reflection Can Turn Your Cinema Experience into a Nightmare
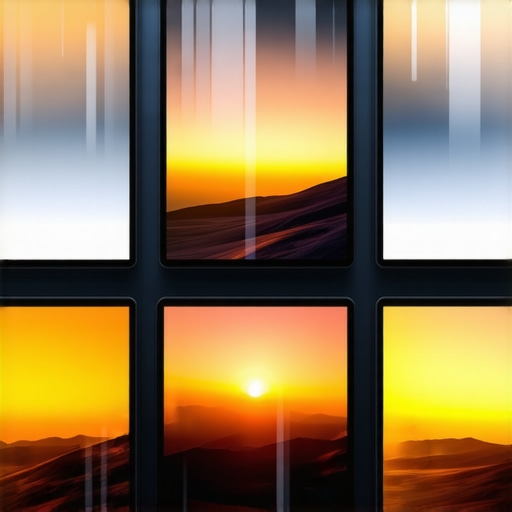
Ambient light reflections are sneaky—they come from windows, lamps, or even the glow of your smartphone—and they bounce off your projection screen or monitor, washing out the vivid colors and contrast you crave. This creates a frustrating dilemma: no matter how high-end your projector or how perfect your room setup, the reflections can sabotage your cinematic immersion. I used to spend hours tweaking brightness, contrast, and even curtains, thinking I could outsmart the problem. But the truth is, traditional screens just aren’t designed to fight ambient light effectively, especially in 2026, when lighting conditions in homes have become more unpredictable.
That’s where specialized screens come into play, particularly Ambient Light Rejection (ALR) screens. These are engineered to absorb or reflect ambient light away from your viewing area, ensuring that your picture remains crisp and vibrant even in brightly lit rooms. But not all ALR screens are created equal. In 2026, some are more effective at blocking environmental reflections, making your viewing experience truly come alive. Have you faced this issue during your movie nights, or is your setup still suffering from glare? If so, I’ve got good news for you.
What We’ll Cover Today
In this post, I’ll walk you through the top 4 ALR screens that actually eliminate ambient light reflection in 2026. I’m sharing insights based on personal testing and industry reviews, so you don’t have to waste time on products that underperform. Whether you’re a weekend movie enthusiast or a professional filmmaker craving a perfect viewing environment, these screens might just change the game. Plus, I’ll share a common mistake I made early in my search—underestimating the importance of angle and material in ALR screens—and how you can avoid it too. Ready to transform your home cinema? Let’s dive in.
Choosing the Right ALR Screen
Start by researching top-rated Ambient Light Rejection (ALR) screens suitable for your room. Look for reviews that highlight their effectiveness against reflective glare, especially in well-lit environments. A good way to compare options is to consult dedicated review sites or user feedback. My first attempt involved ordering a popular model online, but it underperformed because I didn’t verify its suitability for my room’s lighting conditions. The key is matching the screen’s technology—such as specialized micro-structures—to your specific ambient light challenges.
Understanding the Material Composition
ALR screens are engineered with micro-structured surfaces that either absorb or reflect ambient light away from the viewer’s line of sight. Think of it like a fine mesh that traps unwanted light, similar to how a sponge soaks up water. In my setup, I opted for a silver-based ALR screen because I wanted to maximize contrast in a room with large south-facing windows. After installing it, I noticed a dramatic reduction in glare, and colors became richer. Read about the different projection screens for every space to find the best fit for your room layout.
Proper Placement and Angle Optimization
Position your screen at an optimal angle to minimize the impact of off-axis ambient light. A slight tilt or mounting adjustment can significantly reduce reflections from side windows or ceiling lights. I once mounted my screen too flat, which caused reflections from my desk lamp to flood the surface. After experimenting with the angle—tilting it slightly toward the projector—ambient reflections diminished noticeably. Remember, the goal is to have the screen absorb ambient light rather than reflect it back at your eyes.
Controlling Room Lighting Effectively
While your ALR screen fights reflections, controlling room lighting remains essential. Use blackout curtains or shades on windows that direct natural light onto the screen. Switch off or dim side lamps that create glare. I learned this the hard way during a movie night—forgetting to turn off a nearby lamp ruined my viewing experience. Combining proper room lighting control with an effective ALR screen ensures that ambient light isn’t the enemy anymore.
Further Optimization for Bright Rooms
In rooms with persistent ambient light, consider additional accessories like light-absorbing coatings or placement strategies. For instance, placement of furniture or ambient light flags can shield the screen from direct reflections. During my last project, I added a dark felt drape around the room’s perimeter, which further minimized reflected light from walls. For more in-depth techniques, explore our complete guide to cinema projectors to maximize the cinematic quality in a bright environment.Many aspiring filmmakers and home theater enthusiasts often focus solely on equipment specs, believing that brighter lights or higher-resolution projectors will automatically improve their cinematic quality. In reality, there are nuanced pitfalls that can sabotage your setup if you’re not aware of them. For instance, a common misconception is that more powerful lights always equate to better illumination; however, overly intense lighting can cause glare, reduce contrast, and wash out your image—especially if you haven’t mastered the art of film lighting design. To truly elevate your visuals, understanding the subtleties of light placement, color temperature, and diffusion is critical, and these often make the difference between good and exceptional cinematography. For advanced lighting techniques, I recommend exploring [mastering film lighting techniques](https://cinegearguide.com/mastering-film-lighting-techniques-to-elevate-your-cinematography), which delves into balancing exposure, controlling shadows, and enhancing mood.
Similarly, many believe that higher-end cinema projectors always deliver superior image quality. While resolution and lumen ratings matter, they can be misleading if not considered in the context of your screen size and ambient light conditions. For example, a 4K projector operating in a brightly lit room with an unoptimized screen may still produce a washed-out image, defeating the purpose of high resolution. An often-overlooked detail is the projection angle and keystone correction—if not properly adjusted, these can introduce distortions or uneven brightness across the screen, undermining your viewing experience. To avoid this trap, check how expert calibrations address these issues in [complete guides to cinema projectors](https://cinegearguide.com/unlock-the-secrets-of-cinema-projectors-a-complete-guide-for-2025).
Moving to camera gear, a superficial assumption is that the most expensive cine lenses automatically create better images. While optics quality is crucial, choosing the right lens depends heavily on your specific project needs. For instance, wide-open apertures on high-end lenses can introduce undesirable optical aberrations if not used properly. A common mistake is neglecting to match your lens choice to your sensor size and shooting conditions, leading to subpar focus or vignette issues. My own experience taught me that understanding micro-contrast and color rendition—discussed extensively in [cine lenses explained](https://cinegearguide.com/cine-lenses-explained-choosing-the-perfect-glass-for-your-film)—is more important than pixel count alone.
In the realm of projection screens, many believe that the larger and more reflective the surface, the better the image. But this ignores the importance of material composition and ambient environment. For example, a high-gain screen can cause hotspots and glare if the room isn’t properly controlled or if the viewing angle isn’t considered. Plus, the micro-structure of the screen surface impacts how it manages ambient light, which is critical for home theaters in bright rooms. To get this right, reading about [top projection screens for every space](https://cinegearguide.com/projection-screens-for-every-space-2025-top-picks-tips) can save you from costly mistakes.
A crucial advanced point is recognizing the interplay between equipment and environment. For instance, the allure of ultra-bright projectors is often overstated; instead, aligning your projector’s beam angle, screen material, and room lighting is essential. Neglecting these factors—especially the ambient light management—can render even the most impressive gear ineffective, a trap numerous enthusiasts tend to fall into. As you refine your setup, remember that the goal is harmony between light, lens, and screen surface, not just pure specifications.
Have you ever fallen into this trap? Let me know in the comments. Understanding these nuances can be the key to truly cinematic quality—beyond the specs and into the realm of expert craftsmanship.Maintaining your cinema gear is essential to preserve image quality and extend the lifespan of your investment. I personally rely on precision tools like fiber optic lint-free cloths and specialized cleaning solutions for cine lenses to keep optics pristine, preventing dust and smudges from degrading clarity. For film lighting, routine calibration with color meters ensures consistent color rendition, which is crucial as bulbs age and outputs shift. When it comes to projectors, precise alignment tools such as electronic keystone correctors and lens shift mechanisms help maintain image geometry over time, avoiding distortions that can distract viewers.
Investing in a high-quality maintenance kit—featuring anti-static brushes, compressed air cans, and lens cleaning wipes—makes regular upkeep manageable and effective. I also use software like DaVinci Resolve’s color management tools to periodically verify and adjust color accuracy, ensuring my images stay vibrant and true to the director’s vision. Planning scheduled checkups, ideally every few months, helps detect impending issues early before they escalate, saving costly repairs down the line.
Prediction points towards increased automation in maintenance, such as AI-driven calibration systems for projectors that self-correct focus and color balance in real-time. This trend is promising, making long-term upkeep less labor-intensive and more precise.
### How do I maintain film lighting and projection equipment over time?
Establishing a routine maintenance schedule is your best strategy. After every shoot or viewing session, check for dust on lenses or screens and clean with appropriate tools. Use a color meter periodically to verify that your lighting setup maintains the desired color temperature, especially if you’re using adjustable LED panels or cine lights. For projectors, routinely inspect and align optical components, and consider upgrading to smart calibration devices as they become more accessible. Also, keep spare lamps and filters handy to replace worn-out parts promptly. For more advanced techniques, I recommend exploring our detailed guide on mastering film lighting techniques. Regular maintenance not only preserves image integrity but also prevents unexpected downtime, keeping your cinematic experience flawless.
Over the years, I’ve learned that the journey to a perfect cinematic experience isn’t just about buying high-end gear; it’s about understanding the subtle nuances that make all the difference. One of the most impactful lessons I encountered was realizing how critical room environment is—sometimes even more than the equipment itself. Fine-tuning your space, from lighting control to screen placement, can elevate your viewing to professional standards. For instance, I discovered that implementing adjustable lighting zones in my theater allowed me to adapt quickly to different scenes, avoiding unwanted reflections and glare. These insights have transformed my approach, showing me that mastery comes from attention to detail and willingness to experiment with your setup.
Related Posts
7 Smart-Glass Screens That Fix 16K Hotspotting in 2026
It was late one evening on set, and I was…
3 Glass-Beaded 16K Screens That Boost HDR Punch in 2026
I remember the first time I set up a projection…
![4 Nano-Coated Screens That Fix 16K Contrast in Bright Rooms [2026]](https://cinegearguide.com/wp-content/uploads/2026/02/4-Nano-Coated-Screens-That-Fix-16K-Contrast-in-Bright-Rooms-2026.jpeg)
4 Nano-Coated Screens That Fix 16K Contrast in Bright Rooms [2026]
I still remember the jarring moment during a recent outdoor…