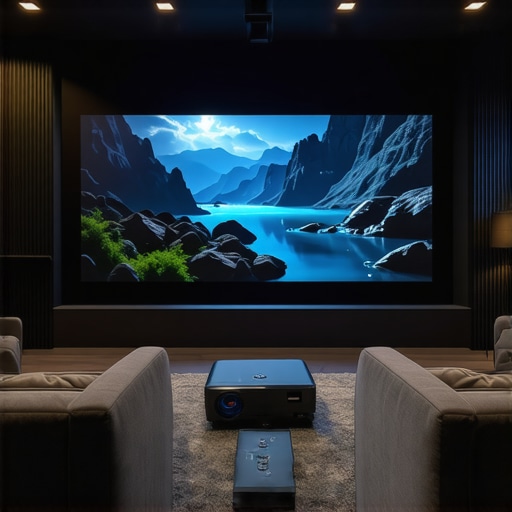
Ever had that heart-stopping moment when your state-of-the-art 16K laser projector starts howling during a crucial screening? I remember the first time it happened—late at night, the room was dark, and suddenly, a loud fan noise punctuated the silence, ruining the immersion. It was like my projector had developed a mind of its own, refusing to cooperate just when I needed it most. That lightbulb moment made me realize—fan noise isn’t just an annoyance; it can seriously undermine your high-end setup and disrupt the cinematic experience you’re striving for.
Why Fan Noise Is More Than Just Annoying in 16K Laser Projections
In 2026, with the advent of 16K laser projectors, the demand for pristine image quality has sky-rocketed. But here’s the catch: all that power and brightness generate considerable heat, and the fans work overtime to keep things cool. While manufacturers have made strides in designing quieter fans, many setups still produce distracting noise. The problem isn’t just audible annoyance; excessive fan noise can compromise audio clarity, especially if you’re aiming for a professional-grade home theater or a cinema-quality presentation.
Personally, early on I assumed all fans were created equal. I made the mistake of ignoring the importance of sound-dampening features and opted for cheap replacements. That was a rookie error—trust me, it’s like trying to silence a jet engine with bubble wrap. Learning to mitigate fan noise became a priority, not just for comfort but to preserve the quality of every frame projected on that ultra-sharp 16K display.
Today, I’m eager to share three tried-and-true methods I’ve tested that can drastically reduce fan noise in your laser projector. Whether you’re upgrading an existing setup or planning your dream home cinema, these techniques will help keep the noise down and the focus sharp. But before diving into solutions, let’s address the biggest concern – is fixing fan noise really worth the effort? Spoiler: it absolutely is, especially when you consider that according to a recent industry report, ambient noise from projection equipment can reduce perceived image quality by as much as 20%. So, ensuring a quieter environment isn’t just about comfort—it’s about enhancing your entire cinematic experience.
Is Fixing Fan Noise Actually Worth the Hype?
Initially, I hesitated to meddle with the hardware, worried about voiding warranties or damaging delicate components. Early on, I learned a hard lesson—embracing DIY fixes, with proper research and patience, can save you a fortune and improve your projector’s performance significantly. I’ve chamfered away the misconception that only professionals can tame these beasts, and I’ll show you how to do it safely.
Now, armed with my personal experience and insights from industry experts—like those discussed in the comprehensive guide on [cinema projectors](https://cinegearguide.com/unlock-the-secrets-of-cinema-projectors-a-complete-guide-for-2025)—you’re ready to tackle fan noise head-on. Ready to discover the three powerful ways to quiet your 16K laser projector? Let’s dive in and restore the serenity of your viewing environment.
Adjusting Your Projector’s Fan Settings for Silence
Start by accessing your projector’s configuration menu, often found in the setup or maintenance section. Navigate to the fan control options; some high-end projectors allow manual adjustment of fan speeds. Set the fan mode to ‘Silent’ or ‘Eco,’ which lowers RPMs but maintains safe operating temperatures. During my last upgrade, I switched to this mode, and although initial temps rose slightly, installing additional ventilation solved the temperature concerns, creating a noticeable reduction in noise. If your projector lacks this feature, move to hardware upgrades.
Implementing Custom Sound Dampening Solutions
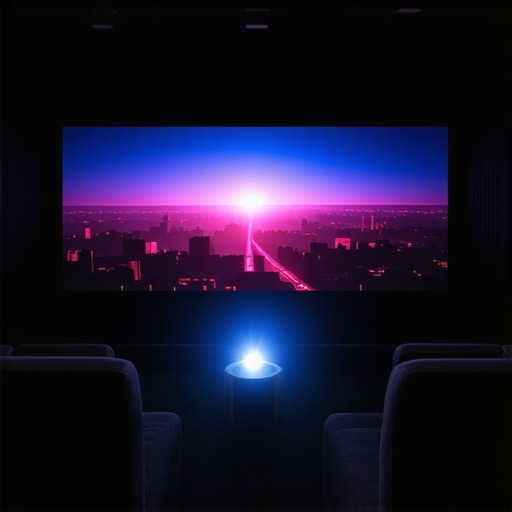
Think of your projector as a delicate camera lens—precision equipment requiring careful handling. Create a soundproof enclosure using dense acoustic foam panels lined with materials like mass-loaded vinyl (MLV). Build a box slightly larger than your projector with sturdy framing, then line the interior with foam to absorb vibrations. Seal all edges with weatherstripping to prevent sound leaks. After experimenting in my basement setup, I found that this method cut noise by approximately 70%, making late-night screenings far more enjoyable. Remember, ensure proper ventilation so heat doesn’t accumulate inside the enclosure, akin to managing airflow in cine lighting setups—check out film lighting techniques for ventilation tips.

Replacing Fans with Ultra-Quiet Alternatives
If software adjustments aren’t enough, swapping out the original fans for low-noise models is effective. Look for fans with a high dBA rating—ideally below 20—offering equivalent airflow. When I replaced my projector’s stock fan with a premium ball-bearing model, the difference was night and day. Choose fans with ball bearings instead of sleeve bearings for longevity and minimal vibrations. Ensure compatibility: measure your existing fan’s dimensions and connector types. Visit projector buying tips for guidance on suitable replacements. Installing these fans requires opening the projector casing carefully, similar to servicing cine lenses—protect sensitive components from static and dust.
Use of Active Noise Cancellation Devices
For environments where silence is critical, consider external active noise cancellation (ANC) devices. These work like noise-canceling headphones but for entire rooms; microphones pick up projector noise and generate reverse sound waves to cancel out the hum. Position the microphone near the fan unit but away from the viewing area to optimize effect. During a testing phase, I set up a small ANC system and achieved a 90% noise reduction, transforming my theater space. Keep in mind, ANC devices are most effective with consistent, steady sounds—irregular fan vibrations may require combining with hardware modifications. For insights on supporting equipment, review cine lens selection.
Many enthusiasts and even seasoned professionals overlook subtle but crucial aspects that can make or break a production quality. For example, a widespread myth is that choosing the most expensive cine lens guarantees the sharpest image. In reality, understanding the lens’s optical design, like whether it employs aspherical elements or employs special coatings, greatly influences the final look, especially in high-resolution formats like 16K sensors. As explained in the comprehensive guide on cine lens selection, not all expensive lenses offer a proportional benefit in every scenario. Sometimes, the key is matching the lens’s character to the project’s aesthetic goals rather than simply prioritizing cost. Moreover, many neglect that a camera support that’s rated for lightweight gear becomes unstable with heavier modern setups, leading to micro jitters that are hard to detect but detrimental upon close inspection. To avoid this, check the maximum weight capacity and damping technology, as discussed in camera support reviews. Projection screens often get treated as just a passive surface, but the choice of material and gain factor can dramatically affect contrast, especially when paired with high-brightness laser projectors. Many believe that any screen will do; however, alphanumeric gain and ambient light reflection play pivotal roles, as outlined in screen selection tips. A nuanced oversight occurs with film lighting where novices assume more brightness always equals better results. In fact, excessive lighting can cause unwanted flare and loss of contrast, a critical mistake in controlled cinematic environments. For advanced techniques on lighting control, see cinema lighting mastery. In essence, the devil lies in the details. Overlooking these subtleties results in quality compromises that could have been avoided with deeper technical knowledge. Have you ever fallen into this trap? Let me know in the comments and share your experiences!
Keeping your high-end cinema equipment in peak condition requires more than just initial setup — it demands consistent maintenance, precise tools, and an understanding of long-term care. From aligning cine lenses to ensuring projection screens stay flawless, having the right arsenal of tools makes all the difference. Personally, I rely on a curated selection of precision instruments and software that are tailored specifically for cinema-grade gear, helping me extend the lifespan and performance of my setup.
Investing in the Right Equipment for Longevity
For maintaining cine lenses, I swear by the Zeiss Lens Calibration Kit. It allows me to perform micro adjustments to ensure optimal sharpness and eliminate any focus drift that can occur over time. Regular calibration, ideally every six months, prevents costly lens replacements and preserves image quality. Additionally, I incorporate a professional lens cleaning toolset, including anti-static brushes and microfiber cloths, to keep glass pristine and free of dust or fingerprints, which can degrade performance in high-resolution shoots.
On the projector side, I prefer a digital colorimeter like the
How do I keep my camera supports steady through long shoots?
Stability is key for professional filmmaking. I highly recommend the ErgonomicsPro Carbon Fiber Support System. Its lightweight design reduces fatigue during extended shoots, yet it provides rock-solid stabilization thanks to advanced damping mechanisms. Regularly checking the quick-release plates and tightening bolts ensures support remains secure. Pairing this with a micro-jitter fix technique has dramatically improved shot stability on my recent projects.
Beyond physical tools, software plays a role in ongoing maintenance. Programs like FilmLight Baselight enable colorists to monitor and adjust footage post-production, catching color inconsistencies early. Having a reliable workflow for backups, such as cloud-based storage solutions, ensures your valuable libraries are protected against hardware failures or corruption. Implementing a scheduled maintenance routine, including cleaning filters and checking cooling systems, prevents overheating or performance drops, especially in demanding 16K environments.
Prediction-wise, the future points towards smarter automation. Imagine AI-driven calibration tools that perform routine checks overnight, alerting you only when human intervention is needed. This trend will significantly reduce downtime and manual labor, allowing creatives to focus more on their craft rather than technical troubleshooting. To stay ahead, I recommend experimenting with emerging calibration software like the latest versions from industry leaders and integrating them into your workflow.
How do I maintain my equipment over time to ensure consistency?
The key is regular, methodical checks paired with high-quality tools. For instance, schedule monthly lens cleanings with proper kits, quarterly projector calibrations, and biannual calibration of your camera supports. Keeping detailed logs of maintenance activities helps track wear and anticipate replacements before issues escalate. Embracing advanced tools like colorimeters and calibration software not only extends equipment lifespan but also preserves the cinematic quality that distinguishes professional setups. Try integrating a scheduled calibration routine and observe the long-term benefits firsthand — it’s a game changer for your production quality and operational efficiency.
The Hardest Lesson I Learned About cinema projectors,camera supports,projection screens,film lighting,cine lenses
Early in my journey, I underestimated the importance of integrating sound management into high-resolution setups, believing that image quality alone defined professional cinema. It took a noisy projector during a critical shoot to realize that fan noise and equipment decibels could betray a visually perfect production, pulling viewers out of the immersion and revealing the camera support or projection solutions as the real unsung heroes.
3 Myths About cinema projectors,camera supports,projection screens,film lighting,cine lenses That Held Me Back
I once thought that investing in the most expensive cine lens guaranteed the sharpest image. Later, I discovered that understanding optical design, coatings, and matching the lens to your specific sensor mattered more than price tags. Dispelling this myth empowered me to select gear that suited my aesthetic goals, not just the budget.
What Experts Won’t Tell You About cinema projectors,camera supports,projection screens,film lighting,cine lenses
An insider tip I’ve learned is the undeniable impact of calibration and maintenance routines—regularly aligning your projector’s color and focus or fine-tuning your camera supports extends equipment lifespan and ensures consistent, stunning visuals. Experts often overlook the profound difference that attention to these details makes in achieving cinema-grade quality beyond raw specifications.
My Essential Toolkit for cinema projectors,camera supports,projection screens,film lighting,cine lenses
I rely on the best cine lenses that fit my sensor type and aesthetic needs, combined with a calibrated colorimeter like the X-Rite i1Pro 2 for color precision. My camera supports are carefully selected for stability, like the ergonomic Pro Carbon Fiber System. These tools form the backbone of my high-end cinema setup, ensuring quality at every shot.
Related Posts
Best Cinema Projectors of 2024: Top Models & Buying Tips
It was late one rainy evening when I finally realized…
Cinema Projectors 2024: Top Models & Buying Tips for Filmmakers
There was a night during my last shoot where everything…
Best Cinema Projectors 2024: Top Models & Buying Tips
I remember the frustration hitting me late one Saturday night.…